background image

8

Basic Operation

On and off

1.

Before turning the set on, be sure that the main power switch
on the set is pushed on.
When the main switch is pushed on, the LED will be lit up red.
This mode is Stand-by.

2.

If the set is in stand-by mode, press the 

POWER

D


/

E

E

TV/AV

,

MULTIMEDIA

or NUMBER button on the remote control hand-

set to turn it on fully. The LED will blink orange for a while and
then lit up green when the power is successfully on.

3.  To turn the set off, press the power button on the remote con-

trol handset. The set reverts to the stand-by mode.

Note :

a.

The lamp cooling fan will continue to spin for approximately 120
seconds after the power is turned off by the remote control handset.

b.

Normally, don’t push off the main power switch. Instead, use the
remote control to turn the power off.

c.

When the set is turned on again immediately after turning off, it
takes around 20 to 40 seconds for sufficient cooling.

d.

When the power is switched off using the main power switch on
the set, the internal cooling system also stops operating.
Therefore, power-on by main power switch takes around 30 to
50 seconds for sufficient cooling.

e.

Forced Power-Off : When the set decides itself that the circum-
stance is not proper for operation, the set will goes to the stand-
by mode automatically. Please retry to turn on the set after a
short period of time.

f.

When the set is switched on, there might be a strange sound from
the set.

Programme selection

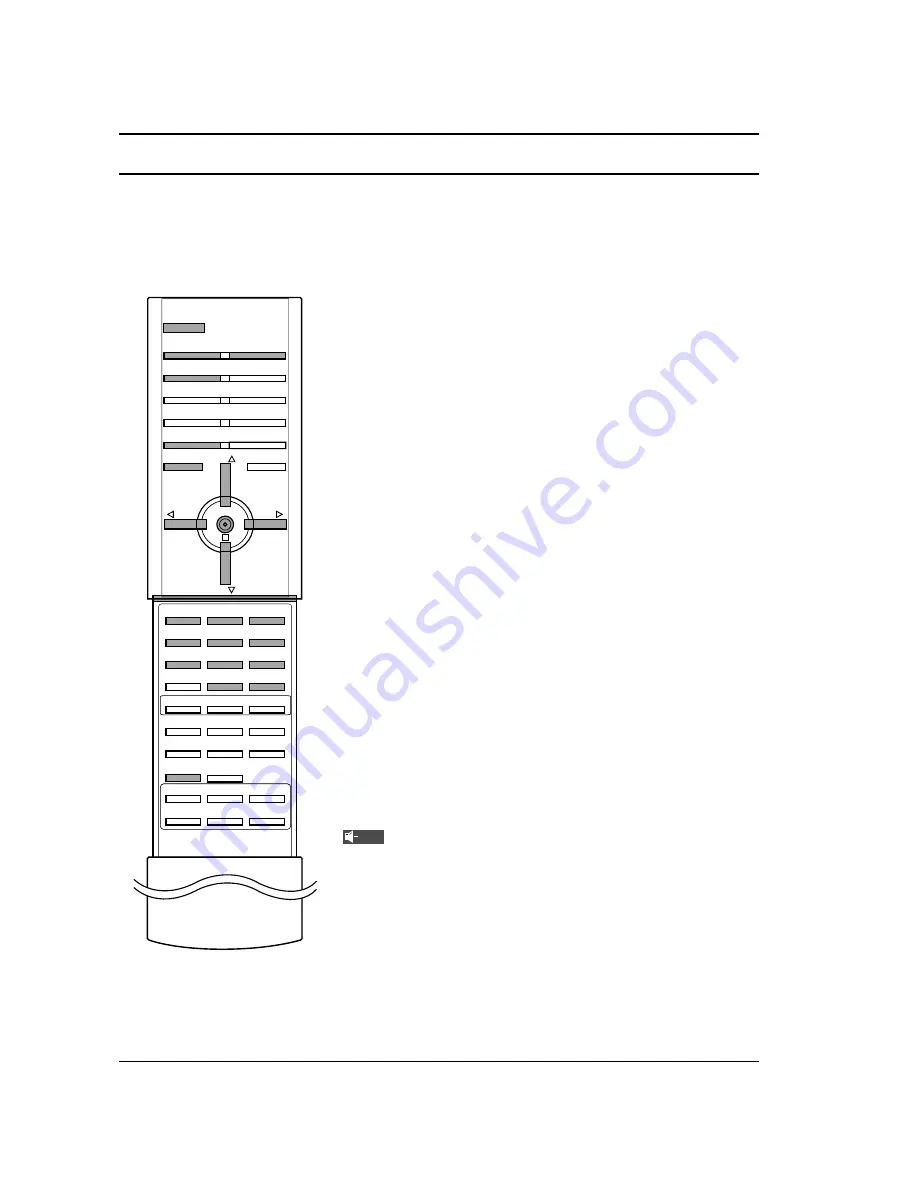
You can select a programme number with the 

D


/

E

E

or NUMBER

buttons.

Volume adjustment

Press the 

F


/

G

G

button to adjust the volume.

Quick view

Press the 

SWAP

button to view the last programme you were

watching.

Note :

This function works only when 

Favourite programme

is

set to 

Off

. Otherwise each press of this button will select a stored

favourite programme.

Mute function

Press the 

MUTE

button. The sound is switched off and the display

appears. 

You can cancel it by pressing the 

MUTE

F


/

G

G

,

SSM

I/II 

button.

1

2

3

4

5

6

7

SSM

8

0

I/II

9

POWER

MULTIMEDIA

TV/AV

MUTE

SWAP

MENU

PR

VOL

OK

VOL

PR

Mute

Содержание 3828VA0531D

Страница 1: ...erence Record model number and serial number of the set See the label attached on the back cover and quote this information to your dealer when you require service Model number Serial number FOR THE GUARANTEE TERMS CONDITIONS PLEASE REFER TO BACK COVER OF THIS MANUAL P NO 3828VA0531D MB05DA 136G 100X TX a 3840VA0016C ...

Страница 2: ...option Sound output selection Stereo Dual reception NICAM reception TIME MENU 23 Clock On Off Timer Auto sleep Sleep timer SPECIAL MENU 25 Child Lock Demo SCREEN MENU 26 Auto Configuration RGB PC mode only Manual Configuration RGB PC Setting Picture Format Cinema NR Noise Reduction Initializing Reset to original factory value PIP DW MENU 30 Main Picture Source Selection Picture in picture PIP func...

Страница 3: ...proceed as follows The wire which is coloured blue must be connected to the terminal which is marked with the letter N or coloured black The wire which is coloured brown must be connected to the terminal which is marked with the letter L or coloured red Service Never remove the back cover of the set as this can expose you to very high voltage and other hazards If the set does not operate properly ...

Страница 4: ...b picture to D D E E or F F G G direction 6 SWAP returns to the previously viewed programme selects a favorite programme 7 MENU selects a menu 8 D D E E Programme Up Down selects a programme or a menu item switches the set on from standby F F G G Volume Down Up adjusts the volume adjusts menu settings OK accepts your selection or displays the current mode 9 NUMBER BUTTONS switches the set on from ...

Страница 5: ...WAP and INPUT buttons are used for teletext function Battery installation The remote control handset is powered by two AAA type batteries To load the batteries turn the remote control handset over and open the battery compartment Install two batteries as indicated by the polarity symbols and marked inside the compartment Note To avoid damage from possible battery leakage remove the batteries if yo...

Страница 6: ...om standby 7 OPERATION INDICATOR Refer to p 7 8 LAMP INDICATOR Refer to p 7 9 TEMPERATURE INDICATOR Refer to p 7 10 MAIN POWER ON OFF switches the set on or off Note There might be a faint white trace on the center of the screen according to the position This is normal and is a characteristic of the screen Front panel ON OFF TV AV MENU OK VOL PR TV AV MENU OK VOL PR 1 2 3 4 5 6 7 8 9 10 Lamp indic...

Страница 7: ...on standby Green On Orange flashing Preparing operation in standby Orange Projection lamp is reaching the end of its life and needs to be replaced with a new lamp Red flashing There is a problem with the lamp or around it Contact an authorized service center Red Lamp life over Green flashing The lamp cover is not closed Red The set has shut down due to overheating After viewing the phrase Thermal ...

Страница 8: ...When the power is switched off using the main power switch on the set the internal cooling system also stops operating Therefore power on by main power switch takes around 30 to 50 seconds for sufficient cooling e Forced Power Off When the set decides itself that the circum stance is not proper for operation the set will goes to the stand by mode automatically Please retry to turn on the set after...

Страница 9: ...ual programme Programme edit Favourite programme STATION G PICTURE SOUND TIME SPECIAL SCREEN PIP DW PSM CSM ACM Contrast 95 Brightness 50 Colour 50 Sharpness 60 STATION PICTURE G SOUND TIME SPECIAL SCREEN PIP DW SSM BBE AVL Balance 0 Equalizer STATION PICTURE SOUND G TIME SPECIAL SCREEN PIP DW PIP DW menu Clock Off time On time Auto sleep STATION PICTURE SOUND TIME G SPECIAL SCREEN PIP DW Child lo...

Страница 10: ...t 6 Press the G G button to begin auto programming All receivable stations are stored The station name is stored for stations which broadcast VPS Video Programme Service PDC Programme Delivery Control or TELETEXT data If no station name can be assigned to a station the channel number is assigned and stored as C V UHF 01 69 or S Cable 01 47 followed by a number To stop auto programming press the ME...

Страница 11: ... button to select Band Press the F F G G button to select V UHF or Cable as required 6 Press the E E button to select Channel Select the desired channel number with the F F G G button or NUMBER buttons If possible select the channel number directly with the number buttons 7 Press the E E button to select Search Press the F F G G button to commence searching If a station is found the search will st...

Страница 12: ...programme tuning steps 1 to 2 2 Press the E E button to select Booster 3 Press the F F G G button to select On or Off 4 Repeatedly press the MENU button to return to normal TV viewing Fine tuning Normally fine tuning is only necessary if reception is poor 1 Repeat the Manual programme tuning steps 1 to 2 2 Press the E E button to select Fine 3 Press the F F G G button to fine tune for the best pic...

Страница 13: ...wn one position Moving a programme 1 Select a programme to be moved with the D D E E or F F G G but ton 2 Press the YELLOW button 3 Move the programme to the desired programme number with the D D E E or F F G G button 4 Press the YELLOW button again to release this function Skipping a programme number 1 Select a programme number to be skipped with the D D E E or F F G G button 2 Press the BLUE but...

Страница 14: ...on to select stored favorite pro grammes Calling the programme table You can check the programmes stored in the memory by displaying the programme table Displaying programme table Press the LIST button to display the Programme table menu The programme table appears on the screen Note a You may find some blue highlighted programmes shown They have been set up in the programme edit mode b Some progr...

Страница 15: ...sor technology When selecting picture options Dynamic Standard and Mild in PICTURE menu XD is automatically changed to On It s not available to use this function in RGB PC HDMI PC mode 1 Press the MENU button and then D D E E button to select the PIC TURE menu 2 Press the G G button and then D D E E button to select XD 3 Press the G G button and then D D E E button to select On or Off 4 Press the ...

Страница 16: ...t the PICTURE menu 2 Press the G G button and then D D E E button to select CSM 3 Press the G G button and then D D E E button to select User 4 Press the G G button and then F F G G button to make appropriate adjustments The adjustment range of Red Green and Blue is 30 30 5 Press the OK button 6 Repeatedly press the MENU button to return to normal TV viewing MENU PR VOL OK VOL PR PSM CSM ACM Contr...

Страница 17: ...V3 AV4 COMPONENT 1 2 HDMI DTV 480p 570p 720p 1080i It s not available to use this function in XD Off mode 1 Press the MENU button and then use D D E E button to select the PICTURE menu 2 Press the G G button and then use D D E E button to select ACM 3 Press the G G button and then use F F G G button to make appro priate adjustments The adjustment range of ACM is 0 3 4 Press the OK button 5 Repeate...

Страница 18: ...n and then F F G G button to make appropriate adjustments then it will be stored for the picture User 4 Press the OK button 5 Repeatedly press the MENU button to return to normal TV viewing Note The adjustment for PICTURE menu contrast brightness colour sharpness and tint affect both the main and sub picture in PIP or Twin Picture mode MENU PR VOL OK VOL PR 18 PSM CSM ACM Contrast 95 Brightness 50...

Страница 19: ...nt on the Equalizer sub menu the display User automati cally appears even though you have already set a factory pre set setting SRS TSXT Flat Music Movie or Speech b Equalizer isn t suitable to use SRS TSXT is a trademark of SRS Labs Inc TruSurround XT technology is incorporated under license from SRS Labs Inc BBE BBE High Definition Sound restores clarity and presence for bet ter speech intelligi...

Страница 20: ...ce 1 Press the MENU button and then D D E E button to select the SOUND menu 2 Press the G G button and then D D E E button to select Balance 3 Press the G G button 4 Make desired adjustment with the F F G G button on the Balance pull down menu 5 Press the OK button 6 Repeatedly press the MENU button to return to normal TV viewing SOUND MENU 20 MENU PR VOL OK VOL PR SSM BBE AVL Balance 0 Equalizer ...

Страница 21: ...V mode you can select output sound for the left and right loud speakers Repeatedly press the I II button to select the sound output L R Audio signal from audio L input is sent to the left loud speaker and audio signal from audio R input is sent to the right loud speaker L L Audio signal from audio L input is sent to left and right loud speakers R R Audio signal from audio R input is sent to left a...

Страница 22: ...y pressing the I II but ton repeatedly DUAL I sends the primary broadcast language to the loudspeakers DUAL II sends the secondary broadcast language to the loud speakers DUAL I II sends a separate language to each loudspeaker NICAM reception If your set is equipped with the receiver for NICAM reception the high quality NICAM Near Instantaneous Companding Sound Multiplex digital sound can be recei...

Страница 23: ...ton and then D D E E button to select the TIME menu 2 Press the G G button and then use D D E E button to select Off Time or On Time 3 Press the G G button and then use D D E E button to select On 4 Press the G G button and then use D D E E button to adjust the hour 5 Press the G G button and then use D D E E button to adjust the minute 6 Only On Time function Press the G button and then use D E b...

Страница 24: ...P button to select the number of minutes The dis play Min will appear on the screen followed by 10 20 30 60 90 120 180 and 240 minutes The timer begins to count down from the number of minutes selected Note a To check the remaining sleep time press the SLEEP button once b To cancel the sleep time repeatedly press the SLEEP button until the display Min appears c If you turn the set off after settin...

Страница 25: ...he screen if any button on the front panel is pressed while viewing the TV Demo Use it to see the difference between XD demo on and XD Demo off It s not available to use this function in RGB PC HDMI PC mode 1 Press the MENU button and then D D E E button to select the SPECIAL menu 2 Press the G G button and then D D E E button to select XD Demo 3 Press the G G button to begin XD Demo 4 To stop XD ...

Страница 26: ...cially that characters are still trembling adjust the picture phase manually This function works in the following mode RGB HDMI COMPO NENT 480p 576p 720p 1080i mode only 1 Press the MENU button and then use D D E E button to select the SCREEN menu 2 Press the G G button and then D D E E button to select Manual config 3 Press the G G button and then D D E E button to select Phase H Size V Size H Po...

Страница 27: ...to be sent 4 3 Following selection will lead you to view a picture with an original 4 3 aspect ratio with black bars appearing at both the left and right sides 16 9 Wide Following selection will lead you to adjust the picture horizontal ly in a linear proportion to fill the entire screen useful for view ing 4 3 formatted DVDs 14 9 You can enjoy the picture format of 14 9 or general TV pro gramme t...

Страница 28: ...iewing NR Noise Reduction 1 Press the MENU button and then D D E E button to select the SCREEN menu 2 Press the G G button and then D D E E button to select NR 3 Press the G G button and then use D D E E button to select 3D NR or MPEG NR 4 Press the F F G G button to make appropriate adjustments The adjustment range of 3D NR is 0 2 The adjustment range of MPEG NR is 0 15 5 Press the OK button 6 Re...

Страница 29: ...he MENU button and then D D E E button to select the SCREEN menu 2 Press the G G button and then D D E E button to select Reset 3 Press the G G button You can initialize Position PIP size PIP position PIP Transparency Phase H Size V Size H position V position and sub picture size of twin picture MENU PR VOL OK VOL PR Auto config Manual config ARC Cinema NR Reset Prev Menu STATION PICTURE SOUND TIM...

Страница 30: ...CR connected to the Euro scart socket 2 on the set SAV2 VCR connected to the Euro scart socket 2 on the set AV3 VCR connected to the Euro scart socket 3 on the set AV4 VCR connected to the AV4 INPUT sockets of the set Component1 2 DVD connected to the DTV DVD INPUT sock ets on the back of set RGB PC connected to the RGB INPUT sockets on the back of set HDMI DVI DTV DVD INPUT connected to the HDMI ...

Страница 31: ...to select the input mode for the sub picture Note a When the PIP function is switched on you can also adjust it in the PIP DW menu b In some models when the sub picture quality get poor for sub picture select Auto PAL SECAM or NTSC in PIP System menu Swapping between main and sub pictures Press the SWAP button to exchange the main and sub pictures Note When the main picture is TV or AV modes the s...

Страница 32: ...ge Press the POSITION button Repeatedly press the D D E E or F F G G button until desired position is achieved The sub picture moves up down or left right Adjusting PIP Transparency PIP mode only 1 Press the MENU button and then D D E E button to select the PIP DW menu 2 Press the G G button and then D D E E button to select PIP Transparency 3 Press the G G button and then F F G G button to adjust...

Страница 33: ... indicates your selec tion while the second shows the current page displayed Press the TEXT button to switch off teletext The previous mode reappears SIMPLE text Page selection 1 Enter the desired page number as a three digit number with the NUMBER buttons If during selection you press a wrong num ber you must complete the three digit number and then re enter the correct page number 2 The D D E E ...

Страница 34: ...o previous selection Alternatively the E E can be used Direct page selection Corresponding to the SIMPLE teletext mode you can select a page by entering it as a three digit number using the NUMBER buttons in TOP mode FASTEXT The teletext pages are colour coded along the bottom of the screen and are selected by pressing the corresponding coloured button Page selection 1 Press the button to select t...

Страница 35: ... if a tele text page consists of 2 or more sub pages The number of sub pages and the sub page displayed is usually shown on the screen below the time When this button is pressed the stop symbol is displayed at the top left hand corner of the screen and the automatic page change is inhibited To continue press this button again MIX Displays the teletext pages superimposed on the TV pic ture To switc...

Страница 36: ...e PC monitor only switch off the set with the POWER button on the remote control handset If you switch off the set with the ON OFF button on the set the screen of the PC isn t displayed Displayable Monitor Specification Synchronization input form separate PERSONAL COMPUTER HDMI DVI INPUT U P G R A D E P O R T PC DTV SXGA 480p 576p 720p 1080i L AUDIO R RGB INPUT DVI RGB INPUT COMPONENT PR PB Y L AU...

Страница 37: ...e Euro scart socket 1 These signals are transmitted for example by a pay TV decoder game machine or photo CD unit etc b If both Euro scart 1 2 and 3 sockets have been connected to the VCRs simultaneously only the AV 2 can be received c If the S VIDEO Y C signal is received through the Euro scart socket 2 you must change to the S Video2 mode d If you use a RCA to Scart adaptor not supplied when bot...

Страница 38: ...e D Sub output socket to RGB INPUT socket on the set and audio cable of the HD SET TOP to the AUDIO sockets of RGB DVI INPUT 2 Connect the audio cable from the SET TOP to the DTV DVD AUDIO sockets of the set 3 Press the TV AV or MULTIMEDIA button to select Component 1 Component 2 RGB or HDMI DVD HDMI DVI INPUT U P G R A D E P O R T PC DTV SXGA 480p 576p 720p 1080i L AUDIO R RGB INPUT DVI RGB INPUT...

Страница 39: ...ices DVD Player or Set Top Box supports DVI If Source Devices have DVI Output Connector Source Devices connect to the set with HDMI to DVI Cable not supplied with the product If Source Devices support Auto DVI automatically Source Devices divert output resolution in 1280 x 720p But if not refer to the reference Manual of Source Devices and select resolution manually To get the best picture quality...

Страница 40: ...ermanently imprinted on the screen Use the Orbiter screen saver when possible When Source Devices are connected with HDMI DVI Input output PC Resolution VGA SVGA XGA Position and Size may not fit to Screen As shown on page 26 press the MENU button to adjust the screen Position of the set and contact an PC graphics card service centre When Source Devices connected HDMI DVI Input output the set Reso...

Страница 41: ...41 Note ...

Страница 42: ...Note 42 ...

Страница 43: ...s the TV switched on Try another channel weak signal Check aerial plugged into TV Check aerial broken lead Check aerial Check for local interference Adjust contrast Adjust brightness Adjust colour Adjust volume Check the batteries in remote control Check Audio Video sockets VCR only Contact LG service provider s A change in ambient humidity or tempera ture may result in an unusual noise at the tim...

Страница 44: ...dealer from whom the equipment was originally purchased The dealer may before carrying out service under guarantee require a receipted account as evidence of the date of purchase D We respectfully point out that your dealer is not obligated to replace batteries if they become exhausted or worn in use E Aerial alignment and consumer control adjustments are not covered by this guarantee This guarant...

Отзывы: