


12
ENG
ENGLISH
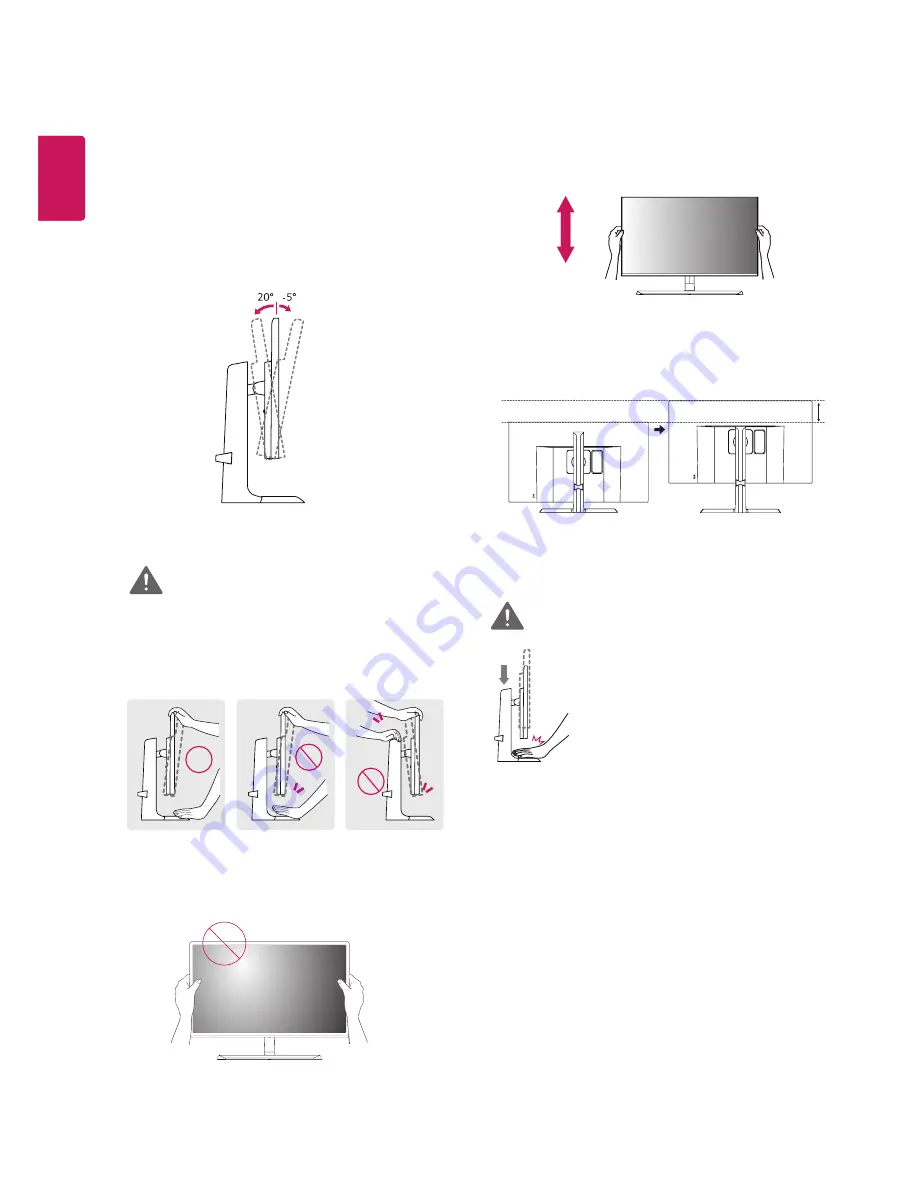
Adjusting the Stand Height
1
Handle the monitor with both hands for safety.
2
The height can be adjusted up to
110.0 mm
.
Adjusting the angle
1
Place the monitor in an upright position, mounted
on the stand base.
2
Adjust the angle of the screen. The angle of the
screen can be adjusted forwards or backwards for a
comfortable viewing experience.
Front Side
Rear Side
y
To avoid injury to the fingers when adjusting the
screen, do not hold the lower part of the moni-
tor's frame as illustrated below.
WARNING
y
Be careful not to touch or press the screen area
when adjusting the angle of the monitor.
110.0 mm
y
Do not put your fingers or hand
between the screen and the base
(chassis) when adjusting the
screen's height.
WARNING
Содержание 32MU99
Страница 7: ...7 ENG ENGLISH Input Connector ...


