


26
ENGLISH
USER SETTINGS
Activating the Main Menu
1
Press the joystick button on the bottom of the
monitor.
2
Move the joystick up/down ( / ) and left/right
(
/ ) to set the options.
3
Press the joystick button once more to exit the
main menu.
Joystick Button
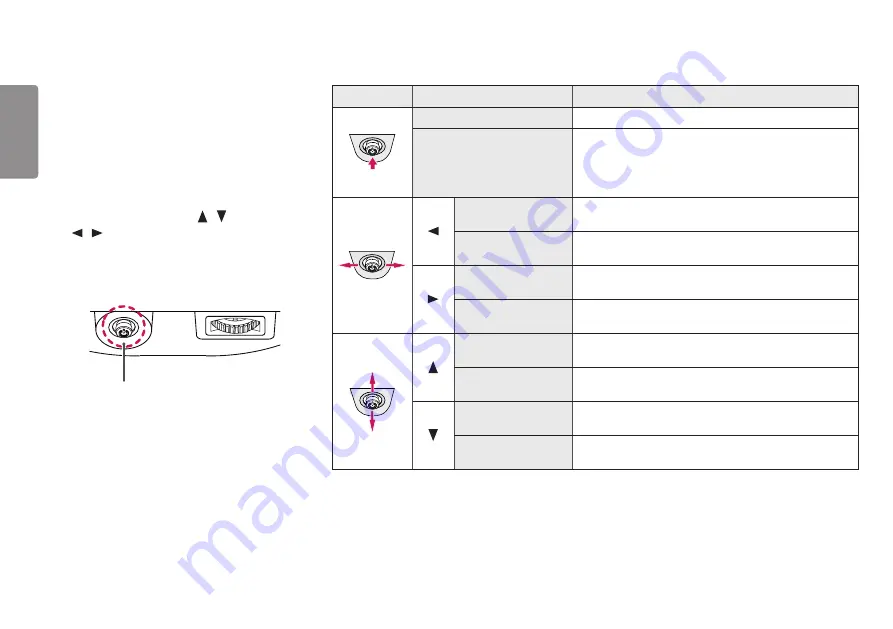
Button
Menu Status
Description
Main menu disabled
Enables the main menu.
Main menu enabled
Exits the main menu.
(Holding down the button more than 5 seconds to turn off
the monitor. You can turn off the monitor this way at any
time, including when the OSD is on.)
Main menu disabled
Adjusts the monitor volume level.
Main menu enabled
Enters the
Input
features.
Main menu disabled
Adjusts the monitor volume level.
Main menu enabled
Enters the
Settings
feature.
Main menu disabled
Adjusts the monitor brightness level.
Main menu enabled
Turns off the monitor.
Main menu disabled
Adjusts the monitor brightness level.
Main menu enabled
Enters the
Game Mode
feature.


