


Instruction / Safety Information
5
LG Easy Guide
may contain undetectable errors despite our dedicated efforts to provide users with
reliable information. We ask for your understanding.
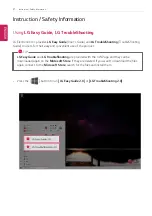
The illustrated figures in
LG Easy Guide
may differ in appearance with the actual products.
Unauthorized reproduction or duplication of any part of
LG Easy Guide
is strictly prohibited.
LG Electronics Inc. reserves the right to modify any part of this manual for quality purposes, without
prior notice.
Copyright (C) 2021 LG Electronics Inc. Digitalmate Co., LTD
Country of Origin
China
Manufacturer
LG Electronics Inc.
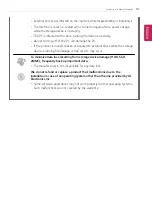
Open Source Software Notice Information
To obtain the source code under GPL, LGPL, MPL, and other open source licenses, that is
contained in this product, please visit https://opensource.lge.com.
In addition to the source code, all referred license terms, warranty disclaimers and copyright
notices are available for download.
LG Electronics will also provide open source code to you on CD-ROM for a charge covering the
cost of performing such distribution (such as the cost of media, shipping, and handling) upon
email request to [email protected].
This offer is valid for a period of three years after our last shipment of this product. This offer is
valid to anyone in receipt of this information.
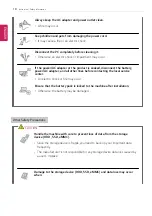
System Protection Feature
If the system becomes too hot, the system protection feature automatically stops recharging and
switches the power mode to Hibernate or Off.
The PC system has to cool down before it can be reactivated.
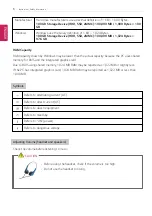
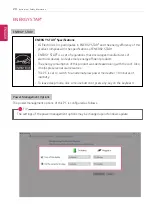
Information on Hard Drive / Memory Capacity
Information on Hard Drive (HDD, SSD, eMMC) Capacity
The hard drive capacity shown by Windows is lower than that stated by the hard drive manufacturer
due to a difference in calculation.
ENGLISH
Содержание 17Z95N Series
Страница 1: ...LG EASY GUIDE NOTEBOOK 17Z95N Series www lg com Copyright 2021 LG Electronics Inc All rights reserved ...
Страница 22: ...22 Instruction Safety Information Regulatory Notices ENGLISH ...
Страница 23: ...Instruction Safety Information 23 ENGLISH ...
Страница 24: ...24 Instruction Safety Information ENGLISH ...
Страница 25: ...Instruction Safety Information 25 ENGLISH ...
Страница 26: ...26 Instruction Safety Information ENGLISH ...
Страница 27: ...Instruction Safety Information 27 ENGLISH ...
Страница 28: ...28 Instruction Safety Information ENGLISH ...
Страница 29: ...Instruction Safety Information 29 ENGLISH ...
Страница 30: ...30 Instruction Safety Information ENGLISH ...
Страница 31: ...Instruction Safety Information 31 ENGLISH ...
Страница 32: ...32 Instruction Safety Information ENGLISH ...
Страница 33: ...Instruction Safety Information 33 ENGLISH ...
Страница 34: ...34 Instruction Safety Information ENGLISH ...
Страница 35: ...Instruction Safety Information 35 ENGLISH ...
Страница 36: ...36 Instruction Safety Information ENGLISH ...
Страница 37: ...Instruction Safety Information 37 ENGLISH ...
Страница 38: ...38 Instruction Safety Information ENGLISH ...
Страница 39: ...Instruction Safety Information 39 ENGLISH ...
Страница 40: ...40 Instruction Safety Information ENGLISH ...
Страница 41: ...Instruction Safety Information 41 ENGLISH ...
Страница 42: ...42 Instruction Safety Information ENGLISH ...
Страница 43: ...Instruction Safety Information 43 ENGLISH ...
Страница 44: ...44 Instruction Safety Information ENGLISH ...
Страница 45: ...Instruction Safety Information 45 ENGLISH ...
Страница 46: ...46 Instruction Safety Information ENGLISH ...
Страница 47: ...Instruction Safety Information 47 ENGLISH ...
Страница 48: ...48 Instruction Safety Information ENGLISH ...
Страница 49: ...Instruction Safety Information 49 ENGLISH ...
Страница 50: ...50 Instruction Safety Information ENGLISH ...
Страница 51: ...Instruction Safety Information 51 ENGLISH ...
Страница 52: ...52 Instruction Safety Information ENGLISH ...
Страница 53: ...Instruction Safety Information 53 ENGLISH ...
Страница 54: ...54 Instruction Safety Information ENGLISH ...
Страница 55: ...Instruction Safety Information 55 ENGLISH ...
Страница 68: ...68 Using Windows 10 3 The selected app is added to the Start menu or taskbar ENGLISH ...
Страница 71: ...Using Windows 10 71 3 Click the New Desktop tile ENGLISH ...
Страница 72: ...72 Using Windows 10 4 Desktop 1 and Desktop 2 are created 5 Select an app in the preview or desktop ENGLISH ...
Страница 73: ...Using Windows 10 73 6 The screen is toggled to the selected app or desktop ENGLISH ...
Страница 80: ...80 Using Windows 10 ENGLISH ...
Страница 89: ...Using Windows 10 89 3 To change the detailed settings of the PC press the All Settings tile ENGLISH ...
Страница 90: ...90 Using Windows 10 Using the Start Menu 1 Press the button and select the Settings menu ENGLISH ...
Страница 103: ...Using the PC 103 3 Go to Keyboard Backlight and select your desired options ENGLISH ...
Страница 113: ...Using the PC 113 2 When the Settings screen appears select Devices 3 Select Mouse Additional Mouse Options ENGLISH ...
Страница 133: ...Using the PC 133 2 When the Settings screen appears select Devices ENGLISH ...
Страница 135: ...Using the PC 135 4 Select a device to connect to 5 Complete the Bluetooth connection as directed ENGLISH ...
Страница 137: ...Using the PC 137 2 Connect the wired LAN cable to the LAN port ENGLISH ...
Страница 139: ...Using the PC 139 4 Select Network Internet Status Change adapter options ENGLISH ...
Страница 140: ...140 Using the PC 5 Right click Ethernet and select the Properties menu ENGLISH ...
Страница 141: ...Using the PC 141 6 Select Internet Protocol Version 4 TCP IPv4 and then click Properties ENGLISH ...
Страница 145: ...Using the PC 145 3 Select the Access Point you want to connect to and press Connect ENGLISH ...
Страница 159: ...Using Software 159 1 Select the All List Update needed menu item ENGLISH ...
Страница 161: ...Using Software 161 1 Select the Notification Setting menu 2 Set Auto Update Search to ON or OFF ENGLISH ...
Страница 164: ...164 Using Software 1 Press the icon on the taskbar ENGLISH ...
Страница 176: ...176 Restoring the System 1 Select Keep my files ENGLISH ...
Страница 179: ...Restoring the System 179 1 Select Remove everything ENGLISH ...
Страница 185: ...Setup and Upgrade 185 1 Reboot the system and press F2 2 In a few moments the system setup screen appears ENGLISH ...
Страница 206: ...206 Setup and Upgrade 3 Boots using the selected device ENGLISH ...
Страница 208: ...208 Setup and Upgrade 2 Select System Display ENGLISH ...
Страница 215: ...FAQ 215 2 Select System Display ENGLISH ...
Страница 220: ...220 FAQ 1 Select Keep my files ENGLISH ...
Страница 223: ...FAQ 223 1 Select Remove everything ENGLISH ...
Страница 231: ...FAQ 231 3 Select the Access Point you want to connect to and press Connect ENGLISH ...


