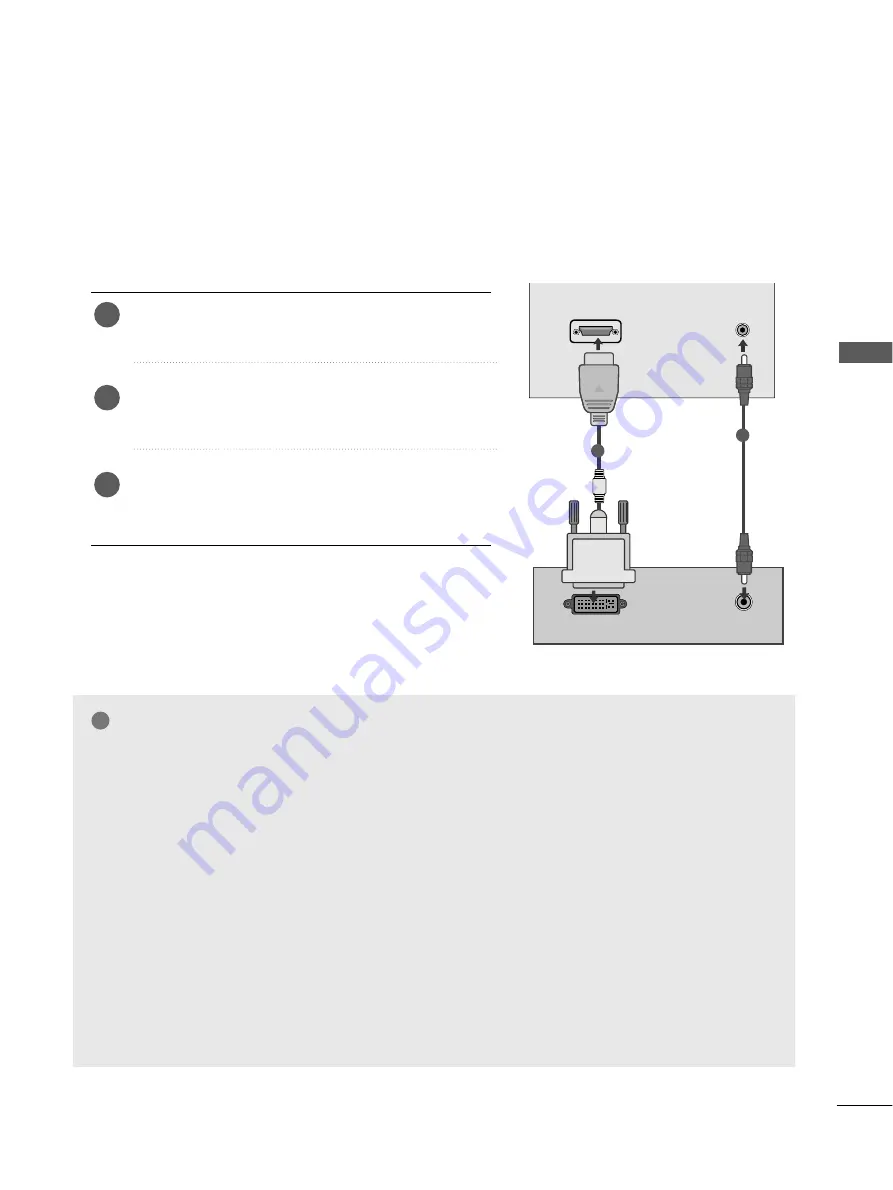
DVI-PC OUTPUT
AUDIO
HDMI/DVI IN
AUDIO
(RGB/DVI) IN
25
EXTERNAL
EQ
UIPMENT
SETUP
When connecting with a HDMI to DVI cable(Only 19/22LS4R*)
Connect the DVI output of the PC to the H
HD
DM
MII//D
DV
VII
II N
N jack on the set.
Connect the audio cable from the PC to the A
AU
UD
DIIO
O
((R
RG
GB
B//D
DV
VII)) IIN
N sockets of the set.
Select
HDMI/DVI
(PC) input source with using the
IIN
NP
PU
UT
T button on the remote control.
2
3
1
1
2
NOTE
!
G
G
If the set is cold, there may be a small “flicker”
when the set is switched on. This is normal, there
is nothing wrong with the set.
G
G
If possible, use the VESA 1280x1024@60Hz
(17LS5R *), 1440x900@60Hz (19LS4R *),
1680x1050@60Hz (22LS4R *) video mode to
obtain the best image quality for your LCD moni-
tor. If used under the other resolutions, some
scaled or processed pictures may appear on the
screen. The set has been preadjusted to the
mode VESA 1280x1024@60Hz (17LS5R *),
1440x900@60Hz (19LS4R *),
1680x1050@60Hz (22LS4R *).
G
G
Some dot defects may appear on the screen, like
Red, Green or Blue spots. However, this will have
no impact or effect on the monitor performance.
G
G
Do not press the LCD screen with your finger for
a long time as this may produce some temporary
distortion effects on the screen.
G
G
When the PC screen appears on the set, a mes-
sage may appear on the screen, and the message
will differ according to the Window system ver-
sion. If a message appears click “Next” until the
message finishes.
G
G
If the message “No signal” appears on the
screen, adjust the PC as in the ‘Displayable
Monitor Specification’ sectio
n.


