background image

28

Beyond the basics

Beyond the basics

Maintaining your printer

Troubleshooting

Appendix

Index

Steps to basic printing

9

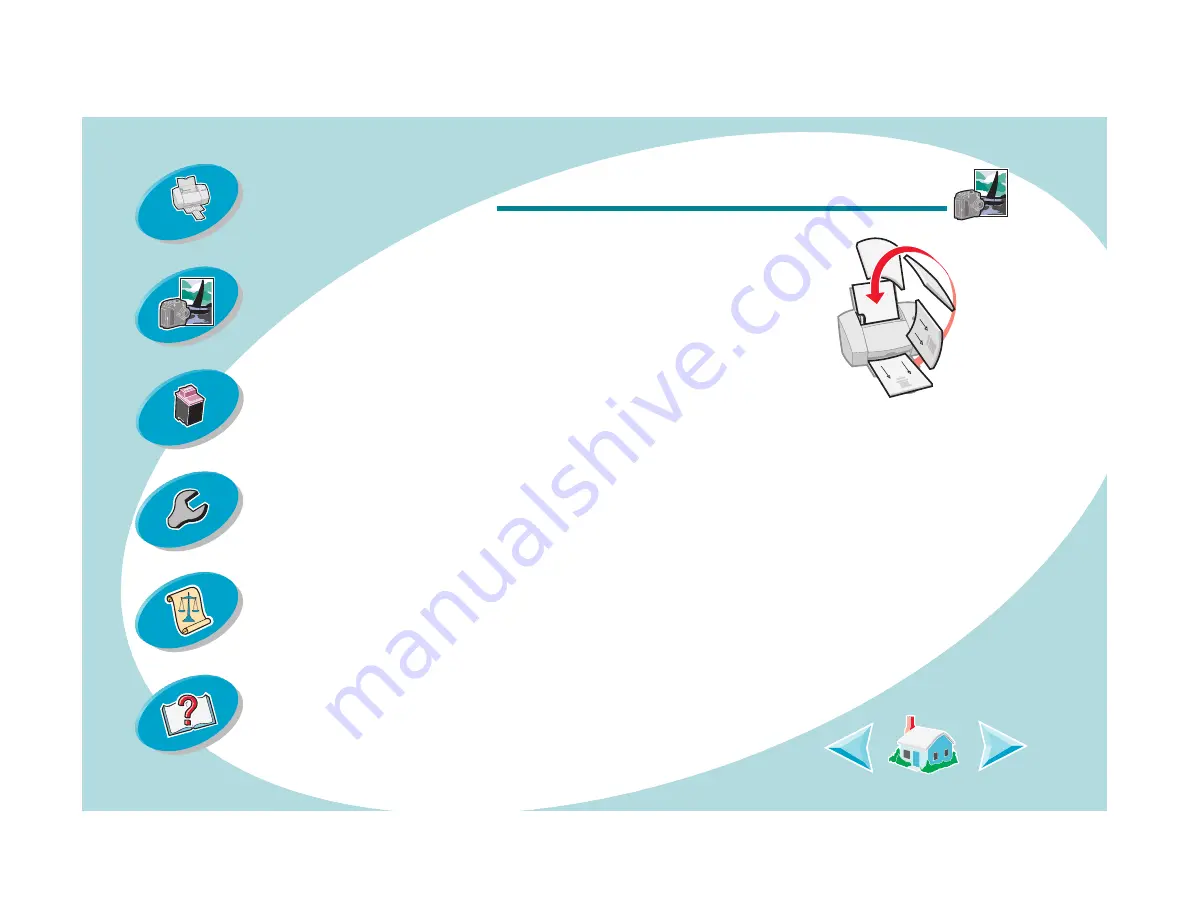
Insert the stack of paper and instruction page 
with the printed side facing away from you and 
the arrows pointing down.
Note: The direction of the arrows on your 
instruction page may be different than the 
instruction page shown. Always insert the stack 
of paper and instruction page with the arrows 
pointing down.

10

Select Continue
The even-numbered pages print on the other side.

Содержание Z43 - Z43 Color InkJet Printer

Страница 1: ...y that product program or service may be used Any functionally equivalent product program or service that does not infringe any existing intellectual property right may be used instead Evaluation and verification of operation in conjunction with other products programs or services except those expressly designated by the manufacturer are the user s responsibility Lexmark Lexmark with diamond desig...

Страница 2: ...int this guide 1 From the Acrobat Reader File menu choose Page Setup 2 Select the Landscape orientation button 3 Click OK 4 From the Acrobat Reader File menu choose Print 5 Select the pages you want to print and then click Print Steps to basic printing tells you how to load paper and adjust your printer software for printing Beyond the basics tells you how to print booklets handouts and two sided ...

Страница 3: ...ntaining your printer Troubleshooting Appendix Index Steps to basic printing Steps to basic printing Basic printing is as easy as Step One Load the paper Step Two Customize your printing options Step Three Print your document ...

Страница 4: ...r You can load up to 100 sheets of paper depending on thickness 1 Place the paper against the right side of the sheet feeder with the print side facing you Note Make sure you do not force the paper into the sheet feeder when you load it For example letter or A4 size paper should extend above the top of the paper support Sheet feeder Paper support ...

Страница 5: ...Beyond the basics Maintaining your printer Troubleshooting Appendix Index Steps to basic printing 2 Squeeze the release tab and the paper guide together and slide the paper guide to the edge of the paper Release tab Paper guide ...

Страница 6: ... Make sure the 10 envelopes print side is facing you envelopes are loaded vertically against the right side of the sheet feeder stamp location is in the upper left corner paper guide is against the side of the envelopes 10 greeting cards index cards postcards or photo cards print side is facing you cards are loaded vertically against the right side of the sheet feeder paper guide is against the si...

Страница 7: ... photo paper Note Remove each photo as it exits the printer and allow it to dry before stacking 25 iron on transfers print side is facing you and you follow the instructions included in the iron on transfer packaging paper guide is against the side of the iron on transfers Note Many software applications accept iron on transfers differently We recommend printing your design on plain paper before p...

Страница 8: ...dix Index Steps to basic printing 100 sheets of custom sized paper the print side is facing you paper size fits within these dimensions Width dimensions mm 76 216 inches 3 0 8 5 Length dimensions mm 127 432 inches 5 0 17 0 paper guide is against the side of the paper Load up to Make sure the ...

Страница 9: ...per print side is facing you and then place the banner paper behind the printer Next bring the unattached edge of the first page over the top of the printer and into the sheet feeder paper guide is against the side of the paper Note Select the Banner Letter or Banner A4 Paper Size in the Lexmark Z42 Page Setup dialog box Load up to Make sure the ...

Страница 10: ...arencies rough sides of the transparencies are facing you smooth side down If your transparency has a removable stripe make sure it is away from you and pointing down paper guide is against the side of the transparencies Note Remove each transparency as it exits the printer and allow it to dry before stacking Load up to Make sure the ...

Страница 11: ... The printer software for your printer lets you perform printing tasks with superior printing results The Page Setup dialog box comes with your operating system It includes options such as paper size orientation and watermarks Click this pop up menu to select a paper size Click one of these to select the page orientation Click Help to access the printer driver Help ...

Страница 12: ...ware It includes options such as number of copies pages to print paper source print quality booklet printing pages per sheet handouts print last page first print on both sides color matching background printing and print time Click this pop up menu to select print settings See the following table for a descriptionof these options Click Help to access the printer driver Help ...

Страница 13: ...n the application s File menu 2 Choose Page Setup 3 Change options as needed 4 Select OK From the pop up menu choose When you want to select General the number of copies the pages to print and wait for pages to dry Paper Type Quality paper type and print quality Layout booklet printing pages per sheet print last page first print on both sides and binding Color ColorSync or Built In color matching ...

Страница 14: ...ication for example word processing spreadsheet graphics and so on open the Print dialog box 1 Open the application s File menu 2 Choose Print 3 Change options as needed 4 Select Save Settings Changing your print settings from your desktop To change your print settings from your desktop open the Print dialog box 1 From your desktop open the File menu 2 Choose Print 3 Change options as needed 4 Sel...

Страница 15: ...y need to change your printer options for printing on specialty papers When you are printing on Open this dialog box And make these selections Envelopes Page Setup From the Paper Size pop up menu select the appropriate envelope size Greeting cards index cards or postcards Page Setup From the Paper Size pop up menu select the appropriate card size Banner paper Page Setup From the Paper Size pop up ...

Страница 16: ... Transparency Paper Type and Normal 600 dpi Print Quality Note Remove each transparency as it exits the printer and allow it to dry before stacking Iron on transfers Print From the Paper Type Quality pop up menu select Iron On Transfer Paper Type Note Many software applications accept iron on transfers differently We recommend printing your design on plain paper before printing it on an iron on tr...

Страница 17: ... your screen 3 Change settings as needed 4 Select Save Settings Glossy Photo Paper Print From the Paper Type Quality pop up menu select Glossy Paper Type and High 1200 dpi or Maximum 2400 dpi Print Quality From the Color pop up menu select Built In Color Matching From the Document Color pop up menu select Natural Color Note Remove each photo as it exits the printer and allow it to dry before stack...

Страница 18: ...oing back to the defaults You may want to change your settings back to the default settings 1 Open the File menu 2 Choose Print The Print dialog box displays on your screen 3 Select Revert to Defaults Step Three Print your document 1 Open the File menu 2 Choose Print The Print dialog box displays on your screen 3 Select Print ...

Страница 19: ...r printer software for Printing booklets Printing handouts Printing last page first Printing on both sides of a sheet of paper Printing booklets You can print and bundle your document together to make a booklet Step One Load the paper Load up to 100 sheets of paper against the right side of the sheet feeder For help loading paper see page 4 ...

Страница 20: ...Two Customize the Print dialog box for booklets 1 Open the Page Setup dialog box For help see page 13 2 Select the appropriate paper size 3 Select the appropriate page orientation 4 Open the Print dialog box For help see page 14 5 From the General pop up menu select Layout Select Layout Select the number of sheets to bundle ...

Страница 21: ... stock select a smaller number of sheets to bundle to allow for binding considerations 7 Select Print When the first half of your booklet is finished printing your printer software prompts you to reload the paper 8 Insert the stack of paper and paper reloading instruction page with the printed side facing away from you and the arrows pointing down Note The direction of the arrows on your instructi...

Страница 22: ...les together and bind your booklet To build a booklet 1 Take the first bundle from the paper exit tray fold it in half and set it aside 2 Take the next bundle fold it in half and stack it on top of the first bundle 3 Stack the rest of your bundles on top of each other until your booklet is complete 4 Bind the bundles together to complete your booklet Five bundles stacked to form a booklet ...

Страница 23: ...he paper Load up to 100 sheets of paper against the right side of the sheet feeder For help loading paper see page 4 Step Two Customize the Print dialog box for Pages per Sheet handouts You can print your handouts on one side of the paper or on both sides of the paper 1 Open the Page Setup dialog box For help see page 13 2 Select the appropriate paper size 3 Select the appropriate page orientation...

Страница 24: ... Select Print Borders if you want to print a border around each page image 8 To print your handout on both sides of the paper select Print on Both Sides 9 Select the appropriate graphic for the binding edge you want You can either bind on the left edge or the top edge of the paper 10 Select Print If you formatted your handouts to print on one side of each page you are finished If you formatted you...

Страница 25: ...y from you and the arrows pointing down Note The direction of the arrows on your instruction page may be different than the instruction page shown Always insert the stack of paper and instruction page with the arrows pointing down 12 Select Continue Printing last page first You can print your pages in reverse order The last page prints first and the first page prints last Step One Load the paper L...

Страница 26: ...e appropriate page orientation 4 Open the Print dialog box For help see page 14 5 From the General pop up menu select Layout 6 Select Print Last Page First 7 Select Print Printing on both sides of a sheet of paper Your Lexmark printer lets you print on both sides of a sheet of paper Besides saving paper this feature is helpful when you want to print tablets Step One Load the paper Load up to 100 s...

Страница 27: ...ize 3 Select the appropriate page orientation 4 Open the Print dialog box For help see page 14 5 From the General pop up menu select Layout 6 Select Print on Both Sides 7 Select the appropriate graphic for the binding edge you want You can either bind on the left edge or on the top edge of the paper 8 Select Print The odd numbered pages print first When the odd numbered pages finish printing your ...

Страница 28: ...nd instruction page with the printed side facing away from you and the arrows pointing down Note The direction of the arrows on your instruction page may be different than the instruction page shown Always insert the stack of paper and instruction page with the arrows pointing down 10 Select Continue The even numbered pages print on the other side ...

Страница 29: ...install replace and care for your print cartridges You can use the Control Panel one of your printer s software programs to help you with these tasks Using the Control Panel Installing or replacing print cartridges Improving print quality Aligning the print cartridges Cleaning the print nozzles Wiping print nozzles and contacts Preserving print cartridges ...

Страница 30: ...g your printer Troubleshooting Appendix Index Steps to basic printing Using the Control Panel The Control Panel includes two tabs Cartridges and About Opening the Control Panel 1 Open the Apple menu 2 Choose Control Panels 3 Choose Lexmark Z42 Control Panel ...

Страница 31: ...ng your printer Troubleshooting Appendix Index Steps to basic printing Select the Cartridges tab to maintain your print cartridges Select Help to access the printer driver Help Select the About tab to find printer software version and copyright information ...

Страница 32: ...dex Steps to basic printing Installing or replacing print cartridges 1 Make sure the Power light is on 2 Raise the front cover The print cartridge carrier moves to the loading position unless the printer is busy Power light Paper Feed light Front cover Print cartridge carrier in the loading position ...

Страница 33: ...placement cartridge in the printer 5 Close the front cover 6 Store or dispose of the old cartridge a If you are installing a new cartridge remove only the sticker and transparent tape from the bottom of the print cartridge b Insert the replacement print cartridge into the print cartridge carrier c Push back firmly on the cartridge until it snaps securely into place Warning Do NOT touch the goldcon...

Страница 34: ...nter Troubleshooting Appendix Index Steps to basic printing 7 Verify the settings on the Cartridge Setup dialog box a Select the cartridge s you installed b Specify whether the cartridge is a New Cartridge or an Old Cartridge one that has been used before c Select OK ...

Страница 35: ... Steps to basic printing 8 If you installed a New Cartridge select Yes to align the cartridges Follow the instructions on the screen to complete the cartridge alignment For additional help see Aligning the print cartridges 9 To see how the cartridges print select Print Test Page Select Print Test Page ...

Страница 36: ...zles Aligning the print cartridges Normally you only align the print cartridges after installing a new print cartridge However you may also need to align the print cartridges when The black portions of a graphic or text do not align properly with the color portions Characters are not aligned correctly at left margin Vertical lines appear wavy To align your print cartridges 1 Load plain paper in th...

Страница 37: ...ith several alignment patterns The test page looks similar to the one shown 4 From each alignment group on the test page find the number under the alignment pattern that comes closest to forming a perfectly straight line In this example in alignment group A 16 comes closest to forming a straight line Depending on the cartridge combination you installed an alignment test pattern prints Each pattern...

Страница 38: ...rinter Troubleshooting Appendix Index Steps to basic printing 5 In the Align Cartridges dialog box enter the pattern numbers from the printed test page that come closest to forming a straight line 6 After you have entered a number for each of the patterns select OK ...

Страница 39: ...y forcing ink through the nozzles to clear any clogged nozzles A test line prints so you can see if the cleaning process was successful Run the nozzle test when Characters are not printing completely White dashes appear in graphics or printed characters Print is too dark or smudged Colors do not print correctly To run the nozzle test 1 Load plain paper in the printer 2 Open the Control Panel For h...

Страница 40: ...er and prints a nozzle test pattern similar to the one shown Broken lines at the top of the page indicate clogged nozzles Unbroken lines at the bottom of the page indicate the nozzles were cleaned These cyan magenta yellow and black purge lines print when ink is forced through the nozzles to unclog them If any of these colors are missing on your printed test page your cartridge may be out of that ...

Страница 41: ... A broken line indicates clogged nozzles If the bottom line still has breaks run the test two more times If the print quality is satisfactory the print nozzles are clean You do not need to complete the remaining steps If the print quality of both sets of lines is not satisfactory continue with the next step 5 Remove and reinstall the print cartridge 6 Repeat the nozzle test 7 If the lines are stil...

Страница 42: ...ontacts in one direction 3 Reinstall the print cartridges and repeat the nozzle test For help see page 39 If the print quality has not improved after this cleaning process replace your print cartridge If print quality still does not improve your printer may require service a Hold the damp cloth against the nozzles for about three seconds Gently blot and wipe dry b Use another clean section of clot...

Страница 43: ... it in an air tight container The print cartridge does not print correctly if removed from the printer and left exposed for an extended period of time If a print cartridge runs out of ink leave the empty cartridge in the printer until you are ready to replace it Printing with only one print cartridge installed may cause printer problems Lexmark s printer warranty does not cover repair of failures ...

Страница 44: ... From the list of printing problems below select a category that describes your printing problem Then search for the solution to your problem General printing problems Printer prints slowly or doesn t print Paper misfeeds or jams Document prints with mistakes or poor quality Problems with envelopes transparencies or photos Error messages and flashing lights Macintosh computer locks up while printi...

Страница 45: ... is a problem first make sure that The power supply is plugged into the printer and a properly grounded electrical outlet The printer is turned on The printer is set as the default printer To check the printer status 1 Double click the Lexmark Z42 printer icon on your desktop 2 From the menu bar choose Printing 3 Make sure Set Default Printer is checked ...

Страница 46: ...s occurred while printing a document and suggests you try printing again Print cartridge ink level indicators on the Cartridges tab of the printer s Control Panel are shaded Error messages such as Paper Out and job progress information do not display on your computer screen Before proceeding verify that The USB cable is securely attached to both the printer and the computer The printer is plugged ...

Страница 47: ...ur desktop 2 From the menu bar choose Printing 3 Make sure Set Default Printer is checked Paper is loaded correctly The print job is not paused To check the print job status 1 Double click the Lexmark Z42 printer icon on your desktop 2 Make sure the Pause button is not selected The print queue is not stopped To check the print queue status 1 Double click the Lexmark Z42 printer icon on your deskto...

Страница 48: ...rint cartridges For help see page 32 Printer prints very slowly Close any open applications not in use Decrease your Print Quality setting Check the document you are printing Photos and graphics may take longer to print than regular text Check your computer s resources Consider purchasing more memory or increasing the virtual memory for your computer Print the document in the foreground rather tha...

Страница 49: ...d for inkjet printers You do not force the paper down into the printer when you load it For example if you are loading letter or A4 size paper the top edge of the paper should extend above the top of the sheet feeder You do not load too much paper in the sheet feeder Depending on the thickness of your paper the sheet feeder can hold up to 100 sheets of paper The paper guide is against the left sid...

Страница 50: ...is against the side of the envelopes Make sure envelope or the appropriate specialty paper is selected in the Page Setup dialog box or the Print dialog box Make sure you are using a paper or envelope size supported by your printer Your application may not be designed to print envelopes For help check your application s documentation Printer has a paper jam If the paper is lodged too far into the p...

Страница 51: ... printer 5 Close the front cover 6 Press the Power button to turn the printer back on 7 Resend your document to print Document prints with mistakes or poor quality Print is too dark or smudged Make sure the paper is straight and unwrinkled Let the ink dry before handling the paper Make sure the Paper Type or Paper Size setting in the printer software matches the type of paper loaded in the printer...

Страница 52: ...For help see page 36 Clean the print nozzles For help see page 39 Print smears on the page The next page exiting the printer may be smearing the ink Remove each page as it exits the printer and allow it to dry before stacking The print nozzles may need cleaning For help see page 39 Printed pages have alternating bands of light and dark print intermittent printing Select the Print Quality setting H...

Страница 53: ... right top or bottom edge of page Like other printers your printer cannot print in the extreme left right top or bottom edges of a page Use these minimum settings Left and right margins 6 35 mm 0 25 in each for all paper sizes except A4 For A4 size paper 3 37 mm 0 133 in each Top and bottom margins Top 1 7 mm 0 067 in Bottom 16 51 mm 0 65 in for most jobs Bottom 19 mm 0 75 in for best print qualit...

Страница 54: ... printout differ from the colors on the screen For ColorSync color matching select the profile and rendering intent you want 1 From the File menu choose Print 2 From the General pop up menu select Color 3 Select ColorSync Color Matching 4 Select the Printer Profile you want 5 Select the Rendering Intent you want For Built In color matching select Natural Color as the Document Color 1 From the File...

Страница 55: ...erals and connect the printer directly to your computer Colors on the printout are faded Try the suggestions listed in the section Colors on the printout differ from the colors on the screen If the colors still seem faded run the nozzle test For help see page 39 Characters are missing or unexpected The printer is set as the default printer To check the printer status 1 Double click the Lexmark Z42...

Страница 56: ... feed envelopes or specialty papers For help see page 50 Transparencies or glossy photo papers stick together Use a transparency or photo paper designed for an inkjet printer Remove each page as it exits the printer and allow it to dry before stacking Transparencies or photos contain white lines Select a higher Print Quality Your print nozzles may need cleaning For help see page 39 ...

Страница 57: ...g out of ink Purchase a new print cartridge The Power light is on and the Paper Feed light is blinking If the printer is out of paper 1 Load paper 2 Press the Paper Feed button If the printer has a paper jam see page 50 The Power light blinks twice The print cartridge carrier has stalled Check your screen for any error messages 1 Turn the printer off 2 After waiting a few seconds turn the printer ...

Страница 58: ...t was in the queue before the computer locked up This could cause your system to lock up again To recover from this problem 1 Turn off the printer and the computer 2 Hold down the Shift key and turn on the computer 3 Continue to hold the Shift key until you see the Mac OS screen with the words Extensions Off 4 Release the Shift key 5 Locate the Lexmark Z42 printer icon on your desktop The inactive...

Страница 59: ...n your screen 3 Click Install and Agree 4 Click Install 5 Select the Lexmark Z42 printer in the Chooser by following the four steps on the dialog box Note If your Macintosh computer locks up or freezes while printing you may need to turn off the printer and the computer and then turn them back on When you turn them back on the printer driver s spooler may attempt to start printing the job that was...

Страница 60: ...tware CD The Lexmark Z42 software installation screen displays on your screen 3 Click Install and Agree 4 From the Easy Install pop up menu choose Uninstall 5 Select Complete Uninstall 6 Click Uninstall Power supply If your power supply fails replace it with the Lexmark replacement part or other UL LISTED Direct Plug In Power Unit marked Class 2 and rated 30 V dc at 500 mA Safety information If yo...

Страница 61: ...ng print set tings 27 loading paper 26 printing 26 building a booklet 22 Built In color matching 54 C cards loading 6 cartridges print aligning 36 installing 32 preserving 43 removing 33 replacing 32 characters misformed 54 characters missing 55 coated paper loading 7 color options 13 colors missing 55 ColorSync color matching 54 contacts print wiping 42 Control Panel opening 30 tabs 31 using 30 c...

Страница 62: ...ng problems 45 glossy paper 17 loading 7 greeting cards loading 6 H handouts customizing print set tings 23 loading paper 23 printing 23 I improving print quality 36 index cards loading 6 Ink Low message 57 installing print cartridges 32 installing printer software 59 intermittent printing 52 iron on transfers loading 7 L last page first loading paper 25 printing 25 layout 13 lights flashing 57 lo...

Страница 63: ...st 39 nozzles print cleaning 39 wiping 42 P page settings changing 13 Page Setup 11 pages per sheet customizing print set tings 23 loading paper 23 printing 23 paper loading 4 misfeeds 49 specialty papers 15 Paper Feed 57 Paper Feed light locating 32 paper guide locating 5 using 5 paper type quality 13 photo paper loading 7 popup menus background printing op tions 13 color options 13 general optio...

Страница 64: ...th sides of the pa per 26 pages per sheet 23 specialty papers 15 printing on both sides of the paper loading paper 26 printing options customizing 11 printing problems error messages 57 poor quality 51 specialty papers 56 Q Quick Print 51 R release tab locating 5 using 5 replacing print cartridges 32 returning to defaults 18 reverse order printing 25 loading paper 25 S safety information 60 saving...

Страница 65: ...0 does not print 46 48 printing 35 transparencies loading 10 troubleshooting error messages 57 flashing lights 57 poor print quality 51 specialty print jobs 56 two sided printing 26 loading paper 26 two way communications problems indicators 46 U unexpected characters 55 uninstalling printer soft ware 60 ...

Отзывы: