Static sensitivity notice
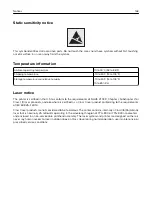
This symbol identifies static-sensitive parts. Do not touch the areas near these symbols without first touching
a metal surface in an area away from the symbol.
Temperature information
Ambient operating temperature
10 to 30°C (50 to 86°F)
Shipping temperature
-10 to 40°C (14 to 104°F)
Storage temperature and relative humidity
-10 to 40°C (14 to 104°F)
15 to 85% RH
Laser notice
The printer is certified in the U.S. to conform to the requirements of DHHS 21 CFR, Chapter I, Subchapter J for
Class I (1) laser products, and elsewhere is certified as a Class I laser product conforming to the requirements
of IEC 60825-1: 2014.
Class I laser products are not considered to be hazardous. The printer contains internally a Class IIIb (3b) AlGaAs
laser that is nominally 25 milliwatts operating in the wavelength region of 770–800 or 775–800 nanometers
and enclosed in a non-serviceable printhead assembly. The laser system and printer are designed so there is
never any human access to laser radiation above a Class I level during normal operation, user maintenance, or
prescribed service conditions.
Notices
163
Содержание CS921
Страница 1: ...CS921 CS923 CS927 User s Guide August 2017 www lexmark com Machine type s 5059 Model s 130 530...
Страница 43: ...5 Insert the new toner cartridge 6 Remove the waste toner bottle Maintaining the printer 43...
Страница 48: ...8 Insert the waste toner bottle and then close the door Maintaining the printer 48...
Страница 71: ...Below the fuser area Duplex area Clearing jams 71...
Страница 76: ...2 Open door J 3 Open door H Clearing jams 76...
Страница 81: ...Staple jam in the staple nisher 1 Slide the staple nisher 2 Remove the staple cartridge holder Clearing jams 81...
Страница 83: ...Staple jam in the staple hole punch nisher 1 Open door H 2 Remove the staple cartridge holder Clearing jams 83...
Страница 126: ...5 Remove the controller board shield Upgrading and migrating 126...
Страница 134: ...7 Connect the tray connector to the printer 8 Open trays 2 and 3 Upgrading and migrating 134...
Страница 139: ...9 Remove the stabilizing feet from the tray Upgrading and migrating 139...
Страница 143: ...17 Secure the tray cable with the clamp Upgrading and migrating 143...
Страница 144: ...18 Connect the tray cable to the printer 19 Attach the tray cable cover Upgrading and migrating 144...
Страница 145: ...20 Slide the tray until it clicks into place 21 Attach the stabilizing feet to the printer Upgrading and migrating 145...
Страница 155: ...8 Attach the nisher to the printer Upgrading and migrating 155...
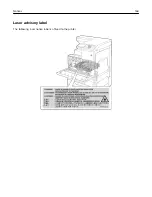
Страница 164: ...Laser advisory label The following laser notice label is affixed to the printer Notices 164...

