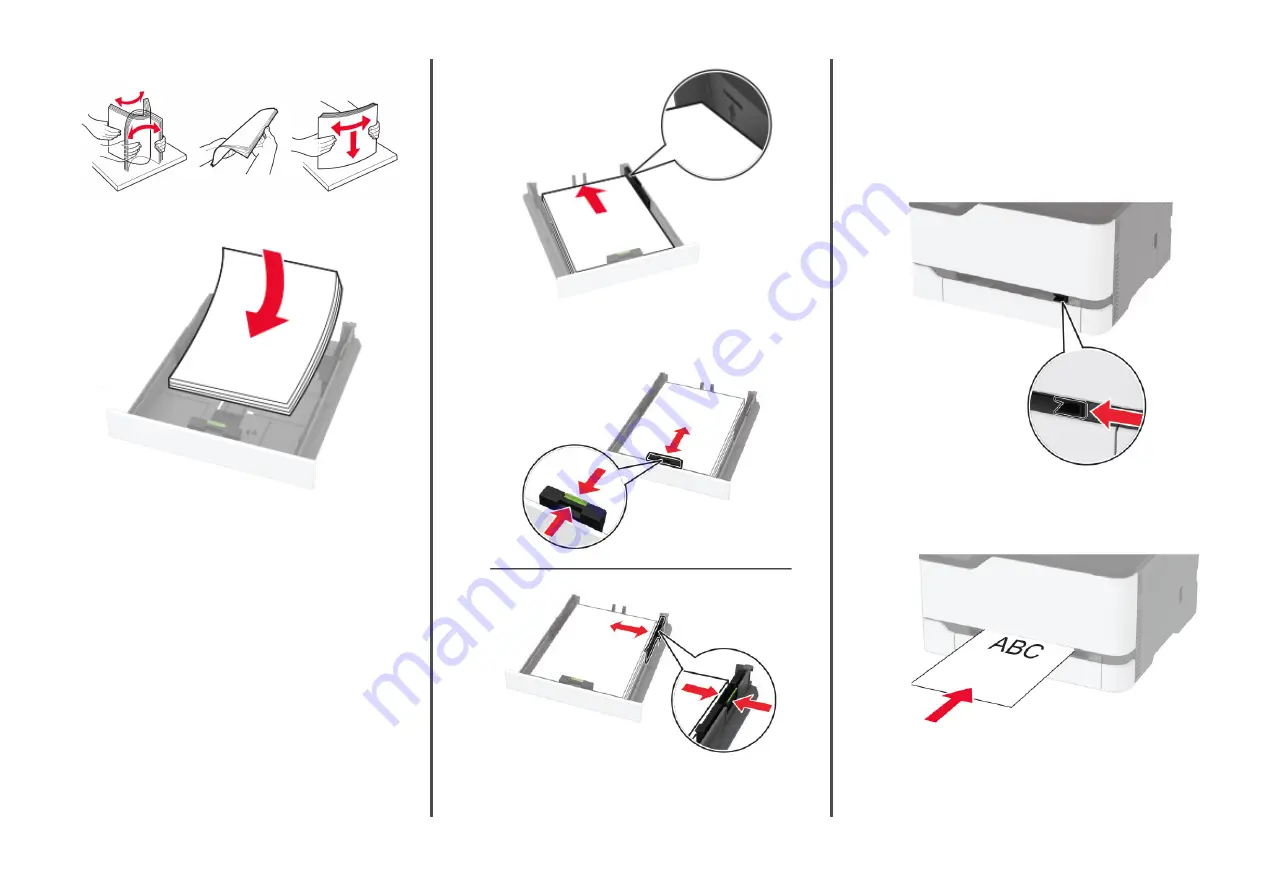
Lexmark 40N9050 Скачать руководство пользователя страница 5

2

Flex, fan, and align the paper edges before loading.

3

Load the paper stack with the printable side faceup.

Notes:

Load letterhead faceup with the header toward the back
of the tray for one

sided printing.

Load letterhead facedown with the header toward the
front of the tray for two

sided printing.

Do not slide paper into the tray.

To avoid paper jams, make sure that the stack height is
below the maximum paper fill indicator.

4

Adjust the guides to match the size of the paper that you are
loading.

5

Insert the tray.

If necessary, set the paper size and paper type from the control
panel to match the paper loaded.

Loading the manual feeder

1

Adjust the guide to match the size of the paper that you are
loading.

2

Load a sheet of paper with the printable side faceup.

Load letterhead with the printable side faceup and the top
edge entering the printer first for one

sided printing.


5

Содержание 40N9050

Страница 1: ...er and then click Properties Preferences Options or Setup 3 Click Fax Enable fax and then enter the recipient number 4 If necessary con gure other fax settings 5 Fax the document For Macintosh users 1...

Страница 2: ...ter wireless network on page 6 1 From your mobile device launch a compatible application or select a document from your le manager 2 Depending on your mobile device do one of the following Tap Print T...

Страница 3: ...ed print cartridge 4 Unpack the new print cartridge Warning Potential Damage Do not expose the underside of the print cartridge to direct light Extended exposure to light may cause print quality probl...

Страница 4: ...ing a damp soft lint free cloth wipe the following areas ADF glass ADF glass pad Scanner glass Scanner glass pad 3 Close the scanner cover Loading the tray 1 Remove the tray Note To avoid paper jams d...

Страница 5: ...paper jams make sure that the stack height is below the maximum paper ll indicator 4 Adjust the guides to match the size of the paper that you are loading 5 Insert the tray If necessary set the paper...

Страница 6: ...twork 1 Enable Wi Fi Direct in the printer From the home screen touch Settings Network Ports Wireless Enable Wi Fi Direct Notes The Wi Fi Direct SSID and password are generated automatically To view t...

Страница 7: ...CAUTION HOT SURFACE The inside of the printer might be hot To reduce the risk of injury from a hot component allow the surface to cool before touching it 5 Remove the jammed paper Note Make sure that...

Страница 8: ...ON HOT SURFACE The inside of the printer might be hot To reduce the risk of injury from a hot component allow the surface to cool before touching it 2 Remove the jammed paper from any of the following...

Страница 9: ...e door Paper jam in the automatic document feeder 1 Remove all original documents from the ADF tray 2 Open the ADF cover 3 Remove the jammed paper Note Make sure that all paper fragments are removed 4...

Отзывы: