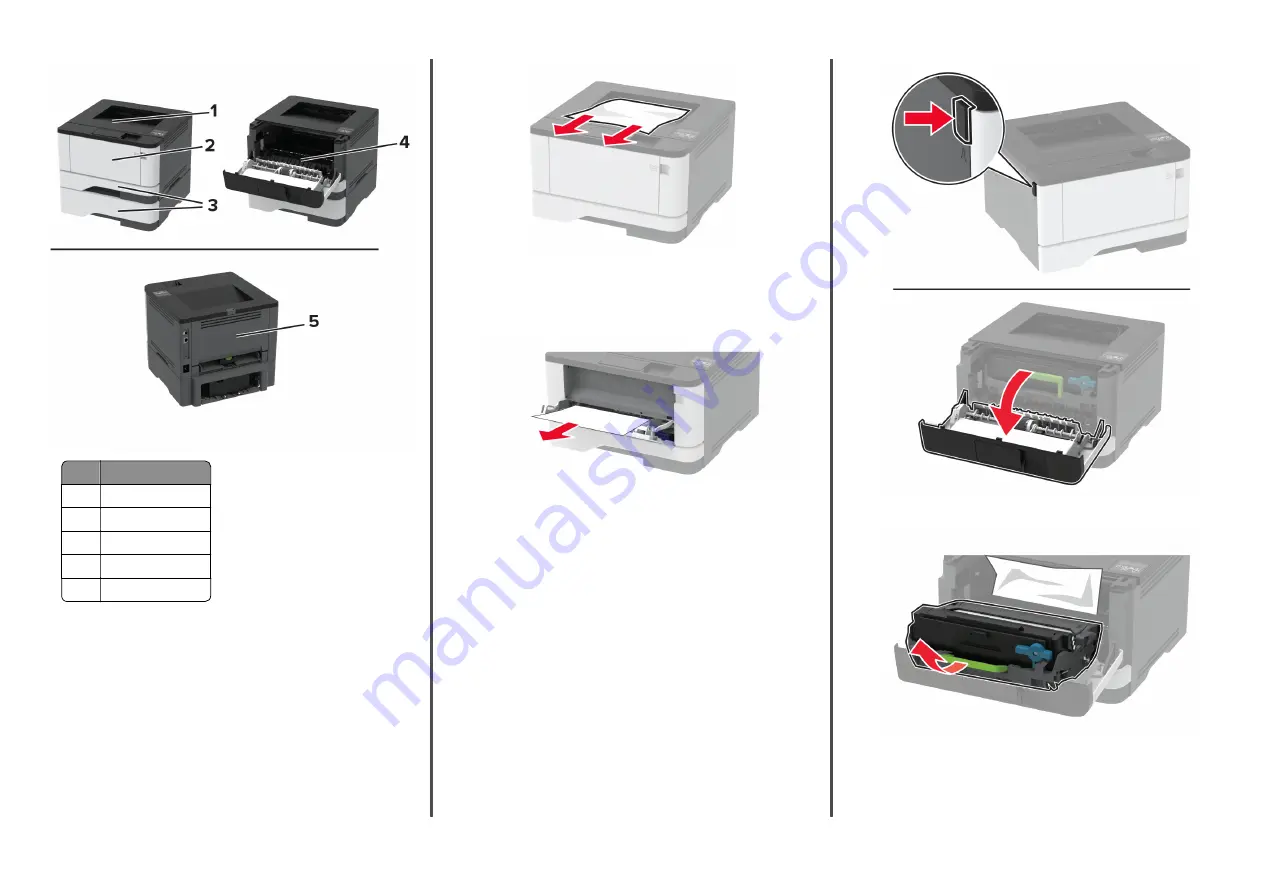
Jam locations
1
Standard bin
2
Multipurpose feeder
3
Trays
4
Duplex unit
5
Rear door
Paper jam in the standard bin
Remove the jammed paper.
Note:
Make sure that all paper fragments are removed.
Paper jam in the multipurpose feeder
1
Remove paper from the multipurpose feeder.
2
Remove the jammed paper.
Note:
Make sure that all paper fragments are removed.
3
Close the multipurpose feeder.
4
Open the front door.
Warning—Potential Damage:
To prevent damage from
electrostatic discharge, touch any exposed metal frame of
the printer before accessing or touching interior areas of the
printer.
5
Remove the imaging unit.
Warning—Potential Damage:
Do not expose the imaging
unit to direct light for more than 10 minutes. Extended
exposure to light may cause print quality problems.
6


