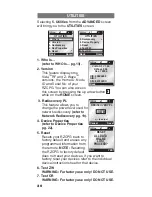
background image

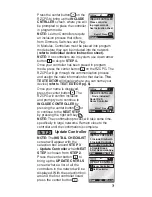
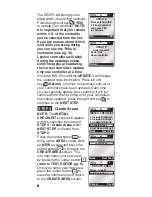
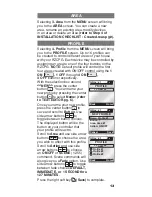
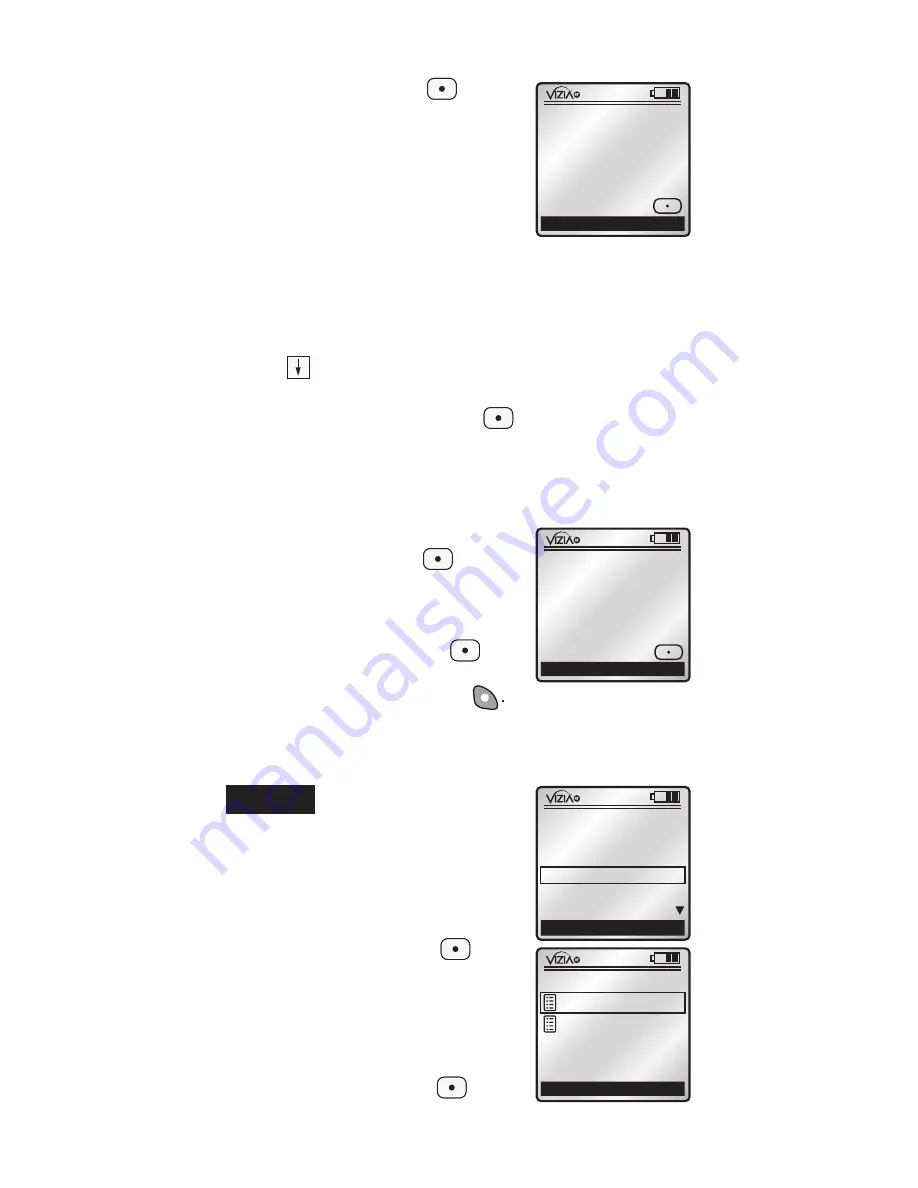
Press the center button       on the 

RZCPG to bring up the 

INCLUDE 

CNTRLLER

 screen, where you will 

be prompted to place the controller 

in program mode.

NOTE: 

Leviton Controllers require 

an inclusion process that differs 

from Dimmers, Switches and Plug-

In Modules. Controllers must be placed into program 

mode before they can be included into the network 

(refer to individual device instruction sheet). 

NOTE: 

If no controllers are in system, use down arrow 

button       to skip to 

STEP 4.

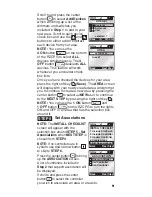
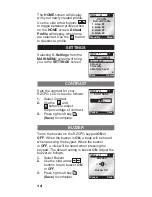
Once your controller has been placed in program 

mode, press the center button       on the RZCPG. The 

RZCPG will go through the communication process 

and assign the node information for that device. 

The 

TEXT EDITOR

 will display where you can name your 

device 

(refer to TEXT EDITOR pg. 6)

.

Once your name is displayed, 

press the center button      .The 

RZCPG will confirm inclusion 

and prompt you to continue to 

INCLUDE CONTROLLER

 by 

pressing the center button       or 

to continue to the 

NEXT STEP


by pressing the right soft key        

NOTE:

 The confirmation process will take some time, 

specifically in large networks. Remain close to the 

controller until the confirmation is complete.

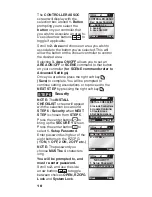
Update Controller

NOTE:

 The 

INSTALL CHECKLIST


screen will appear with the 

selection box around 

STEP 3 

- Update Controller

 when 

NEXT 

STEP

 is chosen from 

STEP 2

.

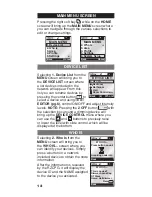
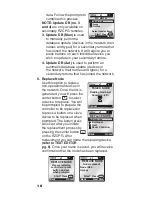
Press the center button        to 

bring up the 

UPDATE CNTRLS


screen where a list of all the 

controllers in the network will be 

displayed. With the selection box 

around the first controller listed 

press the center button       . 

7

x1

Return

INCLUDE CNTRLLER

Place controller
in program mode
See Instruction sheet

Begin? Press

x1

Back

Next Step

    Node included!
Node ID #3:
Room Controller

INCLUDE CNTRLLER

More? Press

STEP 3

x1

Back

INSTALL CHECKLIST

1. Include Dim/Swch
2. Include Controller
3. Update Controller
4. Create Areas
5. Set Associations

Next Step

x1

Back

(2)

Who Is

UPDATE CNTRLS

Room Controller
Hall Controller

1  

ON 

2  

ON 

3  

ON 

4  

ON 

OFF 

OFF 

OFF 

OFF 

x1 

12:00 PM 

Mon 05.01.200 6 

Default Pr ofil e 

Stand By

Menu

Содержание Programmer/Remote

Страница 1: ...Programmer Remote Cat RZCPG USER GUIDE Compatible with enabled products TM 1 ON 2 ON 3 ON 4 ON OFF OFF OFF OFF ...

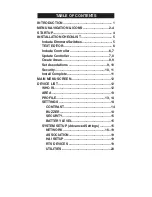
Страница 2: ...ate Controller 7 8 Create Areas 8 9 Set Associations 9 10 Security 10 11 Install Complete 11 MAIN Menu screen 12 device list 12 who is 12 area 13 profile 13 14 settings 14 CONTRAST 14 BUZZER 14 SECURITY 15 BATTERY LEVEL 15 sYSTEM SETUP Advanced Settings 15 NETWORK 16 19 ASSOCIATION 19 HAI SETUP 19 RTS DEVICES 19 UTILITIES 20 TABLE OF CONTENTS ...

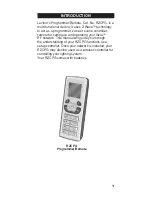
Страница 3: ...up and operating your ViziaTM RF network This manual will guide you through the understanding of your RZCPG functions as a setup controller Once your network is installed your RZCPG may also be used as a wireless controller for controlling your lighting system Your RZCPG comes with batteries INTRODUCTION 1 RZCPG Programmer Remote 1 ON 2 ON 3 ON 4 ON OFF OFF OFF OFF ...

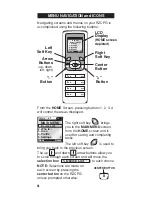
Страница 4: ...ressing the center button on the RZCPG unless prompted otherwise MENU NAVIGATION and ICONS Navigating screens and menus on your RZCPG is accomplished using the following buttons x1 Back MAIN MENU 1 Device List 2 Who Is 3 Area 5 Settings 4 Profile Home 1 ON 2 ON 3 ON 4 ON OFF OFF OFF OFF x1 Stand By RZCPG Default Profile 1 Area 1 2 Area 2 3 Area 3 4 Area 4 Menu LCD Display HOME screen depicted Righ...

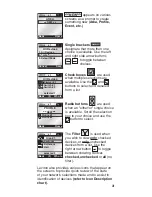
Страница 5: ...oggle between choices x1 Cancel Save All Devices 1 All Devices 2 ON 3 Default Fade x1 Cancel Save All Devices 1 All Devices 2 ON 3 Default Fade 1 ON 2 ON 3 ON OFF OFF OFF x1 12 00 PM M on 0 5 0 1 2 0 0 6 Default Pr ofil e Stand By Menu 1 ON 2 ON 3 ON OFF OFF OFF OFF x1 12 00 PM M on 0 5 0 1 2 0 0 6 Default Pr ofil e Stand By Menu Check boxes are used when multiple selections are available Use the ...

Страница 6: ...le choice radio button not chosen Single choice radio button chosen Multiple selection checkbox not selected Multiple selection checkbox selected ICON 4 STARTUP Upon initial power up of the RZCPG the VIZIATM RF logo will appear briefly You will then be prompted to START INSTALLATION CHECKLIST Press the right soft key YES to begin Installation Checklist Certified Z Wave Compliant by x1 NO INSTALL C...

Страница 7: ...ep is completed simply press the right soft key to select NEXT STEP and the RZCPG will bring you to the next screen Include Dimmers Switches Pressing the center button to select Include Dim Swch will bring you to the INCLUDE DIM SWCH screen and put the RZCPG into Inclusion Mode You will be prompted to press a button on your Dimmer Switch or Plug In Module These devices require a simple one step pr...

Страница 8: ...step by pressing the right soft key Include Controller NOTE The INSTALL CHECKLIST screen will appear with the selection box around STEP 2 Include Controller when NEXT STEP is chosen from STEP 1 x1 TEXT EDITOR Switch 2 Levito Save Press n Switch 2 Template TEXT EDITOR x1 Back Next Step Node included Node ID 2 Bedroom More Press INCLUDE DIM SWCH x1 TEXT EDITOR Switch 2 Leviton Bedroom Abc Save Press...

Страница 9: ...pressing the center button or to continue to the Next step by pressing the right soft key NOTE The confirmation process will take some time specifically in large networks Remain close to the controller until the confirmation is complete Update Controller NOTE The INSTALL CHECKLIST screen will appear with the selection box around STEP 3 Update Controller when NEXT STEP is chosen from STEP 2 Press t...

Страница 10: ...all of your controllers have been updated press the right soft key to continue to the NEXT STEP Create Areas NOTE The INSTALL CHECKLIST screen will appear with the selection box around STEP 4 Create Areas when NEXT STEP is chosen from STEP 2 Press the center button to bring up the AREA screen With NEW selected press the center button to bring up the CREATE AREA screen You can now name your new are...

Страница 11: ...ns NOTE The INSTALL CHECKLIST screen will appear with the selection box around STEP 5 Set Associations when NEXT STEP is chosen from STEP 4 NOTE If no controllers are in system use down arrow button to skip to STEP 6 Press the center button to bring up the ASSOCIATION screen A list of controllers included in Step 2 that support association will be displayed Scroll to and press the center button to...

Страница 12: ...bring up the SECURITY screen Press the center button to select 1 Setup Password Enter password using four of the eight buttons on the RZCPG 1 ON 1 OFF 2 ON 2 OFF etc NOTE The password you choose MUST be 4 characters long You will be prompted to and must re enter password Scroll to 2 and use the side arrow buttons to toggle between choices OPEN RZCPG Lock and System Lock STEP 6 10 x1 Back SECURITY ...

Страница 13: ...STALL CHECKLIST screen will appear with the selection box around STEP 7 Install Complete when you save your security selection Press the center button to receive your confirmation that the INSTALL CHECKLIST is now complete Press the center button again to start using the RZCPG The HOME screen of the RZCPG will be displayed 11 x1 INSTALL CHECKLIST Installation Checklist complete Press button to sta...

Страница 14: ... from the MENU screen will bring you to the WHO IS screen where you can identify your devices Simply press a button on a network included device to obtain the node information After the information is received by the RZCPG it will display the device ID and the NAME assigned to the device you activated MAIN MENU SCREEN x1 Back MAIN MENU 1 Device List 2 Who Is 3 Area 4 Profile 5 Settings Home x1 Bac...

Страница 15: ...ish to affect with this profile Scroll to Action and use side arrow buttons to choose an ON OFF or SCENE 1 255 command Scene commands will also give you a Fade option Use side arrow buttons to toggle between fade choices DEFAULT IMMEDIATE or 1 SECOND thru 127 MINUTES Press the right soft key Save to complete AREA PROFILE 1 ON OFF 4 ON OFF x1 Back PROFILE NEW Home x1 Cancel NEW PROFILE Name Profile...

Страница 16: ...r on the RZCPG keypad ON or OFF When the buzzer is ON a beep will be heard when pressing the keypad When the buzzer is OFF a click will be heard when pressing the keypad The default setting is buzzer ON Adjust the buzzer as follows 1 Select Buzzer 2 Use the side arrow buttons to turn buzzer ON or OFF 3 Press right soft key Save to complete x1 Cancel BUZZER Save Buzzer ON CONTRAST Sets the contrast...

Страница 17: ... Selecting 1 Install Checklist brings you to the Installation Checklist refer to pg 5 NOTE This feature is not available on secondary remotes Selecting 2 Advanced will prompt you to continue with Advanced Settings Pressing the right soft key YES will bring you to the ADVANCED screen NOTE If you are unsure about any of the following ADVANCED SETTINGS consult ViziaRF application guide or visit our w...

Страница 18: ...dating your network specifically if nodes have moved or the network environment has changed It will optimize the mesh network to ensure overall system routing integrity 4 Update Controllers refer to INSTALLATION CHECKLIST Update Controllers pg 8 5 Remove Failed Use this option to detect devices that are non operational and require removal from the network Once the list is generated you will press ...

Страница 19: ...can create new Areas and Profiles with your secondary remote If you wish to duplicate the secondary RZCPG remote with the primary RZCPG remote s application information use RZCPG Utilities 7 RZCPG Utilities This feature allows you to duplicate all necessary network data from a primary RZCPG remote into your secondary RZCPG remotes 1 Get Data is selected from the receiving RZCPG remote to retrieve ...

Страница 20: ...rated you will press the center button to select a device to replace You will be prompted to prepare the controller to be replaced or to press a button on a slave device to be replaced when prompted The button press will occur after you initiate the replacement process by pressing the center button on the RZCPG After replacement you can name the replacing device refer to TEXT EDITOR pg 6 Once your...

Страница 21: ... a particular device Name Node ID and Description when selected from the list 19 RTS DEVICES Selecting 4 RTS Devices from the ADVANCED screen will bring you to the RTS DEVICES screen This is a network optimization feature which can enhance performance and communication ability refer to ViziaRF application guide x1 Back RTS DEVICES 1 Set Routes 2 Set Hail 3 Update Routes Home HAI SETUP Selecting 3 ...

Страница 22: ...1 S N 007358DH 1 ON 2 ON 3 ON 4 ON OFF OFF OFF OFF x1 12 00 PM Mon 05 01 2006 Default Profile Stand By Menu 3 Rediscovery PL This feature allows you to change the power level used for network rediscovery refer to Network Rediscovery pg 19 4 Device Properties refer to Device Properties pg 22 5 Reset Resets your RZCPG back to factory default and erases any programmed information from the remote Note...

Страница 23: ...NOTES ...
Страница 24: ...ly or in an improper environment overloaded misused opened abused or altered in any manner or is not used under normal operating conditions or not in accordance with any labels or instructions There are no other or implied warranties of any kind including merchantability and fitness for a particular purpose but if any implied warranty is required by the applicable jurisdiction the duration of any ...

Страница 25: ...UCTION SHEET MANUAL SPECIFICATIONS SPECIFICATIONS LG 12 19 06 Helvetica DI 104 RZCPG 20A X1 Black N A Final fold size Final fold size 40 lb offset Overall size Overall size 5 75 x 6 Printer Spread 5 75 x 3 booklet saddle stitch Paper size Paper size Saddle Stitch OVERALL SIZE 6 2 3 5 75 3 Booklet 5 75 FINAL SIZE Cat No 1 ...

Отзывы: