


5
Discovery Report WA10 Weather Station
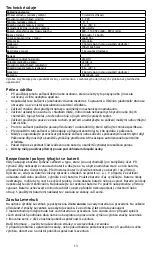
The kit includes:
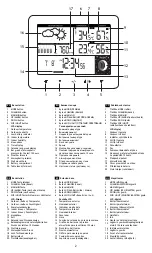
base station, sensor, user manual, and warranty.
Also required (not included):
2 AAA batteries for the sensor; 3 AAA batteries for the base station.
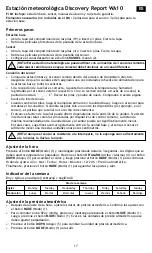
Getting started
Base station
•
Open the battery compartment cover (19) and insert 3 batteries. Close the cover.
•
Remove the protective films from the display of the base station.
Sensor
•
Open the battery compartment cover (3) and insert 2 batteries. Close the cover.
•
Remove the protective films from the sensor display.
•
Set the desired channel with the
CHANNEL
button (2).
Sensor connection
•
Place the base station and the remote sensor within the effective transmission range. Ensure
that the channels are assigned after you set up the power supply for the base station and all the
sensors.
•
If the reception is successful, the display will show the temperature and humidity of the
respective outdoor sensor. If the values are not received from a channel, "– – _ – –°C" appears on
the display. Сheck the batteries and try it again. Check if there is any source of interference.
•
When changing batteries, replace the batteries first in the base unit, and then in all the sensors,
to re-establish the connection. If you change the batteries only in one of the devices (for
example, in the sensor), the signal may not be received correctly.
•
The effective range may differ depending on the unit’s position. Due to interference (various
remote control devices, etc.), the maximum distance between the base unit and the sensor
may be significantly reduced. In such cases, we suggest moving the base unit and sensor a little.
Sometimes it is enough to move one of these units a few inches!
Time setting
Press the
MODE
button (1) and hold it for 3 seconds. The digits that are to be set are flashing. Press
the
UP/ALARM
button (4) or the
DOWN
button (5) to change the value, and then press the
MODE
button (1) to continue.
The setting order: Year > Month > Date > Hours > Minutes > 12/24h > Atmospheric pressure.
Finally, press the
MODE
button (1) button to save the settings and exit.
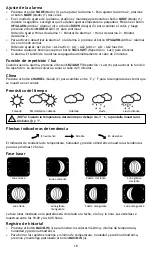
Atmospheric pressure setting
•
After the time setting, enter the atmospheric pressure data. Confirm the settings with the
MODE
button (1).
•
To switch between hPa and mmHg, press and hold the
MODE
button (1). Then, press the
MODE
button (1) 6 times, the air pressure units that are to be set are flashing.
•
Press the
DOWN
button (5) to change the air pressure unit.
•
Press the
MODE
button (1) for exit.
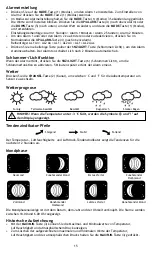
Alarm setting
•
Press the
MODE
button (1) to set the Alarm 1. For setting the Alarm 2 press the
MODE
button (1)
2 times.
•
In the alarm setting mode press and hold the
MODE
button (1) for 3 seconds. The digits that are
to be set are flashing. Press the
UP/ALARM
button (4) or
DOWN
button (5) to change the value,
and then press the
MODE
button (1) to continue.
The setting order: Alarm 1 hours > Alarm 1 minutes > Alarm 2 hours > Alarm 2 minutes.
•
To activate or deactivate the Alarm 1 and/or Alarm 2, press the
UP/ALARM
button (4) in normal
mode.
The order: AL1 On > AL2 On > AL1 + AL2 On > AL1 + AL2 Off.
•
Press any button (except the
SNZ/LIGHT
button) to silence the alarm. The alarm sound will
automatically turn off after 2 minutes.
EN
NOTE! This weather station can be operated with up to 3 remote sensors. Each remote
sensor that is to be connected must be operated on a different channel.
NOTE! Although the sensor is weather resistant, never place it in direct sunlight or
in the rain or snow.


