


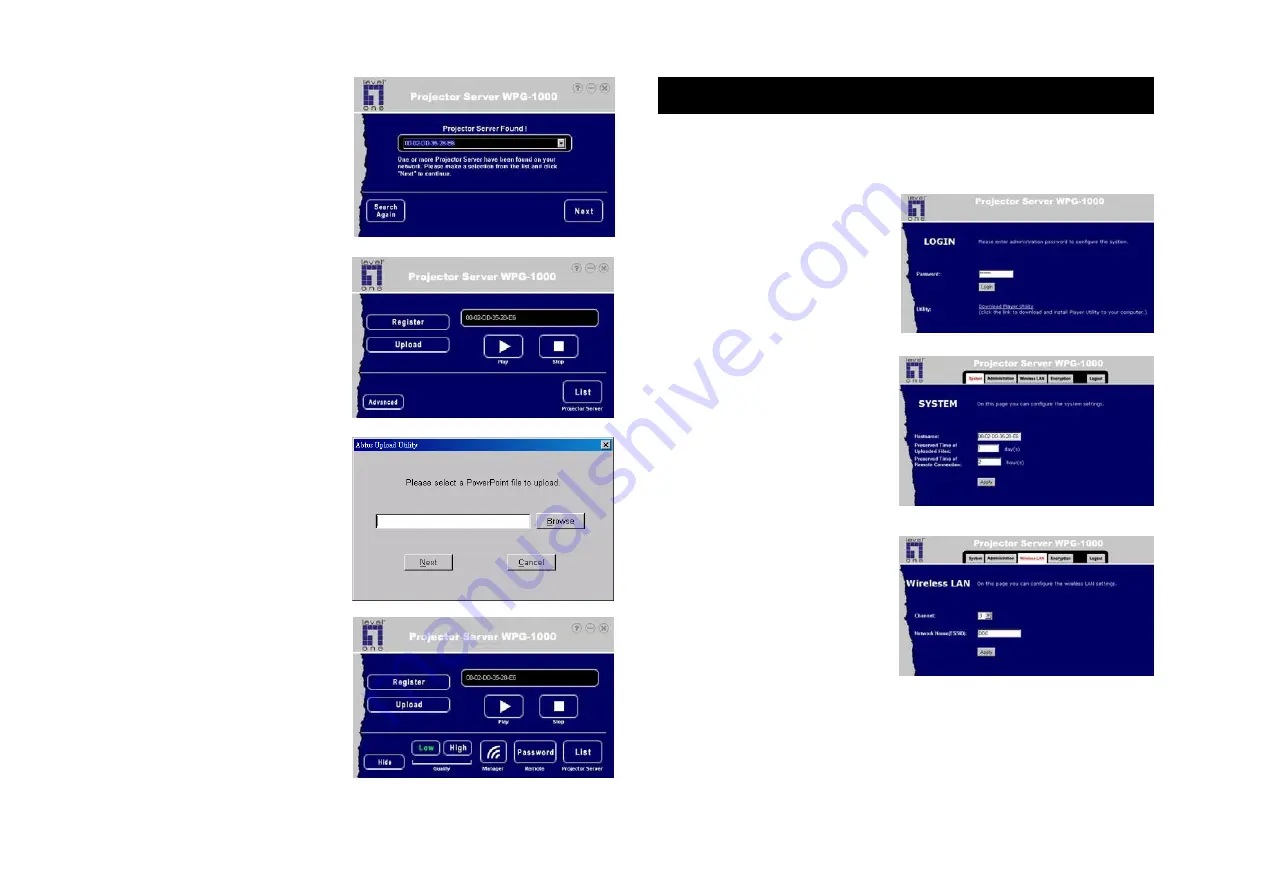
4. After the search, the List
Panel will appear (Fig. 13).
5. Click on the drop down
button at the right side of
the entry box to see the list
of all Projector Servers
found.
6. Highlight one of the
available Projector Server
(if there are multiple
Projector Servers around)
and select it to use.
7. Click
Next
to enter the
Player Panel (Fig. 14).
E) Advanced Configuration
The administration utility allows you to change the name,
password, wireless security and other settings of the Projector
Server from a computer with a web browser.
z
Click
Play
will start
sending the computer's
screen to the projection
image.
z
Click
Stop
to stop sending
screen updates to the
projector.
z
Click
Upload
to upload
PowerPoint files to the
Projector Server. A file
selection dialog box will
appear (Fig. 15).
z
Click
Browse
to select a
PowerPoint file to upload.
After selection, click
Next
to continue.
8. Click
Advanced
from the
Player Panel (Fig. 14) to
open the Advanced
panel (Fig. 16) with more
options.
1. Click the
Manager
button
in the Advanced Panel
(Fig. 16).
2. The Administration Utility
will start in your web
browser (Fig. 17). Enter
the administrator
password (default is
"654321
") and click on the
Login
button to login.
3. Click the
System
tab and
enter the "Hostname” -
the name to identify this
Projector Server (Fig. 18).
After entry, click
Apply
to
confirm the entry.
pg 6
pg 5
4. Click the
Wireless LAN
tab
to select channel and
network name (Fig. 19).
After entry, click
Apply
to
confirm.
Channel
- Select a wireless
channel to use from the list.
Network Name (ESSID)
- The Network Name is for other
wireless devices to identify and join the Projector Server. If
there is other Projector Server nearby, you should set a unique
name for each Projector Server.
Fig. 18
Fig. 17
Fig. 16
Fig. 15
Fig. 14
Fig. 13
Fig. 19


