


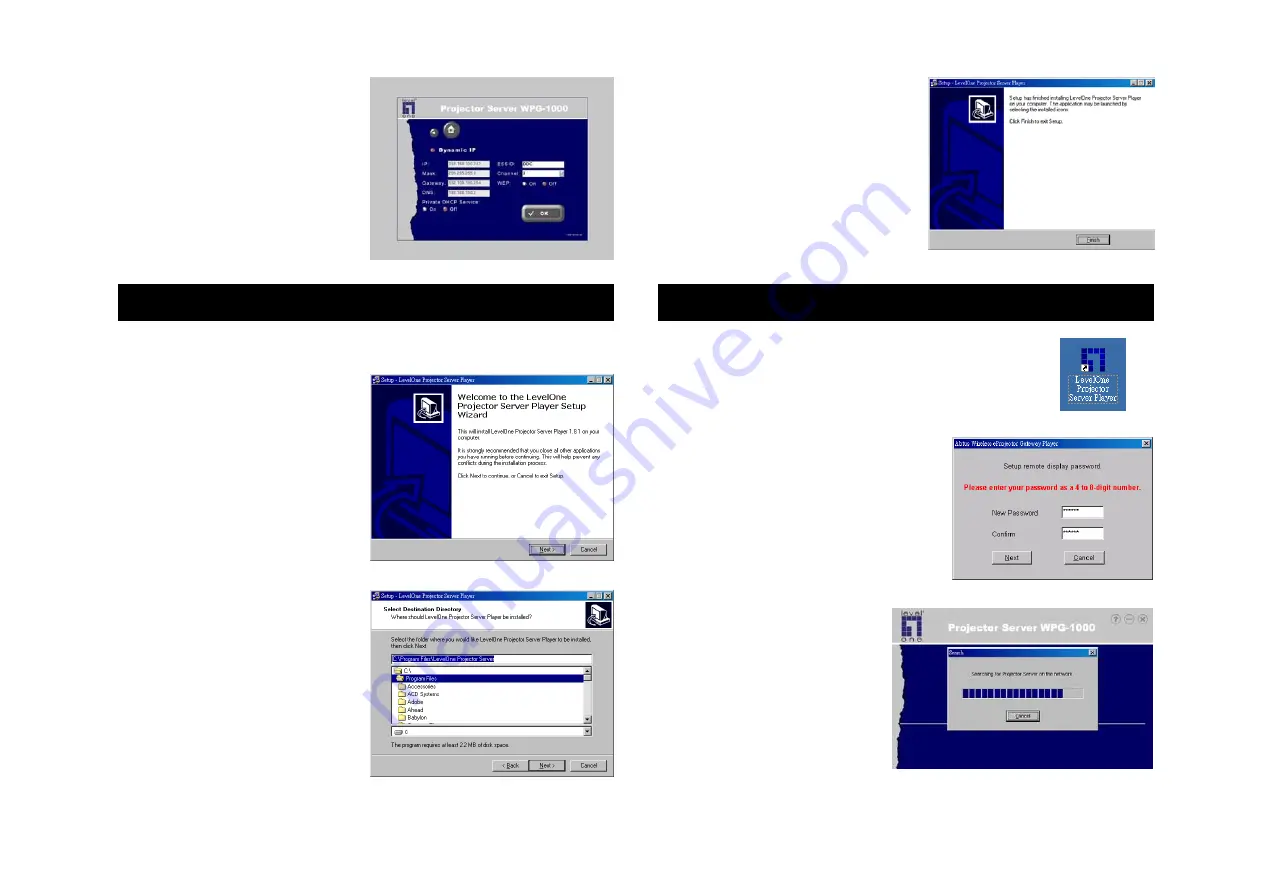
3. The IP setting window
appear as Fig. 6. Change the
IP
settings to valid values for
your Local Area Network
(LAN).
4. Change the wireless settings
(ESSID, Channel, WEP
) if
necessary. Use a different
name and channel from
nearby Access Points.
C) Install the Player Utility
You need the Player Utility installed on your computer in order to
use the Wireless Projector Server.
1. Load the utilities CD-ROM in
your computer.
2. The setup utility will start
with the welcome screen
(Fig. 7), click the
Next
button
to continue.
3. The setup utility will choose
a default folder to install the
utility files (Fig. 8). Click
Browse if you want to
choose a different folder.
Click
Next
to continue.
4. When install under Windows
XP
®
environment, the system
may prompt to ask if
installation shall continue,
simply click
Continue
Anyway.
2. The first time when the Player
utility starts, it will ask you to set
a password (Fig. 11). Enter the
password and click
Next
to
continue. You can change the
password afterward in the
Advanced Panel (Fig. 16).
1. Double click on the program icon of the
“LevelOne Projector Server Player“ (Fig.
10) on your computer’s desktop.
5. The Projector Server Player
utility is now installed.
Select
Yes
to launch the
player after the installation.
Click the
Finish
button (Fig.
9). An Projector Server
Player icon will show on
your desktop.
D) Use the Projector Server Utility
pg 4
pg 3
3. The player utility will
start searching for the
Projector Server on your
local area network (Fig.
12).
Fig. 12
Fig. 11
Fig. 10
Fig. 9
Fig. 8
Fig. 7
Fig. 6


