background image

3-14

Front Panel Display Management

Port
Number

Frame

Indicates

Dimly on

Off

Port enable, link down

On

Off

Port available, link up

Flashing

Off

Link up, transmitting/receiving data

On

On

Disabled by administrator

On

Blinking

Partitioned

Table 3.6

Port Indicators

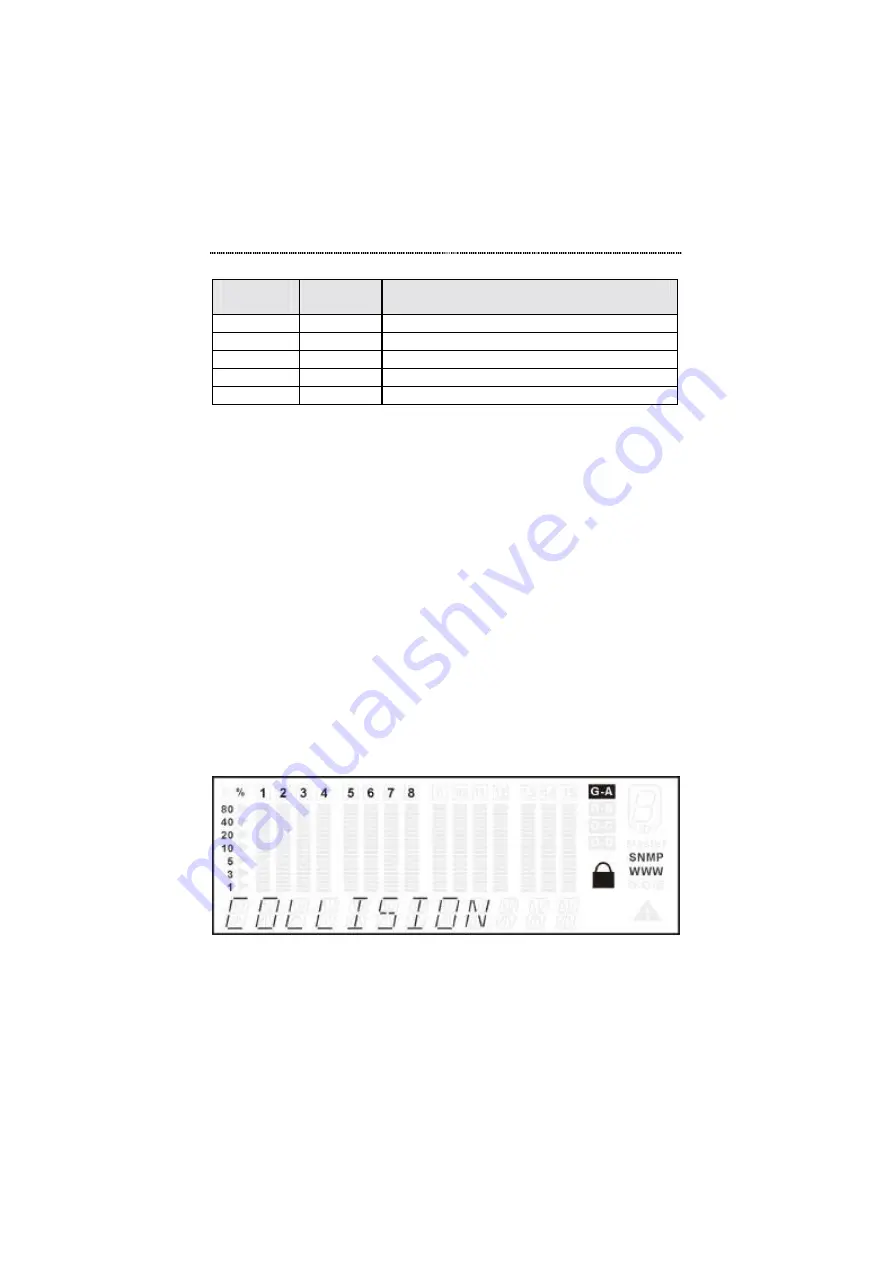
Collision

When COLLISION is the menu item in the Message Zone, the Port Number 
will be illuminated for each port that is connected and the bar gauges 
continuously move up or down indicating the percentage of Collision for 
these ports. A collision occurs when a port, in half-duplex mode, attempts to 
send and receive packets at the same time. The Collision percent can be 
calculated with the following formula.

Collision Ratio = (number of packets collided / number of packets 
transmitted) * 100.

Press

Next

 in the MAIN MENU to select COLLISION.

Figure 3.9 Collision Menu

Содержание GSW-0800TXM

Страница 1: ...LevelOne GSW 0800TXM Expandable 10 100 1000 Mbps Managed Switch User s Manual...

Страница 2: ...n accordance with the user s manual may cause interference in which case the user will be required to correct the interference at his own expense CE Mark Warning This is a Class A product In a domesti...

Страница 3: ...ick Configuration 2 4 Front Panel Display Configuration 2 5 Console Management Configuration 2 7 Console Screens 2 8 Connecting Network Devices 2 10 Connecting Fast Ethernet Hubs 2 10 Connecting Works...

Страница 4: ...sole Lock 3 31 Lock the Console 3 31 Unlock the Console 3 32 Network Configuration 3 33 Network Configuration Options 3 33 Configuringthe Parameters 3 33 IP Address 3 34 Subnet Mask 3 35 Default Gatew...

Страница 5: ...l 5 16 Switch Configuration 5 17 Switch Port Configuration 5 18 Switch Port Configuration Overview Menu 5 18 Switch Port Configuration Menu 5 20 Permanent Address Configuration 5 21 Permanent Address...

Страница 6: ...Menu Tree B 1 Glossary C 1 Index D 1...

Страница 7: ...is chapter you will be introduced to the LevelOne GSW 0800TXM 8Port 10 100Mbps SNMP Switch You will find information about the physical characteristics of the Switch and an introduction to its feature...

Страница 8: ...e Front Panel Display console management or the Network Management Interface Users can monitor utilization collision ratio statistic counters port status and configure the switch Figure 1 1 LevelOne G...

Страница 9: ...prevents unauthorized access Non blocking architecture Self diagnostics 128K per port RAM buffer 4 8Giga bps system wide bandwidth Web based management Optional Modules MDU 2101SX 1 port Gigabit modu...

Страница 10: ...2 The MDU 2101SX The MDU 2101SX uses gigabit technology to provide you with 1000 Mbps backbone connections The module features a single MMF SC connector MDU 2801TX Figure 1 3 MDU 2801TX The dual spee...

Страница 11: ...th 8 100BASE FX Fast Ethernet switch ports This module is excellent for connecting downstream switch hubs All ports use SC fiber connectors MDU 2401FXC Figure 1 5 MDU 2401FXC The MDU 2401FXC provides...

Страница 12: ...ont Panel Display includes a high definition display and the Panel Keys that enable users to easily monitor and configure the system The Front Panel Display provides diagnostic functions that include...

Страница 13: ...Introduction 1 7 or individually and monitor all switch settings Rear Panel Layout The AC power socket is located on the rear panel Figure 1 8 Rear Panel...

Страница 14: ...Chapter 2 This chapter will provide you with detailed information on how to rack mount the Switch quickly set the Switch up and offer some connectivity suggestions Installation...

Страница 15: ...standard EIA 19 inch racks Align the mounting brackets on the sides of the unit with the slit over the holes Secure the screws tightly to affix the brackets to the device Then place the device into th...

Страница 16: ...ing steps Note Modules are not hot swapable You must remove power from the switch before installing or replacing a module 1 Remove the power from the Switch by disconnecting the power cable from the A...

Страница 17: ...rameters must be set in order to configure the Switch into your network The parameters include the IP address subnet mask and default gateway These parameters can be configured via the Front Panel Dis...

Страница 18: ...ms Next Scroll forward through menu items Enter Enter selected menu item Digit Input Prev Scroll through digits 0 9 Next Select current digit and move to next digit Enter Enter selected string of digi...

Страница 19: ...see the PASSED message Configure 1 Enter NETWORK CONF menu 2 Enter IP ADDRESS menu 3 Input IP address digits and press Enter 4 Repeat steps 2 and 3 for SUBNET MASK and DEF GATEWAY Restart 1 Enter NET...

Страница 20: ...ter selecting a menu item with the Tab key to view the selection s sub menu Esc Key Return to the previous menu HELP Select HELP at the bottom of the console screens to view keyboard commands Console...

Страница 21: ...n Console Screens In the Login Screen you must enter a User Name and Password The factory default User name is admin and the Password and empty string i e you do not need to enter a Password Figure 2...

Страница 22: ...shown below This screen allows you to set basic Switch configurations Figure 2 6 POST Download Screen After the settings are configured you must restart the Switch Select REBOOT in the lower right han...

Страница 23: ...nnecting Network Devices This section provides you with some connectivity options Connecting Fast Ethernet Hubs The example on page 2 11 shows how 10 100 Mbps hubs can be connected to the Switch to fo...

Страница 24: ...Installation 2 11 Figure 2 7 Connecting Fast Ethernet Hubs...

Страница 25: ...2 12 Installation Connecting Workstations This example shows the Switch directly connected to workstations Figure 2 8 Connecting Workstations...

Страница 26: ...Installation 2 13 Connecting Fiber Ports This example shows how the fiber modules can be used for long distance connections Figure 2 9 Connecting Fiber Ports...

Страница 27: ...2 14 Installation Connecting Gigabit Devices This example shows how the Gigabit module can be used as a backbone connection Figure 2 10 A Gigabit Backbone Connection...

Страница 28: ...s chapter will provide you with complete information about the Front Panel Display We will start with an overview of the interface then take you through all of the menus and settings Front Panel Displ...

Страница 29: ...ger tip and allows you to observe real time traffic and collision levels at a glance Understanding the functions of the Front Panel Display will easily enable the user to utilize the full power of the...

Страница 30: ...cator Indicates a device malfunction G A Indicates current port icons represent ports in port group A G B Indicates current port icons represent ports in port group B G C Indicates current port icons...

Страница 31: ...r key For a detailed listing of the main menu items and all of their sub menus please see the section titled Menu Tree on page 3 9 or Appendix B Menu Tree UTILIZATION G A G B G C COLLISION G A G B G C...

Страница 32: ...onal modules you install there can be up to three port group indicators available G A port group A G B port group B and G C port group C The desired group can be selected in the Select Group main menu...

Страница 33: ...e ports of the module installed in the lower module slot become port group B For example when the port group B icon is illuminated the Front Panel Display port indicators represent the corresponding p...

Страница 34: ...ctioning properly link down not connected but available Tx Rx enabled or disabled The Port Indicators show the ports that are linked up by intensifying the light for the ports that are available The e...

Страница 35: ...an EEPROM TEST and a PCI TEST This process is known as the Power On Self Test or the POST When the POST is complete the UTILIZATION mode will be displayed To display other main menu items press the N...

Страница 36: ...in menu item is displayed in the Message Zone Press the Next or Prevkey to cycle through all the items in each menu level and press Enter to move to the next menu level or make a selection Note that t...

Страница 37: ...AIN MENU RX FRAMES RX OCTETS RX ALIGN ERR RX PKT ERR OVERSIZE RX TX FRAMES TX OCTETS PACKET LOSS BACK PORT 1 Through PORT X MAIN MENU STATISTICS MAIN MENU 10M PORTS 100M PORTS 1000M PORTS HALF DUPLEX...

Страница 38: ...AIN MENU ENABLED DISABLED BACK LOOP DETECT MAIN MENU ENABLED DISABLED BACK CONSOLE LOCK MAIN MENU IP ADDRESS SUBNET MASK DEF GATEWAY BACK NETWORK CONF MAIN MENU SET PASSWORD SYS RESTART SYS DEFAULT UN...

Страница 39: ...enabled ports of this port group is indicated by the bar gauges moving up and down as the traffic load varies The reference for the level of utilization is based on the speed of the port that is runni...

Страница 40: ...the Front Panel Display indicate the port group that you select to view Figure 3 7 and Figure 3 8 illustrate the utilization of port group A and port group B respectively Figure 3 8 Utilization for Gr...

Страница 41: ...Message Zone the Port Number will be illuminated for each port that is connected and the bar gauges continuously move up or down indicating the percentage of Collision for these ports A collision occ...

Страница 42: ...there is only one group group A The SELECT GRP menu as shown in Figure 3 10 allows users to select the port group A B or C for monitoring the statistics counters and port status and for configuring t...

Страница 43: ...ake a selection as shown in Figure 3 12 Figure 3 12 Select Port Group B Statistics The STATISTICS menu displays the statistic counters of ports It may be helpful to look at the counters to isolate net...

Страница 44: ...users to select a port in the current port group for monitoring statistics counters In the port selection menu the selected port is indicated by a lighted bar gauge under the port number and the port...

Страница 45: ...election The counter selection menu will then be displayed as shown in Figure 3 16 Figure 3 16 Counter Selection Menu Press Prevand Next to scroll back and forth through the statistics counter options...

Страница 46: ...Front Panel Display Management 3 19 Figure 3 17 Readable Frames Counter Statistics Counters The available statistics counters are listed in Table 3 7...

Страница 47: ...ell formed TX FRAMES Displays the number of packets transmitted successfully TX OCTETS To display the count of data and padding octets of frames that were successfully transmitted for the selected por...

Страница 48: ...en running in the desired mode Press Next in the MAIN MENU to select the PORT STATUS menu as shown in Figure 3 18 Figure 3 18 Port Status Menu Press Enter to go to the port selection menu The port sel...

Страница 49: ...All Ports Status Press Next to select ALL PORTS in the port selection menu as shown in Figure 3 19 Figure 3 19 Selecting All Ports Press Enter to view the status for all ports as shown in the example...

Страница 50: ...ion menu as shown in Figure 3 21 Figure 3 21 Selecting Port 7 Press Enter to view the status for the port as shown in the example in Figure 3 22 The six level bar indicates the port number you select...

Страница 51: ...rtner does not support auto negotiation the Switch may be left in AUTO NEGO mode In this situation the Switch will still be able to detect the correct speed but will default to half duplex mode It is...

Страница 52: ...in the EEPROM Port Setting Options Users may perform the following port settings 10BASE T 100BASE X 1000BASE SX AUTO NEGO HALF DUPLEX FULL DUPLEX ENABLED DISABLED Configuring Port Settings The followi...

Страница 53: ...will briefly see the SYS LOCKED message then the password request Figure 3 24 Password Verification Press Prevonce to select the first digit Press Next to select next asterisk Press Prevto select the...

Страница 54: ...example in Figure 3 26 Figure 3 26 Configuring a Port Before Setting Press Prevor Next to scroll through the setting options Press Enter once the desired setting is found to apply the configuration t...

Страница 55: ...ure 3 28 allows users to configure the switch as a whole Press Prevor Next in the MAIN MENU to select UNIT CONFIG Figure 3 28 Unit Configuration Main Menu To configure the switch user authentication i...

Страница 56: ...Authentication To enter the Unit Configuration menu user authentication is required when the system is locked The user will be prompted to enter the password The password is composed of four numeric...

Страница 57: ...onfiguration Please see the section titled Device Control in Chapter 5 Console Management A message will also be sent to the same menu in the Web Management interface A switching device can not sustai...

Страница 58: ...Lock Menu The Console Lock prevents unauthorized persons from making configuration settings to the Switch Once the console is locked a password is required to enter the PORT SETTING or UNIT CONFIG me...

Страница 59: ...the Front Panel Display as shown in Figure 3 32 Figure 3 32 Set Console Lock after setting Press Next to select BACK or MAIN MENU Unlock the Console Press Prevor Next to select DISABLE in the CONSOLE...

Страница 60: ...twork Figure 3 33 Network Configuration Menu Network Configuration Options Users may perform the following Network Configuration options IP ADDRESS SUBNET MASK DEFAULT GATEWAY Configuring the Paramete...

Страница 61: ...ow see the IP ADDRESS menu as shown in Figure 3 35 The current IP address will be displayed Figure 3 35 Setting the IP Address Press Prevto select the first desired digit Press Next to select next dig...

Страница 62: ...s Please refer to IP Address on page 3 34 for guidance on setting the Subnet Mask Default Gateway Setting the Default Gateway involves the same process as setting the IP address Please refer to IP Add...

Страница 63: ...o select next asterisk Press Prevto select the next digit Repeat to enter the new password Press Enter You will briefly see the OK message The new Front Panel Display password will take effect immedia...

Страница 64: ...e Switch is rebooting System Default The system default menu shown in Figure 3 38 allows users to reset the device to the original factory configuration Press Prevor Next in UNIT CONFIG to select SYS...

Страница 65: ...o view system information Press Prevor Next in the MAIN MENU to select SYSTEM INFO Figure 3 39 System Information Menu Press Enter to view system information The following system information is automa...

Страница 66: ...Chapter 4 In this chapter you will learn how to configure your Switch for management through the terminal emulation program Setting Up for Console Management...

Страница 67: ...ese parameters can be configured via the Front Panel Display or the Console program which is accessed through a PC terminal emulation program that supports VT100 The Switch can be managed through the...

Страница 68: ...e Setting Up the Terminal Program A Terminal Program is required to communicate with The Switch s internal software An MSDOS based program such as PC PLUS can make the connection with the device s bui...

Страница 69: ...t menu Click START then Programs Accessories and then HyperTerminal Figure 4 2 Terminal Program An MS DOS type terminal program can also make the connection with the Switch s built in software However...

Страница 70: ...onal and click OK Figure 4 4 New Connection Screen The following screen prompts for your country info area code telephone number and the modem type Since you won t be dialing out via a modem you only...

Страница 71: ...l settings must be set correctly Bits sec 9600 Data bits 8 Parity None Stop bits 1 and Flow Control None as in the figure below Figure 4 6 Port Settings Click the OK button and the connection to the t...

Страница 72: ...Display s display on the Switch After the tests are complete the Console program s logon screen appears Note that in some cases an additional menu will appear before the Login Screen See POST Downloa...

Страница 73: ...ENTER KEY Press the ENTER key after selecting a menu item with the TAB key to view the selection s sub menu EXIT Return to the previous menu HELP Select HELP to view keyboard commands Note that if you...

Страница 74: ...int press Enter a few times and the Login Screen will appear Figure 4 9 The Login Screen User Name and Password The factory default user name is admin The factory default password is an empty string i...

Страница 75: ...will not be granted Main Menu After passing through the login security screen the Main Menu for console management is displayed as shown in Figure 4 10 Figure 4 10 Main Menu There are 5 sub menu selec...

Страница 76: ...no valid system firmware in the Switch s flash memory When a TFTP download operation fails When the user presses Ctrl C during the Power On Self Test Note that pressing Ctrl C during the Power On Sel...

Страница 77: ...download for the Switch place an X in the check box and enter the path for the file in this field System Software Web Pages Database Download If you want to request a system software and web page data...

Страница 78: ...ing Up for Console Management 4 13 SAVESaves changes to this screen without exiting REBOOTReboots the switch thus configuring all Network Configuration changes and executes all selected software downl...

Страница 79: ...Chapter 5 This chapter will provide you with complete information on using the powerful console management interface Console Management...

Страница 80: ...it can then be monitored and configured with the either Console Management Web Based management using a web browser SNMP using programs such as HP OpenView or any combination of these three Using a T...

Страница 81: ...key to view the selection s sub menu EXIT Return to the previous menu HELP Select HELP to view keyboard commands Getting Started To start using console management login through a terminal program If y...

Страница 82: ...s an empty string i e you do not need to enter anything into the Password field After entering the user name and pressing Enter in the password field the main menu will appear Note that if you enter t...

Страница 83: ...consists of five sub menus grouping different system configuration topics Figure 5 2 Main Menu Help Menu Selecting HELP at the bottom of the menu screens and pressing Enter accesses the Help Menu The...

Страница 84: ...5 6 Console Management Figure 5 3 Help Menu System Information The Main Menu item System Information is shown in Figure 5 4...

Страница 85: ...ttings can be edited and saved to memory by users that login with Read Write privileges System Information System Contact Up to 64 alpha numeric characters System Name Up to 64 alpha numeric character...

Страница 86: ...item Management Setup has several sub menus The Management Setup Menu is shown in Figure 5 5 Figure 5 5 Management Setup Menu The Management Setup Menu has 5 sub menus for Network configuration and f...

Страница 87: ...munity Setup Configure community names and access Trap Receiver Configure addresses to which trap messages will be sent Management Capability Setup Enable or Disable Web management Trap Filter Setup C...

Страница 88: ...ss identifying the switch consisting of four numbers from 0 to 255 separated by periods Subnet Mask This number together with the IP address identifies the network your computer is on Default Gateway...

Страница 89: ...nu displays the settings that are required for the terminal connection that allows the Switch to communicate with a computer via the console port connected by an RS 232 cable to a computer s serial po...

Страница 90: ...nt Up to six community names can be configured with access and status rights SNMP Community Setup Index 1 6 SNMP Community Name A name of up to 16 characters Access Rights Read Write or Read Only Stat...

Страница 91: ...will be sent to all entries that have an Active status Entering their names setting their IP addresses and enabling their Status configures the trap receivers Trap Receiver Menu Index 1 6 Community N...

Страница 92: ...press the Enter key Management Capability Setup The Management Setup Menu item Management Capability Setup is shown in Figure 5 10 Figure 5 10 Management Capability Setup Menu The Management Capabilit...

Страница 93: ...ter Setup Menu The Trap Filter Setup Menu allows you to control which traps are sent To have a trap message sent when a trap event occurs place an X before the function listed To prevent a trap messag...

Страница 94: ...5 12 Figure 5 12 Device Control Menu The Device Control Menu is used to view and or configure the Switch and it s ports The switch s ports can be configured without regard to any actual link ups manag...

Страница 95: ...address entry Spanning Tree Protocol Configuration Configure the Spanning Tree Protocol parameters and view STP status Spanning Tree Protocol Port Configuration Naming and configuring individual ports...

Страница 96: ...Unicast Address Capability The maximum number of static unicast addresses that the Switch can store STP Enable State Enables or disables Spanning Tree Protocol for the Switch Dynamic Entry Aging Time...

Страница 97: ...p Port ID The port for which data in that row applies Operational Status The operational status of the port Link Status Presents the current link state of the connection Link Status is accurate even i...

Страница 98: ...lected port The left side of the screen displays the current port configuration The fields on the right side allow you to configure new settings for the port The bottom of the screen states the capabi...

Страница 99: ...of the port Line Speed The line speed of the port Admin State Enables or disables the current port If Disable is selected the port will be partitioned and the amber frame enclosing the port number on...

Страница 100: ...View The Permanent Address Configuration Menu displays current information on all permanent addresses currently stored in the Switch To edit a permanent address tab to select an Index number and press...

Страница 101: ...are not sent Follow these steps to add or edit a permanent address 1 In the first Permanent Address Configuration Menu View use the Tab key to select a MAC address If there are no MAC addresses assig...

Страница 102: ...P system The switch uses one STP system with a single MAC address Spanning Tree Protocol Configuration Menu Settings STP Specification Read only States the IEEE STP specification used STP Base MAC Add...

Страница 103: ...pology Changed Read only States the time elapsed since the last network topology change Role of STP Bridge Read only States whether or not the STP bridge is acting as the root bridge STP Bridge Priori...

Страница 104: ...and configure the STP settings for each of the switch s ports Spanning Tree Protocol Port Configuration Menu Settings Unit ID States the unit ID of the Switch Port ID Select the port to be configured...

Страница 105: ...Read only State whether the port is Disabled Blocking Listening Learning Forwarding or Broken Role of STP Port Read only States whether the port is acting as Root Port Designated Port Blocked Port or...

Страница 106: ...Bytes Received States the total bytes received by the port Broadcast Frames RX The total number of frames received that were from the broadcast address Multicast Frames RX The total number of frames...

Страница 107: ...eceived which were longer than 1518 octets and had a FCS or alignment error Jabbers The number of packets received which were less than 64 octets and had a FCS or alignment error Collisions Shows the...

Страница 108: ...nformation and allows you to select a user index to add or edit The second screen allows you to add or edit the selected user index The third screen allows you to edit the Front Panel Display Password...

Страница 109: ...et The defaults are User Name admin Password empty string just press Enter Privilege Read Write And User Name guest Password empty string just press Enter Privilege Read Only To change the settings ta...

Страница 110: ...selected to edit you will see the User Authentication Menu 2 as shown in Figure 5 23 Figure 5 23 User Authentication Menu 2 The User Authentication Menu 2 is used to configure the Front Panel Display...

Страница 111: ...rd Select EXIT to return to the main User Authentication Menu Note that the Front Panel Display Password cannot be deleted System Utility The Main Menu item System Utility has several sub menus The Sy...

Страница 112: ...f overview of the System Utility sub menus System Utility System Restart Restart the Switch Factory Reset Reset to factory configuration Login Timeout Interval Specify the period of inactivity time re...

Страница 113: ...restart Selecting Cold Start starts the system from the Boot ROM Selecting Warm Start starts the system from the system firmware thus skipping the POST start up stage To initiate a system restart in t...

Страница 114: ...In the System Restart Menu Confirm press the Enter key to execute the selected system restart or press the Esc key to cancel the restart and return to the first System Restart Menu Factory Reset The...

Страница 115: ...such as IP address default gateway subnet mask etc Not Reset The network configuration settings will not be reset Reset to Factory Default The network configuration settings will be reset to empty st...

Страница 116: ...Not Reset The current SNMP community configuration settings will not be reset Reset to Factory Default The current SNMP community configuration settings will be deleted After the factory reset options...

Страница 117: ...u Login Timeout The System Utility Menu item Login Timeout is shown in Figure 5 29 Figure 5 29 Login Timeout Menu The Login Timeout Menu allows you to set the amount of time an established console man...

Страница 118: ...nload is shown in Figure 5 30 Figure 5 30 System Download Menu The System Download Menu allows you to view and set the parameters used in performing a TFTP download operation System Download Notes The...

Страница 119: ...s Bootp server select the Bootp Request option by typing Ctrl S to place an X in the Bootp Request check box If you do not want to use your network s Bootp server or if your network does not have an...

Страница 120: ...erminal emulation program 8 At this point you should conduct a ping from the terminal you are using to ensure that the new software is configured properly Note If the ping is timed out simply plug you...

Страница 121: ...BASE FX with SC connectors Eight ports of 100BASE TX with RJ 45 connectors Four ports of 100BASE FX with SC connectors Single port of 1000BASE SX with SC connectors Switch Performance RAM buffer 128K...

Страница 122: ...ager for standard platforms such as HP OpenView Smart Front Panel Display Operation Per port traffic Utilization display per port traffic Collision display Port statistic counter display Port Setting...

Страница 123: ...Menu Tree B 1 Appendix B Menu Tree...

Страница 124: ...B 2 Menu Tree...

Страница 125: ...TP PMD but uses Ethernet framing CSMA CD 10BASE T A variant of IEEE 802 3 which allows stations to be attached via twisted pair cable AUI Attachment Unit Interface The Ethernet IEEE 802 3 term for the...

Страница 126: ...Twisted Pair UTP Standardization of unshielded twisted pair cable Category 5 Unshielded Twisted Pair Standardization of unshielded twisted pair cable for data use TP PMD requires Category 5 cable rath...

Страница 127: ...3 now can be run on two types of coaxial cable as well as multi mode fiber and unshielded twisted pair Raw rate of data transmission is 10 megabits second Fast Ethernet A term used for the 100Mbps ver...

Страница 128: ...network The common understanding of the term is that it is one that translates an entire stack of protocols e g translates TCP IP style mail to ISO style mail Gigabit Ethernet High speed version of Et...

Страница 129: ...ol A layer within the OSI Data Link Layer MIB Management Information Base The set of parameters an SNMP management station can query or set in an SNMP agent e g router Standard minimal MIBs have been...

Страница 130: ...it their size Router A network relay that uses a protocol beyond the data link protocol to route traffic between LANs and other network links Routing Protocol A protocol sent between routers by which...

Страница 131: ...main to each of it s ports TCP IP Transmission Control Protocol Internet Protocol Literally two protocols developed for the Defense Data Network to allow their ARPANET to attach to other networks rela...

Страница 132: ...which communication is blocked More complex is a feature which allows each VLAN to reside on two or more switches e g some of VLAN A s ports are on switch 1 and some of its ports are on switch 2 and...

Страница 133: ...een 5 3 Login Timeout 5 39 Main Menu 5 5 Management Capability Setup 5 14 Management Setup 5 8 Network Configuration 5 9 Permanent Address Configuration 5 21 Permanent Address Configuration Permanent...

Страница 134: ...g The Switch 4 2 Menu Tree 3 9 Message Zone 3 4 Navigating the Console Program Screens 4 8 5 3 Network Configuration 5 9 Network Configuration 3 33 Configuring the Parameters 3 33 Default Gateway 3 35...

Страница 135: ...ystem Default 3 37 System Download 5 40 System Info 3 38 System Information 5 6 System Information Default Gateway 3 38 Hardware Version 3 38 IP Address 3 38 Software Version 3 38 Subnet Mask 3 38 Sys...

Отзывы: