


68
2.
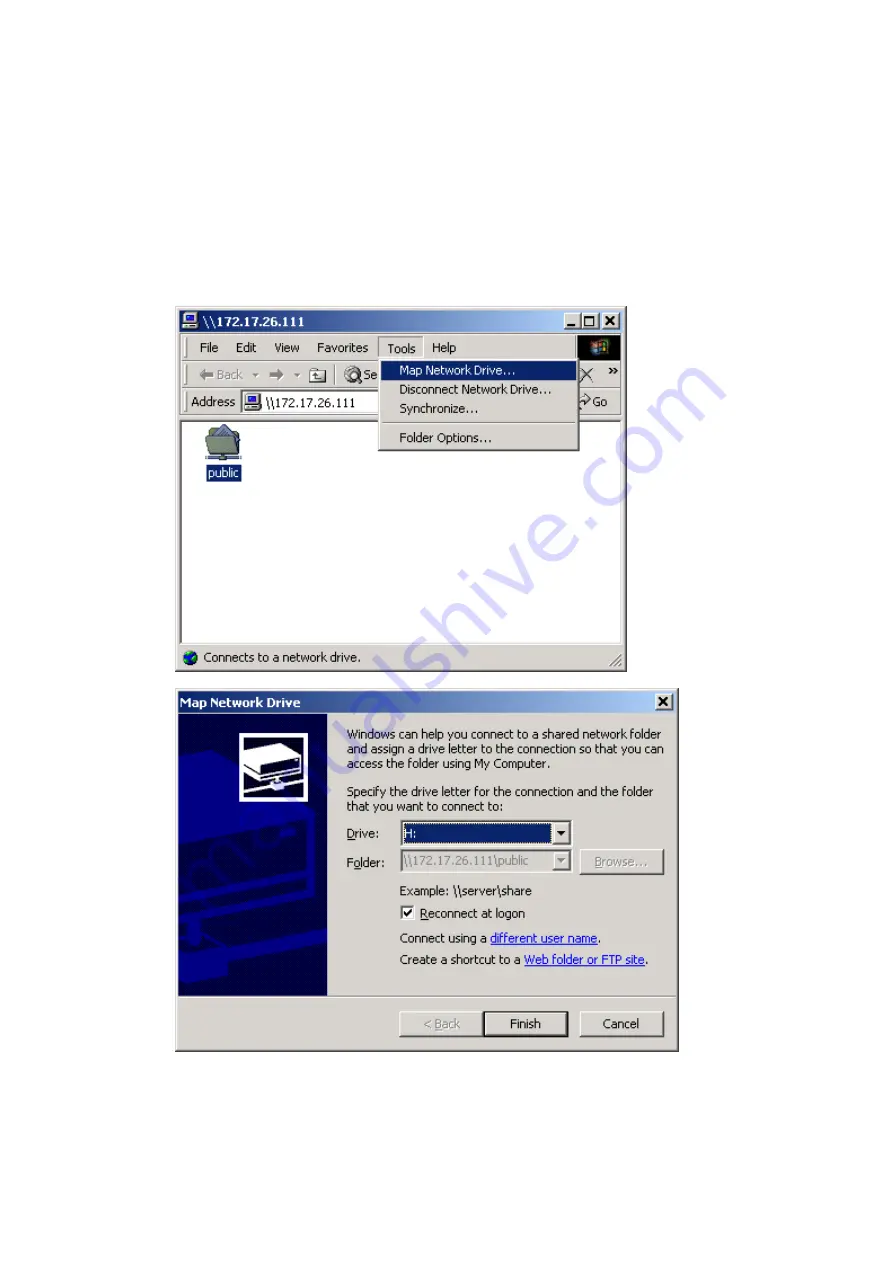
Once the connection to FNS-7000A is successful, all listing on your available
network share will be displayed. Select an appropriate network share folder
and select
Map Network Drive
by right clicking on the item. To make the
share folder available for your next start-up, check the
Reconnect at logon
box on the popup window and click OK to map the folder as your network
drive.
Содержание FNS-7000A
Страница 1: ...LevelOne FNS 7000A 4 bay Tower NAS w 2 Gigabit Ethernet User s Manual...
Страница 13: ...13 6 Select the network file services to provide on the server 7 Configure disk volume on this server...
Страница 14: ...14 8 Configure the method of user authentication...
Страница 15: ...15 9 Manage users and user groups of this server...
Страница 28: ...28 8 View Network Settings You can view current network settings and status in this section...
Страница 33: ...33 iv Format Disk Volume v View Disk Volume Status...
Страница 71: ...71 e Choose a network share to connect The network share will appear on the desktop...
Страница 93: ...93 5 Enter the home page of FNS 7000A Double click on FNS 7000A to enter the administration page...
Страница 100: ...100 9 Monitor Select the files and folders for monitoring Then click Monitor...
Страница 102: ...102 d Option Select recovery option and error option...


