


User Manual of Network Camera
48
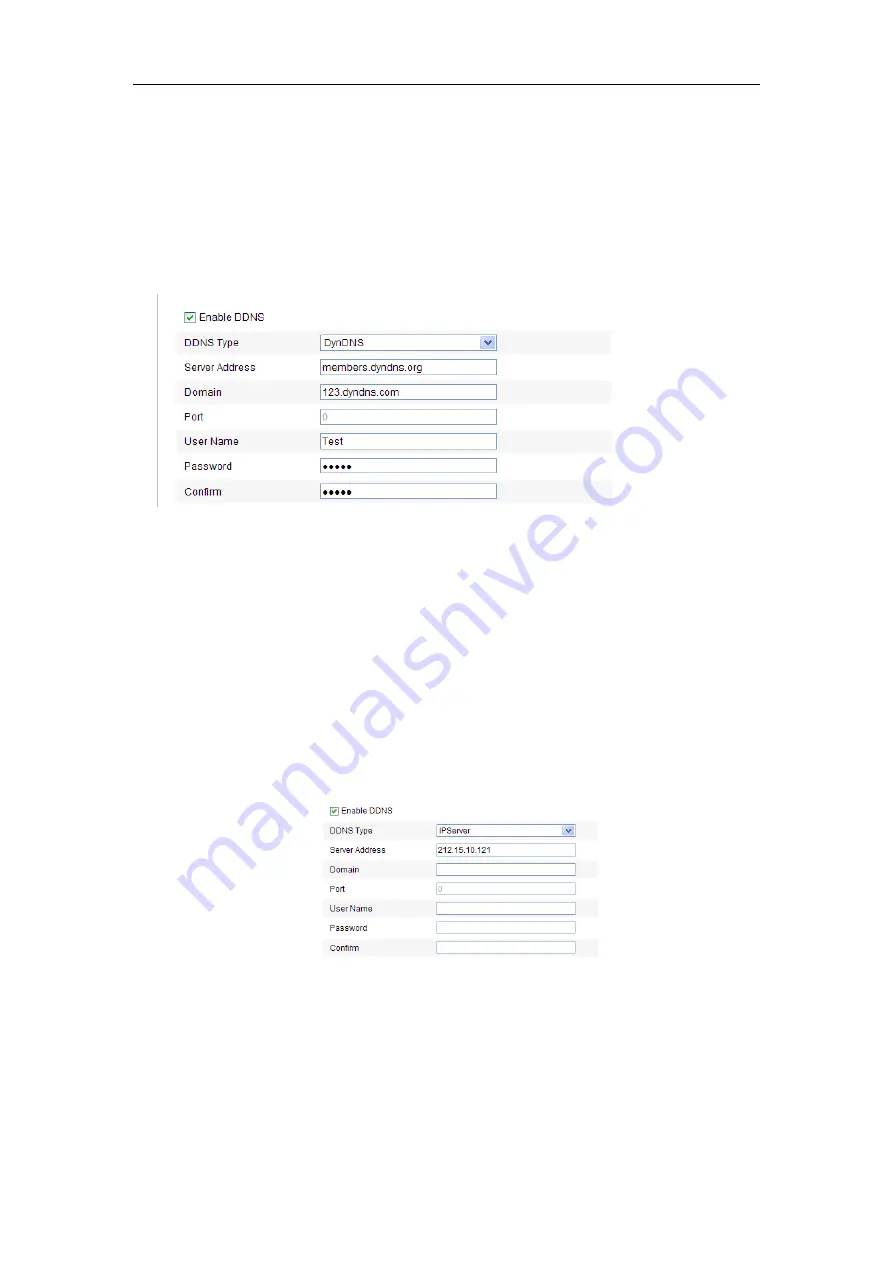
(2)
In the
Domain
text field, enter the domain name obtained from the DynDNS
website.
(3)
Enter the
Port
of DynDNS server.
(4)
Enter the
User Name
and
Password
registered on the DynDNS website.
(5)
Click
Save
to save the settings.
Figure 6-9
DynDNS Settings
⚫
IP Server:
Steps:
(1)
Enter the Server Address of the IP Server.
(2)
Click
Save
to save the settings.
Note:
For the IP Server, you have to apply a static IP, subnet mask, gateway and
preferred DNS from the ISP. The
Server Address
should be entered with the
static IP address of the computer that runs the IP Server software.
Figure 6-10
IPServer Settings
Note:
For the US and Canada area, you can enter 173.200.91.74 as the server
address.
⚫
NO-IP:
Steps:
Содержание 57107207
Страница 1: ...User Manual of Network Camera 1 User Manual Network Camera...
Страница 24: ...User Manual of Network Camera 24 web browser and log in again after installing the plug in...
Страница 143: ...User Manual of Network Camera 143 Figure 8 3 Overlay Content Settings...
Страница 147: ...User Manual of Network Camera 147 4 To export the log files click Save log to save the log files in your computer...
Страница 162: ...User Manual of Network Camera 162 Figure A 1 2 Modify Network Parameters...
Страница 167: ...User Manual of Network Camera 167 FCS 3097 FCS 3098 FCS 4203 FCS 5092 FCS 5093 FCS 5094 FCS 5095 FCS 5096...


