background image

Willow

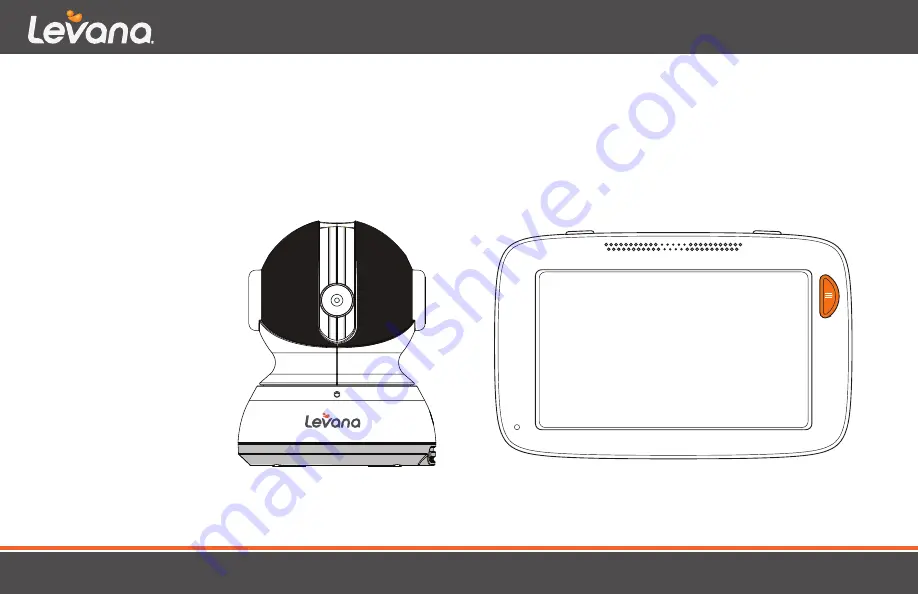
Digital Baby Video Monitor

MANUAL

CAUTION: Keep small parts away from children.

Tap to pair additional camera

Tap to pair additional camera

Tap to pair additional camera

Press pairing button on camera now

12:45 

am

22°c

1

3

2

4

BACK

3

ft

pi

pies

+

-

3

ft

pi

pies

+

-

+

-

Feed/Nap Timer

Lullabies

Temperature

Settings

Support

12:45 

am

22°c

1

Pair Camera

Feed/Nap Timer

Lullabies

Temperature

Settings

Support

12:45 

am

22°c

1

Pair Camera

Introduction

FAQ

Customer Support

12:45 

am

22°c

1

BACK

Feed/Nap Timer

Lullabies

Temperature

Settings

Support

12:45 

am

22°c

1

Pair Camera

Introduction

FAQ

Customer Support

12:45 

am

22°c

1

BACK

Introduction

FAQ

Customer Support

12:45 

am

22°c

1

BACK

Introduction

FAQ

Customer Support

12:45 

am

22°c

1

BACK

Introduction

FAQ

Customer Support

12:45 

am

22°c

1

BACK

Tap to pair additional camera

Tap to pair additional camera

Tap to pair additional camera

Press pairing button on camera now

12:45 

am

22°c

1

3

2

4

BACK

Tap to pair additional camera

Tap to pair additional camera

Tap to pair additional camera

Press pairing button on camera now

12:45 

am

22°c

1

3

2

4

BACK

3

ft

pi

pies

+

-

3

ft

pi

pies

+

-

+

-

Feed/Nap Timer

Lullabies

Temperature

Settings

Support

12:45 

am

22°c

1

Pair Camera

Feed/Nap Timer

Lullabies

Temperature

Settings

Support

12:45 

am

22°c

1

Pair Camera

Introduction

FAQ

Customer Support

12:45 

am

22°c

1

BACK

Feed/Nap Timer

Lullabies

Temperature

Settings

Support

12:45 

am

22°c

1

Pair Camera

Introduction

FAQ

Customer Support

12:45 

am

22°c

1

BACK

Introduction

FAQ

Customer Support

12:45 

am

22°c

1

BACK

Introduction

FAQ

Customer Support

12:45 

am

22°c

1

BACK

Introduction

FAQ

Customer Support

12:45 

am

22°c

1

BACK

Tap to pair additional camera

Tap to pair additional camera

Tap to pair additional camera

Press pairing button on camera now

12:45 

am

22°c

1

3

2

4

BACK

Содержание Willow Series

Страница 1: ...Willow Digital Baby Video Monitor MANUAL CAUTION Keep small parts away from children ...

Страница 2: ...designed for indoor use only The unit should not be exposed to rain moisture dripping or splashing No objects filled with liquid should be placed on top of or beside the product such as a glass or vase This item should not be used near water Non Use Periods Always unplug the AC adapters from the wall outlets during long periods of non use Ventilation This baby monitor should not be used on a bed s...

Страница 3: ...n in use may cause signal disruption at close range Buildings with metal frames may also cause signal disruption Maximum transmission range is 500 ft Night vision range is up to 12 ft under ideal conditions Objects at or beyond this range may be partially or completely obscured depending on the camera application Battery life of 12 hours based on Power Save mode Battery lasts an average of 8 hours...

Страница 4: ... harmful interference and 2 This device must accept any interference received including interference that may cause undesired operation FCC RADIATION EXPOSURE STATEMENT This equipment complies with FCC radiation exposure limits set forth for an uncontrolled environment This equipment should be installed and operated with minimum distance 20cm between the radiator your body This transmitter must no...

Страница 5: ...device may not cause interference and 2 this device must accept any interference including interference that may cause undesired operation of the device The device is compliance with RF exposure guidelines users can obtain Canadian information on RF exposure and compliance The minimum distance from body to use the device is 20cm IC STATEMENT ...

Страница 6: ...gainst defects in workmanship and materials If you have warranty or support issues please contact us using any of the following methods Web www mylevana com Support www mylevana com Support_Center eng html LEVANA Canada 4080 Montrose Road Niagara Falls ON Canada L2H 1J9 SUPPORT LEVANA USA 840 Aero Drive Cheektowaga NY USA 14225 ...

Страница 7: ... expressed or implied is provided LEVANA assumes no responsibilities for any other claims not specifically mentioned in this warranty This warranty does not cover the shipping cost insurance or any other incidental charges You MUST contact LEVANA at www mylevana com Support_Center eng html before sending any product back for repair You will be sent a Return Authorization form with return instructi...

Страница 8: ...tures 12 Battery Installation 13 Getting The Most Out Of Your Rechargeable Battery 13 Connecting Power To The Monitor Charging The Battery 14 Connecting Power To The Camera 14 Set Up 14 Placement Of The Monitor 15 Placement Of The Camera 15 Mounting The Camera On A Wall Safely 16 Night Vision 17 Turning On The Monitor 17 Pairing 17 Operations 17 TABLE OF CONTENTS ...

Страница 9: ...a Views 20 Pan Tilt Zoom 21 Menu Functions 22 Menu Icons 22 Menu 23 Feed Nap Timer 24 Lullabies 26 Temperature 28 Pairing 31 Unpairing 33 Settings 35 Support 45 Troubleshooting 49 Support 49 Specifications 51 TABLE OF CONTENTS ...

Страница 10: ...adult supervision Check on your child at regular intervals and make sure your monitor is always adequately charged Failure to do so can be fatal We reserve the right to change models configuration or specifications without notice or liability Product may not be exactly as shown This is not a medical product If there is a problem with the child baby please call 911 immediately 2016 LEVANA All right...

Страница 11: ...tible with 2 different types of cameras To learn more about adding additional cameras please visit our website at www mylevana com MONITOR CAMERAS Introduction FAQ Customer Support Tap to pair additional camera Tap to pair a 3 4 LET S GET STARTED ...

Страница 12: ... 10 4 1 5 8 7 9 5 1 2 4 6 3 MONITOR AND CAMERA FEATURES LET S GET STARTED 1 Power Button 2 Push to Talk Button 3 Menu Button 4 Speaker 5 Volume 1 Microphone 2 Power LED 3 Night Vision Light Sensor 4 Temperature Sensor 5 Antenna 6 Power Input 7 Power On Off 8 Speaker 9 Pairing Button ...

Страница 13: ...oduction FAQ 12 45 am 1 BACK LET S GET STARTED NOTE For extended periods of non use Levana recommends removing the battery from the monitor GETTING THE MOST OUT OF YOUR RECHARGEABLE BATTERY Fully charge the battery 3 7 hours before first use To maximize battery life charge the battery before the battery is fully drained Avoid extreme heat or cold as this will affect the life of the battery Turn th...

Страница 14: ...ustomer Support Introduction FAQ Customer Support 12 45 am 22 c 1 BACK Introduction FAQ Customer Support Tap to pair additional camera Tap to pair additional camera Tap to pair additional camera Press pairing button on camera now 12 45 am 22 c 1 3 2 4 BACK Feed Nap Timer Lullabies Temperature Settings Support 12 45 am 22 c 1 Pair Camera Timer Lullabies Temperature Settings Support m 22 c 1 mera Cu...

Страница 15: ...ill not activate correctly if objects are too close To increase the downward viewing angle of the camera use the Pan Tilt Zoom feature to move the camera to the desired angle 1 Place the camera on a tabletop no less than 3 feet away from your baby s crib 2 Feed the power cord down the back of the table or use wall clips not included to secure the cord away so the baby cannot reach it 3 Plug in the...

Страница 16: ...only stick out approximately 4 Plug the power cord into the power input of the camera 5 Locate the wall mounting holes on the bottom of the camera base 6 Slide the holes over the screws sticking out of the wall 7 Confirm that the camera is secure if it is loose you may have to tighten the screws more 8 Use wall clips not included to secure the power cord away from the crib or the baby s reach 9 Co...

Страница 17: ...ht The night vision LEDs will activate automatically when the light sensor on the camera detects that the light levels are too low TURNING ON THE MONITOR Press and hold the Power button on the top left of the monitor PAIRING The camera and monitor come paired connected to each other If after setup the camera and monitor are not automatically paired you will need to connect them manually Please see...

Страница 18: ...ange the volume on the touch screen will appear on the screen Press the icon to increase the volume in live view the volume icon will display the volume level in the top corner of the screen Press the icon to decrease the volume to mute decrease the volume until the icon appears in the top left corner of the screen 12 45 am 22 c 1 1 OPERATIONS ...

Страница 19: ...M With the simple press of a button you can talk to your child at any time without entering the nursery 12 45 am 22 c 1 1 2 3 4 1 Introduction FAQ Customer Support Tap to pair additional camera Tap to pair additional camera 1 3 2 4 OPERATIONS 1 To talk press and hold the button on the top right corner of the monitor and release to listen You can adjust the volume coming from the camera in the lull...

Страница 20: ...m 22 c 1 12 45 am 22 c 1 12 45 am 22 c 1 1 12 45 am 22 c 1 2 3 4 12 45 am 22 c 1 2 12 45 am 22 c 1 12 45 am 22 c 1 12 45 am 22 c 1 12 45 am 22 c 1 2 12 45 am 22 c 1 1 12 45 am 22 c 1 12 45 am 22 c 1 Single Screen Split Screen Quad Screen OPERATIONS 1 To change the camera view when you have paired multiple cameras tap the camera 1 icon shown on the bottom left hand corner of the screen NOTE In spli...

Страница 21: ... camera is equipped with Pan Tilt Zoom PTZ You can adjust the angle 300 degrees horizontal and 110 degrees vertical from the center position 1 Tap the touch screen The navigational arrows will appear on the screen 2 Using the navigational arrows move the camera to the desired position 3 The PTZ arrows will automatically be removed from the screen after 5 seconds when the screen is not touched 12 4...

Страница 22: ...Timer Last feed right Quad Screen Camera 2 Timer Last feed left Split Screen Camera 3 Timer ON LED Indicator 1 Camera 4 Battery 100 LED Indicator 2 Signal 1 Battery 50 75 LED Indicator 3 Signal 2 Battery 25 50 LED Indicator 4 Signal 3 Battery 0 25 LED Indicator 5 Signal 4 Battery Charging Volume 1 Temperature Cold MENU FUNCTIONS ...

Страница 23: ...mera Introduction FAQ Customer Support 12 45 am 22 c 1 BACK 12 45 am BACK Tap to pair additional camera Tap to pair additional camera Tap to pair additional camera Press pairing button on camera now 12 45 am 22 c 1 3 2 4 BACK Feed Nap Timer Lullabies Temperature Settings Support 12 45 am 22 c 1 Pair Camera Introduction FAQ Customer Support P Introduction FAQ Customer Support 12 45 am 22 c 1 BACK I...

Страница 24: ... indicator 4 LED indicator 3 LED indicator 2 LED indicator 1 Dont Show Again Camera 2 Camera 3 Camera 4 12 45 am 22 c 12 45 am 22 c 12 45 am 22 c 12 45 am 22 c BACK BACK Feed Nap Timer Lullabies Temperature Pair Camera Settings Support Feed Nap Timer Lullabies Temperature STOP PLAY Set Duration Set Timer 03 00 Camera Volume Camera 1 Camera 1 Alert Settings START REPEAT AUDIBLE ON SCREEN LEFT RIGHT...

Страница 25: ...e the following types of alerts Audible Audible alert will sound On Screen An icon will flash on the screen Audible On Screen Will play an audible alert and flash the icon on the screen Start Repeat Tapping this on screen icon allows you to start the timer or to repeat the timer p Timer Lullabies Temperature mera Settings Support p Timer Lullabies Temperature Lullaby 1 STO PLAY Set Duration 01 15 ...

Страница 26: ...ettin AUDIBLE START REPEAT AUDIBLE ON SCREE LEFT RIG Last Feed ON OFF Timer ON Alert OFF Hr Min Hr Min Camera 2 Camera 3 Camera 4 12 45 am 22 c 12 45 am 22 c 12 45 am 22 12 45 am 22 BACK BACK 2 The Lullabies Menu has options to set Lullabies for each camera eed Nap Timer Lullabies Temperature Pair Camera Settings Support eed Nap Timer Lullabies Temperature Pair Camera Settings Support eed Nap Time...

Страница 27: ...ill change to OFF When displaying OFF tapping the icon will turn the lullabies off Camera Volume Tap the or icons to adjust the volume of the lullaby being played from the camera This will also adjust the volume of the camera when using the Talk to Baby feature d Nap Timer Lullabies Temperature r Camera Settings Support d Nap Timer Lullabies Temperature r Camera Settings Support d Nap Timer Lullab...

Страница 28: ... Duration 01 15 Camera V Camera 1 Temperature C F Alert Settin AUDIBLE ON SCREE ON OFF Timer ON Alert OFF Temp Range Low Hi Hr Min 12 45 am 22 c 12 45 am 22 c 12 45 am 22 c 20 24 12 45 am 22 12 45 am 22 BACK BACK 12 45 am 22 BACK BACK eed Nap Timer Lullabies Temperature Pair Camera Settings Support eed Nap Timer Lullabies Temperature Pair Camera Settings Support Lullaby 1 PLAY Set Duration 01 15 C...

Страница 29: ...perature to ensure the room is just right for baby Alert Settings You can set a temperature alert type to indicate when the temperature is too low or too high Select to review an audible alert on screen alert or both The color will change from white to orange indicating it is on By tapping Audible you will hear 3 beeps to alert you of high or low temperatures By tapping the On Screen icon you will...

Страница 30: ...45 am 22 c 12 45 am 22 c 1 12 45 am 22 c 1 BACK STOP PLAY t Duration 15 Camera Volume Alert Settings AUDIBLE ON SCREEN OFF Timer lert OFF Range Hi Min 12 45 am 22 c 1 24 22 c 22 c ACK ACK 22 c 12 45 am 22 c ACK BACK MENU FUNCTIONS 2 When the temperature is too high a red thermometer will flash on screen ...

Страница 31: ...g button on camera now 12 45 am 2 1 3 2 4 Pair Camera BACK BACK BACK ed Nap Timer Lullabies Temperature air Camera Settings Support Are you sure you want to unpair camera F ON SCREEN ed Nap Timer Lullabies Temperature Settings Support Temp Range Low Hi 2 45 am 22 c 20 24 12 45 am 22 c 1 Tap to pair additional camera Tap to pair additional camera Tap to pair additional camera Press pairing button o...

Страница 32: ...era Tap to pair additional camera 12 45 am 1 3 12 45 am 22 c 1 3 2 4 BACK Tap to pair additional camera Tap to pair additional camera Tap to pair additional camera Tap to pair additional camera Tap to pair additional camera 12 45 am 22 c 1 3 2 4 22 c 2 4 ACK BACK MENU FUNCTIONS 2 If the camera fails to pair to the monitor you will see an on the screen If shown repeat the pairing steps ...

Страница 33: ... 12 45 am 22 c 1 Tap to pair additional camera Tap to pair additional c Tap to pair additional c Press pairing button on camera now 12 45 am 22 1 3 2 4 Pair Camera BACK BACK BACK d Nap Timer Lullabies Temperature ir Camera Settings Support Are you sure you want to unpair camera C F AUDIBLE ON SCREEN d Nap Timer Lullabies Temperature Settings Support ON OFF Temp Range Low Hi 45 am 22 c 20 24 2 45 a...

Страница 34: ...ES NO Feed Nap Timer Lullabies Temperature Settings Support 12 45 am 22 c 1 Tap to pair additional camera Tap to pair additional c Tap to pair additional c 12 45 am 22 c 1 Press pairing button on camera now 1 3 2 4 Pair Camera Camera unpairing successful BACK BACK MENU FUNCTIONS 4 Select YES to unpair the camera or NO to go back to the previous screen If YES is selected you will see a success mess...

Страница 35: ... Menu and tap the Settings icon Feed Nap Timer Lullabies Temperature Settings Support 12 45 am 22 c 1 12 45 am 22 c 1 Pair Camera BACK Settings Support Power Save Brightness Time Set Calibration Factory Reset 12 45 am 22 c 1 Language Pair Camera BACK MENU FUNCTIONS ...

Страница 36: ...ivity Audio Only Sleep Mode 12 45 am 22 c 1 12 45 am 22 c 1 12 45 am 22 c 1 Calibration Factory Reset 12 45 am 22 c 1 Language Language BACK BACK BACK BACK BACK wer Save Brightness Time Set alibration Factory Reset Sensitivity Audio Only Sleep Mode 45 am 22 c 1 45 am 22 c 1 12 45 am 22 c 1 Calibration Factory Reset 12 45 am 22 c 1 Language Language BACK BACK BACK BACK MENU FUNCTIONS 2 The Power Sa...

Страница 37: ...n the Power Save Menu Sleep Mode By tapping Sleep Mode the icon will turn orange and the monitor screen will shut off in 20 seconds No audio will be heard from the monitor When a sound is heard through the camera the monitor will turn back on There are 4 sensitivity settings to choose from To adjust tap the and icons on the screen NOTE Power Save does not function with multiple cameras Only the ca...

Страница 38: ...Time Set bration Factory Reset r Save Brightness Time Set Sensitivity Audio Only Sleep Mode 5 am 22 c 1 5 am 22 c 1 5 am 22 c 1 1 12 45 am 22 c 1 12 45 am 22 c 1 Language Language BACK BACK BACK BACK Time BACK Power Save Brightness Time Set Calibration Factory Reset Power Save Brightness Time Set Calibration Factory Reset Power Save Brightness Time Set Sensitivity Audio Only Sleep Mode 12 45 am 22...

Страница 39: ...45 am 22 c 1 2 45 am 22 c 1 12 45 am 22 c 1 Language Language BACK BACK BACK BACK BACK BACK Time 12hr 24hr am 12 45 Power Save Brightness Time Set Calibration Factory Reset Power Save Brightness Time Set Calibration Factory Reset 12 45 am 22 c 1 12 45 am 22 c 1 12 45 am 22 c 1 12 45 am 22 c 1 12 45 am 22 c 1 12 45 am 22 c 1 Language Language BACK BACK BACK BACK BACK BACK MENU FUNCTIONS 2 The Time ...

Страница 40: ...ower Save Brightness Time Set Calibration Factory Reset 12 45 am 22 c 1 12 45 am 2 1 12 45 am 2 1 Language Language BACK BACK BACK 12hr 24hr am 12 45 Do you want to calibrate the screen NO YES ower Save Brightness Time Set Calibration Factory Reset ower Save Brightness Time Set Calibration Factory Reset 2 45 am 22 c 1 12 45 am 22 c 1 12 45 am 22 c 1 Language Language BACK BACK BACK MENU FUNCTIONS ...

Страница 41: ...rate the screen NO YES Please tap the X Please tap the X Screen successfully calibrated 12 45 am 22 c 1 12 45 am 22 c 1 12 45 am 22 c 1 BACK BACK 12 45 am 22 c 1 BACK BACK Please tap the X Screen successfully calibrated 1 12 45 am 22 c 1 BACK MENU FUNCTIONS 2 Once completed a message will show Screen successfully calibrated ...

Страница 42: ...monitor 1 Tap the Language icon to enter the submenu EXIT Power Save Brightness Time Set Calibration Factory Reset 12 45 am 22 c 1 12 45 am 22 1 Language FRENCH ESPANOL ENGLISH BACK BACK EXIT wer Save Brightness Time Set libration Factory Reset 45 am 22 c 1 12 45 am 22 c 1 Language FRENCH ESPANOL ENGLISH BACK BACK MENU FUNCTIONS ...

Страница 43: ...5 am 22 c 1 12 45 am 22 1 12 45 am 22 1 Language BACK BACK BACK Are you sure you want to reset to factory default settings This action cannot be undone OK ower Save Brightness Time Set Calibration Factory Reset 2 45 am 22 c 1 12 45 am 22 c 1 12 45 am 22 c 1 Language BACK BACK BACK MENU FUNCTIONS 2 A message will be shown on the screen stating Are you sure you want to reset the factory default sett...

Страница 44: ...44 Factory Reset Continued 1 When successfully reset you will see a confirmation message on screen OK Your monitor has been restored to it s factory default 12 45 am 22 c 1 BACK MENU FUNCTIONS ...

Страница 45: ...submenu Introduction FAQ 12 45 am 1 12 45 am 1 Feed Nap Timer Lullabies Temperature Settings Support 12 45 am 22 c 1 Pair Camera BACK BACK BACK Introduction FAQ Customer Support 12 45 am 22 c 1 12 45 am 22 c 1 Lullabies Temperature Settings Support 22 c BACK BACK BACK MENU FUNCTIONS 2 Tap Introduction ...

Страница 46: ...o turn the Introduction mode ON or OFF during start up By tapping the icon you can go through the introduction again to review the features and functions of the monitor 12 45 am 22 c 1 12 45 am 22 c 1 ON Introduction on start up OFF Introduction FAQ BACK BACK MENU FUNCTIONS ...

Страница 47: ...p OFF BACK BACK BACK BACK BACK BACK troduction FAQ Customer Support troduction FAQ Customer Support 2 45 am 22 c 1 12 45 am 22 c 1 12 45 am 22 c 1 12 45 am 22 c 1 2 45 am 22 c 1 2 45 am 22 c 1 ON Introduction on start up OFF BACK BACK BACK BACK BACK BACK MENU FUNCTIONS 2 A list of the most frequently asked questions will appear on the screen For example by selecting How do I pair an addi tional ca...

Страница 48: ...act Us form 1 Tap Customer Support www mylevana com support Introduction FAQ Customer Support Introduction FAQ Customer Support 12 45 am 22 1 12 45 am 22 c 1 BACK BACK www mylevana com support ntroduction FAQ Customer Support ntroduction FAQ Customer Support 12 45 am 22 c 1 2 45 am 22 c 1 BACK BACK MENU FUNCTIONS 2 The web address will be shown on the screen ...

Страница 49: ...setting to prevent feedback Touchscreen If touch screen seems slow to respond perform a screen calibration this tool is used to improve the responsiveness of the screen to the user s touch TROUBLESHOOTING Monitor Camera does not function Confirm that the camera and monitor are on The battery may be depleted try recharging the battery The power adapters may not be properly connected No reception Th...

Страница 50: ...ts or solvents Noise static beeping The battery power may be too low try recharging the battery Picture works but there is no sound Volume setting may be too low Audio works but there is no picture The Power Save settings may be enabled Press the power button to turn the monitor screen back on Press the orange Menu button and tap Settings Power Save and tap the Audio Only icon to turn the feature ...

Страница 51: ...2 4 to 2 483GHz 19 Channels Quad Screen Yes Volume Indicator LED Yes Private Signal Yes Split Screen Yes Key Lock No Technology Digital FHSS Scan View No Housing Material ABS Plastic No of hop sec 300 Speaker Yes Power Adapter Input 100 240VAC No of hopping channels 19 Microphone Yes Power Adapter 5V 1000mA USB Channel Bandwidth 3 375 MHz Talk to Baby Yes Operating Temperature 0 C to 45 C 32 F to ...

Страница 52: ...A PTZ Yes Operating Temperature 0 to 45 Degree Celsius 32 to 113 Degrees Fahrenheit Range of Motion Horizontal 300 Degrees Dimensions 3 5 x 4 0 x 4 5 Range of Motion Vertical 110 Degrees Weight 0 55 lbs Frequency 2 4 GHz Private Signal Yes Technology Digital FHSS Max Transmission Range 500 ft Optimum Transmission Range 150 ft Number of IR LEDs 8 IR Wavelength 940 nm Night Vision Distance 12 ft Bat...

Страница 53: ...Thank you for choosing Levana To learn more about our products and accessories please visit WWW MYLEVANA COM ...

Отзывы: