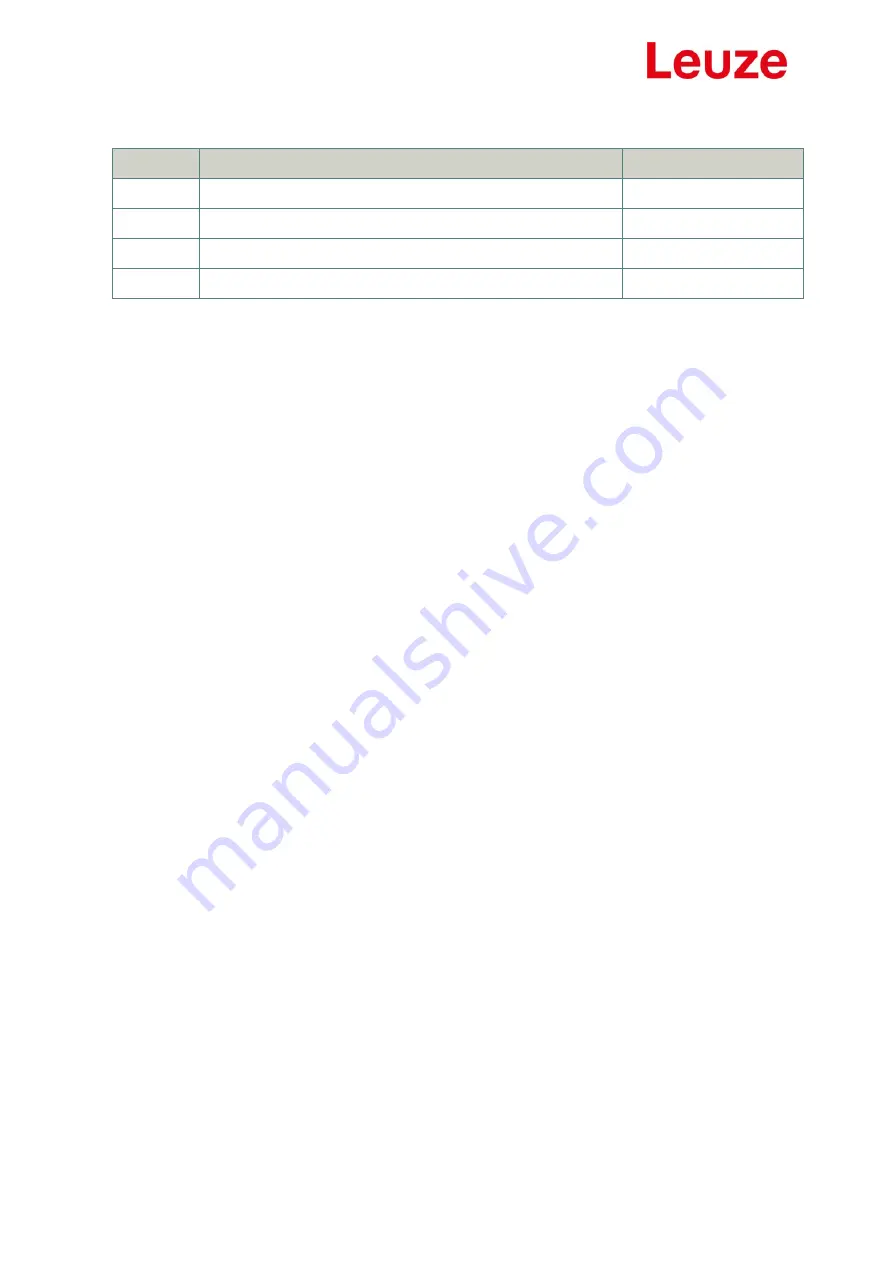
Leuze 50132136 Скачать руководство пользователя страница 2


Revision  Changes 

Date | Name 

1.0 

First Edition 

20.05.2016 | esh 

1.1 

Addition RTSP-Protocol, Live stream in Browser 

04.01.2018 | esh 

1.2. 

RTSP limits 

30.01.2018 

1.3. 

Image settings Update 

29.07.2020 | esh 


DISCLAIMER  

Copyright 

© 2016 Leuze electronic GmbH+Co. KG. The information, data, and figures in this document including 
respective references have been verified and found to be legitimate. In particular in the event of error 
they  may,  therefore,  be  changed  at  any  time  without  prior  notice.  The  complete  risk  inherent  in  the 
utilization of this document or in the results of its utilization shall  be  with the user; to this end,  Leuze 
electronic  GmbH+Co  KG  shall  not  accept  any  liability.  Regardless  of  the  applicability  of  respective 
copyrights, no portion of this document shall be copied, forwarded or stored in a data reception system 
or entered into such systems without the express prior written consent of Leuze electronic GmbH+Co 
KG,  regardless  of  how  such  acts  are  performed  and  what  system  is  used  (electronic,  mechanic, 
photocopying,  recording,  etc.).  All  product  and  company  names  are  registered  trademarks  of  the 
respective companies. 

Our General Business, Delivery, Offer, and Payment Terms and Conditions shall otherwise apply. 


ELECTRONIC EMISSION NOTICES 

Federal communications commission statement 

Note: This equipment has been tested and found to comply with the limits for a Class A digital device, 
pursuant to Part 15 of the FCC Rules. These limits are designed to provide reasonable protection 
against harmful interference when the equipment is operated in a commercial environment. This 
equipment generates, uses, and can radiate radio frequency energy and, if not installed and used in 
accordance with the instruction manual, may cause harmful interference to radio communications. 
Operation of this equipment in a residential area is likely to cause harmful interference, in which case 
the user will be required to correct the interference at his own expense. 

Properly shielded and grounded cables and connectors must be used in order to meet FCC emission 
limits. ELTEC is not responsible for any radio or television interference caused by using other than 
recommended cables and connectors or by unauthorized changes or modifications to this equipment. 
Unauthorized changes or modifications could void the user's authority to operate the equipment. 

This device complies with Part 15 of the FCC rules. Operation is subject to the following two 
conditions: (1) this device may not cause harmful interference, and (2) this device must accept any 
interference received, including interference that may cause undesired operation. 

Canadian department of communications statement 

This digital apparatus does not exceed the Class B limits for radio noise emissions from digital apparatus 
set out in the Radio Interference Regulations of the Canadian Department of Communications. 

This class B digital apparatus complies with Canadian ICES-003. 


Содержание 50132136

Страница 1: ...LCAM 408i Industrial Ethernet Camera User Manual Revision 1 3 ...

Страница 2: ...ts for a Class A digital device pursuant to Part 15 of the FCC Rules These limits are designed to provide reasonable protection against harmful interference when the equipment is operated in a commercial environment This equipment generates uses and can radiate radio frequency energy and if not installed and used in accordance with the instruction manual may cause harmful interference to radio com...

Страница 3: ...ty Before installing the motherboard and adding devices on it carefully read the manuals that came with the package Before using the product make sure all cables are correctly connected and the power cables are not damaged If you detect any damage contact your dealer immediately To avoid short circuits keep paper clips screws and staples away from connectors slots sockets and circuitry Avoid dust ...

Страница 4: ...ABLE LAW EXCEPT WHEN OTHERWISE STATED IN WRITING THE COPYRIGHT HOLDERS AND OR OTHER PARTIES PROVIDE THE PROGRAM AS IS WITHOUT WARRANTY OF ANY KIND EITHER EXPRESSED OR IMPLIED INCLUDING BUT NOT LIMITED TO THE IMPLIED WARRANTIES OF MERCHANTABILITY AND FITNESS FOR A PARTICULAR PURPOSE THE ENTIRE RISK AS TO THE QUALITY AND PERFORMANCE OF THE PROGRAM IS WITH YOU SHOULD THE PROGRAM PROVE DEFECTIVE YOU A...

Страница 5: ... to do 10 3 Technical terms 10 3 1 Binning 10 3 2 RTP 11 4 Software 12 Still image 12 MJEG Streaming 12 Stream data structure 13 RTP Streaming 14 Ring buffer 14 5 Web Interface 15 Default network settings 15 Default login data 15 Web interface 15 SSH 15 6 Web menus 16 Network 16 Network menu 16 Network settings 16 Services SSH and FTP 16 Administration 17 Administration menu 17 Factory reset 18 Pa...

Страница 6: ...rest 20 6 3 2 4 Automatic ROI correction 21 6 3 2 5 Binning and framerate 21 6 3 2 6 RTP 22 6 3 2 7 Gain control 22 6 3 2 8 Color saturation 23 6 3 2 9 White balance 23 6 3 2 10 Image orientation 23 Live image 23 Ringbuffer 23 About Menu 25 System information 25 Licenses 26 7 Appendix 27 Data sheet key data 27 ...

Страница 7: ...e details see the datasheet M12 connectors The M12 connectors on the bottom side are used for Ethernet connection named with SERVICE and the other for Power Supply named with PWR It is an X coded M12 with 8 pins female and an A Coded M12 with 4 Pins Be sure to use only matching cables Pin definition Ethernet connector M12 X Coded female Pin Signal Name 1 D1 2 D1 3 D2 4 D2 5 D4 6 D4 7 D3 8 D3 ...

Страница 8: ...ile system is used to store persistent data Optics The lens M12 is mounted behind a protective front glass no optical requirements that cannot be changed be the user The setup the lens focus is done in the production and cannot be changed by the user The field of view is 1 80 x 1 40 m 1 Meter distance 2 50 x 1 90 m 1 5 Meter distance 3 40 x 2 60 m 2 Meter distance Mounting the camera There are dif...

Страница 9: ...9 At a rod 10 20mm with the BT 56 1 or BT 300 1 With a mounting angle The camera can mount to the BT 300W and adjust in different directions ...

Страница 10: ...o an address like 192 168 60 101 so it is in the same sub net Open Internet browser on the computer In the browser s address line type in the IP address of the LCAM in the form 192 168 60 101 Watch for the camera s web server surface to show up should appear as in Menu general appearance Proceed with setting password and video parameters For that you need a password see below for default Start str...

Страница 11: ... a streaming protocol used for video and audio See https en wikipedia org wiki Real time_Transport_Protocol https en wikipedia org wiki Real_Time_Streaming_Protocol The camera can be configured to supply the images using RTP ...

Страница 12: ...eoLANClient VLC on a 64 Bit Windows system use the line C Program Files x86 VideoLAN VLC vlc exe tcp IPaddress 5001 network caching 0 Fill in the IP address of the camera and adjust the path to vlc exe as needed The typical setting in VLC looks like this Figure 1 Screenshot network settings Show more options may have to be selected Be sure to set caching time and IP address if not done so on the c...

Страница 13: ... data for the separator string jworudfg83h23lsow2z04 The following line contains the content type and the next the length of the image data The typical structure of the stream data is jworudfg83h23lsow2z04 Content Type image jpeg Content Length 200976 jpeg data here jworudfg83h23lsow2z04 Content Type image jpeg Content Length 200437 ...

Страница 14: ...st be re armed This can be done using the web page Alternatively the webserver URL http ipaddress api rearmRingBuffer cgi can be used The URL allows supplying the number of post alarm images http ipaddress api rearmRingBuffer cgi post_trigger 2 The script returns a Json formatted string Below there is an example using curl on the commandline With libcurl such a call can be implemented in a C C pro...

Страница 15: ...1 This is in one of the private IP spaces IP Mask 255 255 0 0 Gateway 192 168 3 1 Not needed for test change for large nets DNS server 192 168 3 62 Not needed for test change for large nets Order number xxx Camera individual Default login data Web interface User admin Password leuze SSH User root Password rootLogin ...

Страница 16: ...nfigured Network settings Figure 3 Screenshot network settings Here you can choose between static address assignment and DHCP mode For static IP fill out the fields as needed And press Save data To use the new settings pressing Restart network is needed For DHCP mode no addresses are needed they are obtained from the DHCP server Services SSH and FTP Here SSH and FTP can be selected Figure 4 Screen...

Страница 17: ...set The admin password it the one used for the web server pages The root password is the one used for e g SSH connections Figure 6 Screenshot password selection Supply the new password and repeat it If the passwords are lost there is no way to reset the camera Update The update process needs a path to a firmware file Figure 7 Screenshot system update Please be patient The update process needs seve...

Страница 18: ... finished after two minutes Figure 8 Screenshot system reboot Factory reset Figure 9 Screenshot factory reset When you hit the button Factory reset network and image settings are reset and the camera is rebooted It comes up with the factory network and image settings ...

Страница 19: ...ing message Figure 12 Warning shown on page reload The image you see in image settings mode is a full screen image all sensor pixels shown regardless which image region of interest ROI is used This is done to allow selecting arbritary ROI for acquisition white balance and gain Switching the sensor and the acquisition to full screen mode needs some time so this warning is shown The warning message ...

Страница 20: ...mouse or by changing the values in the edit fields To be able to change one of the ROI select one in the Windows area Figure 14 Select ROI to change To change a ROI with the mouse press the left mouse button nearby a corner for resizing or in the middle of the ROI for moving it Figure 15 Resize a ROI using the mouse While you move or resize you will see the size and top left corner change Remark T...

Страница 21: ... Rounding the values is done automatically when moving or resizing the ROI with the mouse When you enter the values manually and leave the input box e g using the TAB key the values are rounded too 6 3 2 5 Binning and framerate Figure 17 Binning and framerate Under binning and framerate the binning mode can be changed Changing the binning directly affects the size of the outut jpeg image See the c...

Страница 22: ...h is corrected accordingly Figure 19 Enabling RTP 6 3 2 7 Gain control Gain control can be done automatically or manually For automatic gain control the pixels in the gain control window are used The gain control algorithm tries to adjust the image brightness so that the average grey value is reached inside the gain control ROI Figure 20 Automatic gain control Flicker free exposure is nice in a ro...

Страница 23: ... is calculated and the result is saved for the next reboot Figure 24 White balance 6 3 2 10 Image orientation Sometimes it is convenient to change the image orientation e g if the camera is installed upside down Image flip can be done using the flip checkboxes Figure 25 Image orientation Live image The live image page shows the live image using its current resolution To see the live image without ...

Страница 24: ...gure 27 Ringbuffer re arm download and display When the images are fetched from the ringbuffer and stored in the filesystem the web page changes Use the slider to watch the different images The button Download images can be used to download the images packed as ZIP file The button Rearm ringbuffer restarts the ringbuffer recording which waits for a trigger Post alarm images denotes the number of i...

Страница 25: ...stem information can be retrieved Additionally the licenses of the OpenSource components used can be viewed System information Figure 29 Screenshot system information This page shows the cameras system information In case of support request this information is needed ...

Страница 26: ...26 Licenses This page contains the information about the licenses of the OpenSource components used in the camera The page will look similar but not identical to the image below Figure 30 Licenses page ...

Страница 27: ...27 7 Appendix Data sheet key data Below you find a block diagram of the electronics and key data for the sensor Figure 31 Block diagram of the ectronics Figure 32 Sensor data ...

Отзывы: