background image

15


LETTERBOX SENTRY TG1/FG1 (revision. 1.0)


Setting the Lock Time


Follow this procedure to change the time at which you want the unit to lock 
the letterbox. The initial factory setting for the lock time is set to 5:00 PM.  


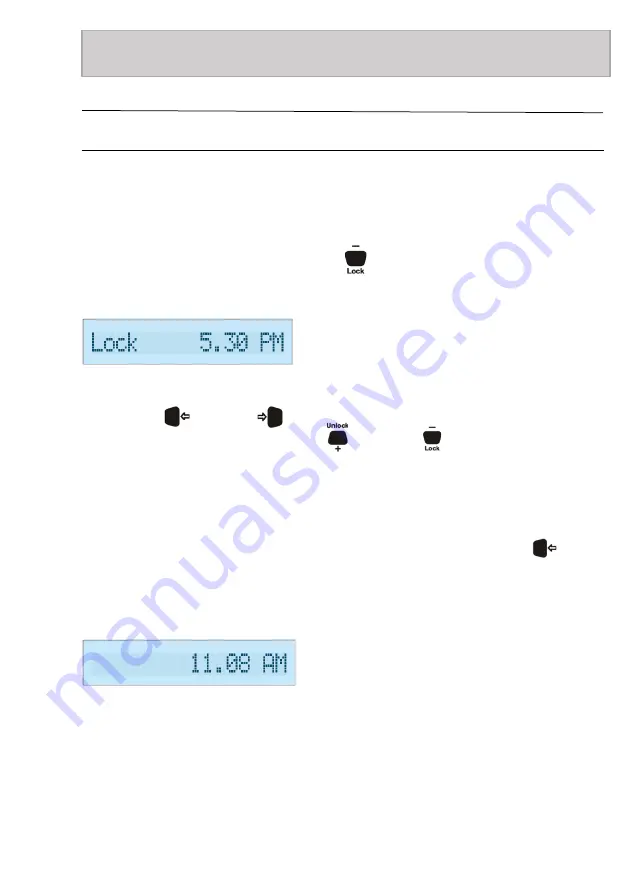
Press and hold the down-arrow button        for 4 seconds until the display 

shows ‘

Lock

’ followed by the 

current lock time. 


Use the left         and right         arrow buttons to move the cursor over the hour 
and minutes digits and use the plus       and minus       buttons to adjust the 
values as required. AM and PM will change automatically when changing the 
hour values. 


Once the desired lock time has been adjusted, press the left-arrow         button 
to move the cursor to left until the display clears and displays the current clock 
time.  


The unit’s 

lock time has now been stored.


 Setup 

Содержание FG1

Страница 1: ...LETTERBOX SENTRY TG1 FG1 Letterbox Security Device USER MANUAL...

Страница 2: ...ions about this manual our products or general feedback please contact Letterbox Sentry Ltd at the following address Letterbox Sentry Ltd Eagle Park Unit 23 Haslams Lane Derby DE21 4TS or Email us at...

Страница 3: ...batteries 8 Battery replacement 8 DC Power Adaptor FG1 Only 9 4 Installation 10 Guidance Safety 10 Tools required 10 Fitting the Letterbox Sentry TG1 11 Fitting the Letterbox Sentry FG1 12 5 Setup 14...

Страница 4: ...entryTM to lock and unlock your letterbox automatically at desired times protecting your home during the hours when you are not expecting legitimate mail Stopping unwanted objects from being posted in...

Страница 5: ...mm Round Clutch Head One Way Slot Drive Machine Screw 2 x Plain Stainless Steel Countersunk Head Self Tapping Screw N 6 x 1 2in Long 13mm Long FG1 Accelerant sensing unit FG1 Unit User manual 6 x AA A...

Страница 6: ...ash every 15 seconds when the batteries in the unit are running low It also briefly flashes when the unit s lock button is pressed 4 PWR LED Green The green LED periodically flashed to show that power...

Страница 7: ...tly 8 Right Arrow Button A short press will display the unit s current time Pressing and holding the button for 4 seconds allows the unit s internal clock to be modified It is also used to move the cu...

Страница 8: ...erant Vapour sensor FG1 Only 3 Locking pin Catch for locking pin 1 Screw holes for fixing to the door 2 Locking pin locating holes provided at different offsets to cater for varying letterbox flap dep...

Страница 9: ...with the ones on the unit Replace the battery compartment cover and fix in place with the two screws Battery Replacement When the BATT red LED flashes every 15 seconds and the sounder chirps every 5...

Страница 10: ...tionality will be turned off however the unit will continue to operate on its installed batteries locking and unlocking at its scheduled times When replacing the batteries ensure that they are replace...

Страница 11: ...ny DIY work ensure you take the necessary safety precautions such as wearing safety goggles for eye protection and gloves for protecting the hands also when using power tools always adhere to the manu...

Страница 12: ...tterbox flap using the one way slot drive machine screws NOTE The fixing screws are tamper proof and are one way only meaning you will not be able to unscrew them due to their design 5 Fit the 6 AA ba...

Страница 13: ...from the template If using a cone cutter also run the cone cutter in the hole on the reverse side of the flap to remove any burred metal created when making the hole 5 Ensure the drilled holes align...

Страница 14: ...or into the unit to supply power for the accelerant sensor operation This connector is a locking connector once inserted turn 90 clockwise to lock it in place Sensor Warming will show on the display f...

Страница 15: ...rrow buttons to move the cursor over the hour and minutes digits and use the plus and minus buttons to adjust the values as required AM and PM will change automatically when changing the hour values O...

Страница 16: ...lay shows Lock followed by the current lock time Use the left and right arrow buttons to move the cursor over the hour and minutes digits and use the plus and minus buttons to adjust the values as req...

Страница 17: ...y shows unlock followed by the current unlock time Use the left and right arrow buttons to move the cursor over the hour and minutes digits and use the plus and minus buttons to adjust the values as r...

Страница 18: ...cause of activation on the display If the tamper alarm is not silenced by a button press the green PWR LED will continue to flash every 2 seconds to alert the homeowner that there has been an alarm ac...

Страница 19: ...g connected or powered The sounder will chirp every 5 minutes to alert the homeowner Indicates that the DC power to the unit has been restored FG1 only Indicates that the 6 AA batteries are running lo...

Страница 20: ...sponsibility that the product Model name Letterbox Sentry included variants TG1 FG1 and all variations specified in the annex are in conformity with the provisions of the following EU directive s incl...

Страница 21: ...d and similar electrical appliances Safety Part 1 General requirements 2012 A13 2017 Document Short Description Issue Version 2014 30 EU Electromagnetic compatibility EMC EN 55014 1 Electromagnetic co...

Страница 22: ...Made in the UK...

Отзывы: