


62
NE1064TO Installation Guide
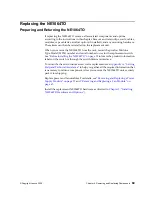
Replacing the Fan Module
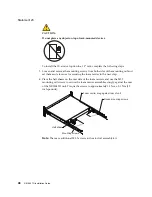
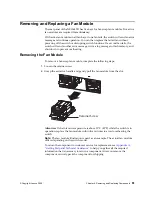
To replace a hot-swap fan module, complete the following steps:
1.
Select an empty fan module bay on the rear of the switch. If the target bay is
covered by a blank fan filler plate, loosen the retainer screw and slide the filler plate
out of the slot.
2.
Remove the new fan module from the antistatic shielded bag.
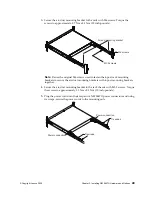
3.
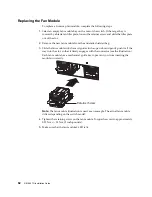
Slide the fan module into the card guides in the open slot and gently push it all the
way into the slot, so that it firmly engages with the connector (see the illustration).
Each fan module has a mechanical guide key to prevent you from inserting the
module incorrectly.
Note:
The fan module illustration is used as an example. The actual fan module
differs depending on the switch model.
4.
Tighten the retaining screw on the fan module. Torque the screw to approximately
0.25 Nm +/- 0.1 Nm (2 inch-pounds).
5.
Make sure that the fan module’s LED is lit.
Retainer Screw
Содержание ThinkSystem NE1064TO RackSwitch
Страница 1: ...Lenovo ThinkSystem NE1064TO RackSwitch Installation Guide For Network Operating System ...
Страница 6: ...6 Lenovo NE1064TO Installation Guide ...
Страница 14: ...14 NE1064TO Installation Guide ...
Страница 17: ... Copyright Lenovo 2020 17 Chapter 2 Switch Components This chapter describes the NE1064TO hardware components ...
Страница 54: ...54 NE1064TO Installation Guide ...
Страница 70: ...70 NE1064TO Installation Guide ...
Страница 88: ...88 NE1064TO Installation Guide ...


