background image

password, you cannot change the configurations that are protected by the supervisor password. For
more information, refer to “Using passwords” on page 51.

2. Use the cursor keys to select a tab; or use the cursor keys to locate an item and press Enter to select it.

Then a submenu is displayed.

Note:

Some menu items are displayed only if the computer supports the corresponding features.

3. Set the value of an item by doing one of the following:

• Press the F6 key to change to a higher value.

• Press the F5 key to change to a lower value.

Note:

Default values are in

boldface

.

4. To change other configurations, press the Esc key to exit the submenu and return to the parent menu.

5. When you complete the configuration, press the F10 key to save and exit. You also can select the

Restart

tab in the ThinkPad Setup menu, and restart your computer with one of the provided options.

Note:

You can press the F9 key to restore to the default settings.

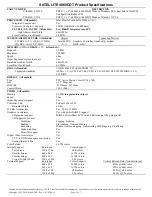
Main menu

When you enter the ThinkPad Setup program, you will first see the

Main

menu as follows:

UEFI BIOS Version

UEFI BIOS Date (Year-Month-Day)

Embedded Controller Version

ME Firmware Version

Machine Type Model

System-unit serial number

System board serial number

Asset Tag

CPU Type

CPU Speed

Installed memory

UUID

MAC address (Internal LAN)

Preinstalled OS License

UEFI Secure Boot

OA3 ID

OA2

Config menu

To change the configuration of your computer, select the

Config

tab from the ThinkPad Setup menu.

The following table lists the

Config

menu items. Default values are in

boldface

. The menu items might

change without notice. Depending on the model, the default value might vary.

Attention:

The default configurations are already optimized for you. Improper change of the configurations

might cause unexpected results.

66

ThinkPad T460p User Guide

Содержание ThinkPad T460p

Страница 1: ...ThinkPad T460p User Guide ...

Страница 2: ...e 161 The latest Safety Warranty and Setup Guide and the Regulatory Notice are available on the Lenovo Support Web site at http www lenovo com UserGuides First Edition January 2016 Copyright Lenovo 2016 LIMITED AND RESTRICTED RIGHTS NOTICE If data or software is delivered pursuant a General Services Administration GSA contract use reproduction or disclosure is subject to restrictions set forth in ...

Страница 3: ...e Windows operating system 16 Special keys 17 ThinkPad pointing device 18 TrackPoint pointing device 19 Trackpad 20 Trackpad touch gestures 21 Customizing the ThinkPad pointing device 21 Replacing the cap of pointing stick 22 Power management 22 Using the ac power 22 Checking the battery status 23 Charging the battery 23 Maximizing the battery life 23 Managing the battery power 24 Power saving mod...

Страница 4: ...s 102 Problems with drives and other storage devices 105 A software problem 107 Problems with ports and connectors 107 Chapter 9 Recovery overview 109 Recovery overview for the Windows 7 operating system 109 Creating and using a recovery media 109 Performing backup and recovery operations 110 Using the Rescue and Recovery workspace 111 Creating and using a rescue medium 112 Reinstalling preinstall...

Страница 5: ...0 A per phase 149 Japan notice for ac power cord 149 Lenovo product service information for Taiwan 149 Eurasian compliance mark 149 Brazil audio notice 150 Appendix C WEEE and recycling statements 151 Important WEEE information 151 Recycling information for China 152 Recycling information for Japan 152 Recycling information for Brazil 153 Battery recycling information for Taiwan 153 Battery recycl...

Страница 6: ...iv ThinkPad T460p User Guide ...

Страница 7: ...yboard by lifting your hands from the palm rest Protect yourself from the heat generated by the ac power adapter When the ac power adapter is connected to an electrical outlet and your computer it generates heat Extended contact with your body even through clothing may cause a skin burn Do not place the ac power adapter in contact with any part of your body while it is in use Never use it to warm ...

Страница 8: ...mited Warranty For more information see Warranty Information in the Safety Warranty and Setup Guide that comes with your computer Customer safety is important Our products are developed to be safe and effective However personal computers are electronic devices Power cords power adapters and other features can create potential safety risks that can result in physical injury or property damage espec...

Страница 9: ...rheating smoke sparks or fire Damage to a battery such as cracks dents or creases discharge from a battery or a buildup of foreign substances on the battery A cracking hissing or popping sound or strong odor that comes from the product Signs that liquid has been spilled or an object has fallen onto the computer product the power cord or power adapter The computer product power cord or power adapte...

Страница 10: ...walked on tripped over or pinched by objects Protect power cords and power adapters from liquids For instance do not leave your power cord or power adapter near sinks tubs toilets or on floors that are cleaned with liquid cleansers Liquids can cause a short circuit particularly if the power cord or power adapter has been stressed by misuse Liquids also can cause gradual corrosion of power cord ter...

Страница 11: ...his is a safety feature Do not defeat this safety feature by trying to insert it into a non grounded outlet If you cannot insert the plug into the outlet contact an electrician for an approved outlet adapter or to replace the outlet with one that enables this safety feature Never overload an electrical outlet The overall system load should not exceed 80 percent of the branch circuit rating Consult...

Страница 12: ... crush or puncture the battery Do not short circuit the battery or expose it to water or other liquids Keep the battery away from children Keep the battery away from fire Stop using the battery if it is damaged or if you notice any discharge or the buildup of foreign materials on the battery leads Store the rechargeable batteries or products containing the rechargeable batteries at room temperatur...

Страница 13: ...at depends on the amount of system activity and the battery charge level Extended contact with your body even through clothing could cause discomfort or even a skin burn Periodically take breaks from using the keyboard by lifting your hands from the palm rest and be careful not to use the keyboard for any extended length of time Do not operate your computer or charge the battery near flammable mat...

Страница 14: ...se in the installation and configuration procedures Do not use your computer until all internal parts enclosures are fastened into place Never use the computer when internal parts and circuits are exposed DANGER Connect and disconnect cables as described in the following procedures when installing moving or opening covers on this product or attached devices To connect 1 Turn everything OFF 2 First...

Страница 15: ...e computer s maximum wide band true RMS output voltage to 150 mV To help protect against hearing loss ensure that the headphones or earphones you use also comply with EN 50332 2 Clause 7 limits for a wide band characteristic voltage of 75 mV Using headphones that do not comply with EN 50332 2 can be dangerous due to excessive sound pressure levels If your Lenovo computer came with headphones or ea...

Страница 16: ...Save these instructions xiv ThinkPad T460p User Guide ...

Страница 17: ...nvironment on page 11 Lenovo programs on page 12 Locating computer controls connectors and indicators This section introduces the computer hardware features to give you the basic information you need to start using the computer Front view Figure 1 Front view 1 Camera available on some models 2 Microphones available on some models 3 Power button 4 Fingerprint reader 5 TrackPoint pointing stick 6 Tr...

Страница 18: ...following 1 Go to Control Panel and then change the view of Control Panel from Category to Large icons or Small icons 2 Click Power Options Choose what the power buttons do 3 Follow the instructions on the screen For more information see Lenovo programs on page 12 4 Fingerprint reader Fingerprint authentication provides simple and secure user access by associating your fingerprint with your passwo...

Страница 19: ...he Ethernet connector DANGER To avoid the risk of electrical shock do not connect the telephone cable to the Ethernet connector You can only connect an Ethernet cable to this connector The Ethernet connector has two indicators that show the status of the network connection When the green indicator is on the computer is connected to a LAN When the yellow indicator blinks data is being transmitted 4...

Страница 20: ...or to provide ac power to the computer and charge the battery 2 Always On USB 3 0 connector By default the Always On USB connector enables you to charge some mobile digital devices and smartphones in the following situations When your computer is on or in sleep mode When your computer is in hibernation mode or is turned off but connected to ac power If you want to charge these devices when your co...

Страница 21: ...ch while using the headset If you press it the headset microphone will be disabled and the integrated microphones on the computer will be enabled instead The combo audio connector does not support a conventional microphone For more information see Using audio features on page 31 5 Smart card slot available on some models Your computer might have a smart card slot For more information see Using a f...

Страница 22: ...yboard drainage holes can help drain out liquid from your computer if you accidentally spill water or drink over the keyboard 4 Speakers Your computer is equipped with a pair of stereo speakers Status indicators This topic helps you locate and identify the various status indicators on your computer 1 Fn Lock indicator The Fn Lock indicator shows the status of Fn Lock function For more information ...

Страница 23: ...hone mute indicator When the microphone mute indicator is on the microphones are muted 6 CapsLock indicator When the CapsLock indicator is on all the typed letters are uppercase 8 ac power status indicator This indicator shows the ac power charging status of the computer Amber The computer is connected to ac power and the charging status is 1 80 Green The computer is connected to ac power and the ...

Страница 24: ...e machine type and model information helps support technicians to identify your computer and provide faster service The following illustration shows the location of the machine type and model of your computer FCC ID and IC Certification information The FCC and IC Certification information is identified by a label located in the battery slot of your computer as shown in the following illustration 8...

Страница 25: ...ficate of Authenticity label affixed to the computer cover or inside the battery compartment The Certificate of Authenticity is your indication that the computer is licensed for a Windows 7 product and is preinstalled with a Windows 7 genuine version In some cases an earlier Windows version might be preinstalled under the terms of the Windows 7 Professional license downgrade rights Printed on the ...

Страница 26: ...features might vary or not apply To view the microprocessor of your computer do the following For Windows 7 Open the Start menu right click Computer and then click Properties For Windows 10 Do either of the following Open the Start menu and then click Settings If Settings is not displayed click All apps to display all programs and then click Settings System About Right click the Start button and t...

Страница 27: ...Camera available on some models Microphones available on some models Computer specifications This section lists the physical specifications for your computer Size Width 339 mm 13 35 inches Depth 235 mm 9 25 inches Height 24 4 mm 0 96 inch Heat output depending on the model 45 W 154 Btu hr maximum 65 W 222 Btu hr maximum Power source ac power adapter Sine wave input at 50 to 60 Hz Input rating of t...

Страница 28: ...novo programs Your computer comes with Lenovo programs to help you work easily and securely Note The available programs are subject to change without notice To learn more about the programs and other computing solutions offered by Lenovo go to http www lenovo com support Accessing Lenovo programs To access Lenovo programs on your computer do the following 1 Click the Start button to open the Start...

Страница 29: ...h Fingerprint Manager Windows 7 If your computer comes with a fingerprint reader the Fingerprint Manager Pro program Lenovo Fingerprint Manager program or Touch Fingerprint Manager program enables you to enroll your fingerprint and associate it with your passwords As a result fingerprint authentication can replace your passwords and enable simple and secure user access Hotkey Features Integration ...

Страница 30: ...ally displays messages to inform you about important notices from Lenovo such as alerts on system updates and alerts on conditions that require your attention Password Manager Windows 7 The Password Manager program automatically captures and fills in authentication information for Windows programs and Web sites Power Manager Windows 7 The Power Manager program provides convenient flexible and comp...

Страница 31: ...owing benefits Quicker service when you call Lenovo for help Automatic notification of free software and special promotional offers To register your computer with Lenovo go to http www lenovo com register and follow the instructions on the screen to register your computer If you are using a Windows 7 operating system you also can register your computer through the preinstalled Lenovo Product Regis...

Страница 32: ...see the help information system of the program Before you dispose of the data on the storage drive be sure to read Notice on deleting data from your storage drive on page 60 How do I give presentations or attach an external monitor often Ensure that you follow the procedure in the topic Connecting an external display on page 30 With the Extend desktop function you can display output on both the co...

Страница 33: ...the following 1 Go to Control Panel then change the view of Control Panel from Category to Large icons or Small icons 2 Click Keyboard In the Keyboard Properties window click the Fn and function keys tab 3 Select the options of your preference Enables or disables the Fn Lock function When the Fn Lock function is enabled The Fn Lock indicator is on To input F1 F12 press the function keys directly T...

Страница 34: ...ication area Then click Adjust screen brightness and make changes as desired Manage external displays Enables or disables the wireless features For more information on the wireless features refer to Wireless connections on page 26 For Windows 7 Opens Control Panel For Windows 10 Opens the Settings window For Windows 7 Opens Windows Search For Windows 10 Opens the Cortana search box Views the progr...

Страница 35: ...he functions of a traditional mouse such as pointing clicking and scrolling The TrackPoint pointing device consists of the following four components 1 Pointing stick 2 Left click button primary click button 3 Right click button secondary click button 4 Scroll bar To use the TrackPoint pointing device refer to the following instructions Note Place your hands in the typing position and use your inde...

Страница 36: ...e trackpad to perform all the pointing clicking and scrolling functions of a traditional mouse The trackpad can be divided into two zones 1 Left click zone primary click zone 2 Right click zone secondary click zone To use the trackpad refer to the following instructions Point Slide one finger across the surface of the trackpad to move the pointer accordingly Left click Press the left click zone 1 ...

Страница 37: ... with two fingers to display a shortcut menu Two finger scroll Put two fingers on the trackpad and move them in the vertical or horizontal direction This action enables you to scroll through the document Web site or apps Two finger zoom out Put two fingers on the trackpad and move them closer together to zoom out Two finger zoom in Put two fingers on the trackpad and move them farther apart to zoo...

Страница 38: ...s the faster you consume battery power Spend more time unplugged with ThinkPad batteries Mobility has revolutionized business by enabling you to take your work wherever you go With ThinkPad batteries you will be able to work longer without being tied to an electrical outlet Using the ac power The power to run your computer can come either from the battery or from ac power While you use ac power th...

Страница 39: ...computer user has different habits and needs it is difficult to predict how long a battery charge will last There are two main factors How much energy is stored in the battery when you begin to work The way you use your computer How often you access the storage drive How bright you make the computer display How often you use the wireless features Charging the battery It is recommended that you cha...

Страница 40: ...displayed For Windows 10 Open the Start menu click Power and then click Sleep Hibernation mode By using this mode you can turn off your computer completely without saving files or exiting any programs that are running When the computer enters hibernation mode all open programs folders and files are saved to the storage devices and then the computer turns off To put the computer into hibernation mo...

Страница 41: ...e battery installed is not supported by this system and will not charge Please replace the battery with the correct Lenovo battery for this system DANGER Do not attempt to disassemble or modify the battery Attempting to do so can cause an explosion or liquid leakage from the battery A battery other than the one specified by Lenovo or a disassembled or modified battery is not covered by the warrant...

Страница 42: ... or death do not 1 throw or immerse into water 2 allow it to heat to more than 100 C 212 F or 3 attempt to repair or disassemble it Dispose of it as required by local ordinances or regulations and your company s safety standards Connecting to the network Your computer has one or more network cards that enable you to connect your computer to the Internet and other network connections Ethernet conne...

Страница 43: ...ireless LAN feature To achieve the best connection use the following guidelines Place your computer so that there are as few obstacles as possible between the wireless LAN access point and the computer Open your computer lid to an angle of slightly more than 90 degrees If you use the wireless feature the 802 11 standards of your computer simultaneously with a Bluetooth option the data transmission...

Страница 44: ...ilt in wireless WAN card integrated with some wireless WAN technologies such as 1xEV DO HSPA 3G GPRS or LTE By using the built in wireless WAN card and the configuration utility that comes with your computer you can establish wireless WAN connections and monitor the connection status Note The wireless WAN service is provided by authorized service providers in some countries Tips for using the wire...

Страница 45: ...ssion speed can be delayed and the performance of the wireless feature can be degraded 1 Ensure that the Bluetooth feature is enabled For Windows 7 Press the wireless radios control key and turn on the Bluetooth feature For Windows 10 Do one of the following Open the Start menu and then click Settings If Settings is not displayed click All apps to display all programs and then click Settings Devic...

Страница 46: ...ay do the following For Windows 7 Right click on the desktop then click Screen resolution Detect For Windows 10 Right click on the desktop then click Display settings Detect Connecting a wireless display Note To use a wireless display ensure that both your computer and the external display support the Wi Di or Miracast feature For Windows 7 Open the Start menu and click Devices and Printers Add a ...

Страница 47: ... settings 2 Select the display that you want to configure 3 Change display settings as you want Note If you set a higher resolution for the computer display than the external display only part of the screen can be shown on the external display Using audio features Your computer is equipped with the following items Speakers Microphones Combo audio connector 3 5 mm 0 14 inch in diameter Your compute...

Страница 48: ... with a program refer to the help information system of the program Configuring camera settings You can configure the camera settings to meet your needs such as adjusting the quality of the video output To configure the camera settings do the following For Windows 7 Start the Communications Utility program and configure the camera settings as desired For Windows 10 Do one of the following Open the...

Страница 49: ...page 1 2 Make sure that the card is correctly oriented For the flash media card The metal contacts are facing down and pointing toward the card slot For the smart card The metal contacts are facing upward and pointing toward the card slot 3 Press the card firmly into the card slot If the plug and play feature is not enabled do the following 1 Go to Control Panel 2 Click Hardware and Sound 3 Click ...

Страница 50: ...to stop the card 3 Press the card to eject it from your computer 4 Remove the card and store it safely for future use Note If you do not remove the card from your computer after you eject the card from the Windows operating system the card can no longer be accessed To access the card you must remove it and then re insert it 34 ThinkPad T460p User Guide ...

Страница 51: ... directly over the World Wide Web All you need is an Internet connection and a credit card To shop at Lenovo go to http www lenovo com accessories services index html ThinkPad docking stations You can attach your computer to a supported docking station to expand working capability Depending on the model your computer might support the following docking stations ThinkPad Basic Dock ThinkPad Pro Doc...

Страница 52: ... your computer when you attach the docking station 4 Docking station connector Used to attach your computer Rear view 1 Always On USB connector Used to connect devices that are compatible with USB 2 0 or charge some mobile digital devices and smartphones when your computer is in sleep or hibernation mode 2 USB 2 0 connectors Used to connect devices that are compatible with USB 2 0 3 USB 3 0 connec...

Страница 53: ...ton to turn on or turn off the computer 2 Key lock indicator This indicator turns on when the system lock key is in the locked position 3 Docking status indicator This indicator turns on when your computer is docked 4 Eject button Press the eject button to release the computer from the docking station 5 Sliding adjuster Use the sliding adjuster as a guide to align the docking station connector on ...

Страница 54: ...ed to connect the ac power adapter 6 DisplayPort connector Used to attach a high performance monitor a direct drive monitor or other devices that use a DisplayPort connector 7 DVI connector Used to connect a monitor that supports Digital Visual Interface DVI connection Note The DVI connector provides a digital interface only This connector can only be used with a computer that supports DVI connect...

Страница 55: ...e locked position 3 Docking status indicator This indicator turns on when your computer is docked 4 Eject button Press the eject button to release the computer from the docking station 5 Sliding adjuster Use the sliding adjuster as a guide to align the docking station connector on your computer when you attach the docking station 6 Docking station connector Used to attach your computer 7 System lo...

Страница 56: ...of the one on the computer 5 ac power connector Used to connect the ac power adapter 6 DisplayPort connectors Used to attach a high performance monitor a direct drive monitor or other devices that use a DisplayPort connector 7 HDMI connector Used to connect a high definition television 8 DVI connector Used to connect a monitor that supports Digital Visual Interface DVI connection Note The DVI conn...

Страница 57: ...wing Note The ThinkPad Basic Dock does not have the system lock 1 Disconnect all cables and devices from the computer 2 Ensure that the system lock key is turned to the unlocked position horizontal 3 Align the top left corner of the computer with the position mark of the docking station Attach your computer to the docking station vertically until you hear a click 1 Then turn the system lock key to...

Страница 58: ...system lock 1 Disconnect all cables and devices from the computer 2 Ensure that the system lock key is turned to the unlocked position horizontal 3 Press the eject button until the computer moves up Then grasp both sides of the computer to remove it Connecting external displays to a docking station For the ThinkPad Pro Dock if you connect two external displays to the DisplayPort connector and the ...

Страница 59: ...s as shown in the drawing The security feature is different when the key is in different positions When the key is in position 1 the eject button of the docking station is locked and you cannot remove your computer The key lock indicator is on when the eject button is locked The security cable is locked When the key is in position 2 the eject button of the docking station is unlocked and you can r...

Страница 60: ...44 ThinkPad T460p User Guide ...

Страница 61: ...ight sources proper seating and the placement of your computer hardware can help you improve your performance and achieve greater comfort This example shows someone in a conventional setting Even when not in such a setting you can follow many of these tips Develop good habits and they will serve you well General posture Make minor modifications in your working posture to deter the onset of discomf...

Страница 62: ...ostures Making minor voluntary postural changes and taking short frequent work breaks are the key ingredients for healthy computing Your computer is light and mobile you can easily reposition your working surface to accommodate many posture modifications Work area setup options Familiarize yourself with all of your office furniture so that you know how to adjust your work surface seat and other wo...

Страница 63: ...s events such as error messages On Screen Keyboard If you prefer to type or enter data into your computer using a mouse joystick or other pointing device instead of a physical keyboard you can use On Screen Keyboard On Screen Keyboard displays a visual keyboard with all the standard keys You can select keys using the mouse or another pointing device or you can tap to select the keys if your comput...

Страница 64: ...ght prevent some items from fitting on the screen Customizable item size You can make the items on your screen easier to read by changing the item size To change the item size temporarily use the Magnifier tool in Ease of Access Center See Ease of Access Center on page 47 To change the item size permanently do the following Change the size of all the items on your screen 1 Go to Control Panel and ...

Страница 65: ...note of the following tips If you intend to use your computer or wireless services such as Internet and Bluetooth check with the airline for restrictions and availability of services before boarding the airplane If there are restrictions on the use of computers with wireless features on the airplane you must abide by those restrictions If necessary enable the Airplane mode before boarding In the A...

Страница 66: ...To purchase travel accessories go to http www lenovo com accessories 50 ThinkPad T460p User Guide ...

Страница 67: ...ode Note If a Windows password has been set you will be prompted to enter it Typing passwords When this icon is displayed type a power on password or a supervisor password When this icon is displayed type a user hard disk password To type a master hard disk password press F1 When the icon changes to type the master hard disk password Note To return to the icon press F1 again Power on password You ...

Страница 68: ...nceled Supervisor password The supervisor password protects the system information stored in the ThinkPad Setup program If you have set a supervisor password no one can change the configuration of the computer without the password It provides the following security features If only a supervisor password is set a password prompt is displayed when you try to start the ThinkPad Setup program Unauthor...

Страница 69: ...rd do the following a In the Enter Current Password field type the current supervisor password and press Enter b In the Enter New Password field type the new supervisor password and press Enter then retype the password in the Confirm New Password field and press Enter To remove a password do the following a In the Enter Current Password field type the current supervisor password and press Enter b ...

Страница 70: ...er Select User if you want to set only one hard disk password Select User Master if you want to set a user hard disk password and a master hard disk password for example if you are an administrator or a supervisor If you select User do the following a When a window for typing the new password opens type your new password in the Enter New Password field and press Enter b In the Confirm New Password...

Страница 71: ...ter then retype the new password in the Confirm New Password field and press Enter 4 A Setup Notice window is displayed Press Enter again to continue The user hard disk password is changed Note If you leave the Enter New Password and Confirm New Password fields blank and press Enter twice the user hard disk password is removed Tips on using the hard disk passwords You can set the minimum length of...

Страница 72: ...ncryption Windows BitLocker Drive Encryption is an integral security feature of some editions of the Windows operating system It can help you protect the operating system and data stored on your computer even if your computer is lost or stolen BitLocker works by encrypting all user and system files including the swap and hibernation files BitLocker uses a Trusted Platform Module to provide enhance...

Страница 73: ... on the model your computer might have a fingerprint reader Fingerprint authentication can replace your passwords such as the Windows password power on password and hard disk password In this way you can log in to your computer simply and securely To enable fingerprint authentication enroll your fingerprints first During the enrollment the fingerprints are associated with the Windows password auto...

Страница 74: ...cription 1 Off The fingerprint reader is not ready for tapping 2 Solid green The fingerprint reader is ready for tapping 3 Amber blinking The fingerprint cannot be authenticated Associating your fingerprints with your power on password and hard disk password To associate your fingerprints with your power on password and hard disk password do the following 1 Turn off and then turn on the computer 2...

Страница 75: ... an external fingerprint reader is attached Security Mode Specifies the settings of the security mode Password Authentication Enables or disables the password authentication Note This item is displayed only if High security mode is enabled Reset Fingerprint Data Select this item to erase all of the fingerprint data stored in either the internal or external fingerprint reader To change the settings...

Страница 76: ... delete all the data from the storage drive when you dispose of sell or hand over your computer You can destroy the data physically by smashing the storage drive with a hammer or magnetically by means of strong magnetic power thus making the data unreadable But it is recommended that you use the software payware or service pay service developed for that purpose The process might take several hours...

Страница 77: ...u detect and eliminate viruses Lenovo provides a full version of antivirus software on your computer with a free 30 day subscription After 30 days you must renew the license to continue receiving the antivirus software updates For more information about how to use your antivirus software refer to the help information system of your antivirus software Chapter 5 Security 61 ...

Страница 78: ...62 ThinkPad T460p User Guide ...

Страница 79: ...he C SWTOOLS directory to a removable storage device The supplement files for the Windows 7 operating system are in the C SWTOOLS OSFIXES directory The device drivers are in the C SWTOOLS DRIVERS directory The preinstalled programs are in the C SWTOOLS APPS directory 2 Start the ThinkPad Setup program See Using the ThinkPad Setup program on page 65 3 Select Startup Boot to display the Boot Priorit...

Страница 80: ...the operating system will not start correctly When you install the Windows 7 operating system you might need one of the following country or region codes Country or region Code Country or region Code China SC Netherlands NL Denmark DK Norway NO Finland FI Spain SP France FR Sweden SV Germany GR Taiwan and Hong Kong TC Italy IT United States US Japan JP Installing the Windows 10 operating system Be...

Страница 81: ...nnector you need to download and install the USB 3 0 driver To download the latest device drivers do the following 1 Go to http www lenovo com ThinkPadDrivers 2 Select your product name to view all the device drivers for your computer 3 Select the device drivers you that you need and follow the instructions on the screen Attention Do not download the device drivers from the Windows Update Web Alwa...

Страница 82: ...inkPad Setup menu and restart your computer with one of the provided options Note You can press the F9 key to restore to the default settings Main menu When you enter the ThinkPad Setup program you will first see the Main menu as follows UEFI BIOS Version UEFI BIOS Date Year Month Day Embedded Controller Version ME Firmware Version Machine Type Model System unit serial number System board serial n...

Страница 83: ...ption ROM for Legacy Only boot mode or Both with Legacy first Disabled Enabled Loads the Ethernet LAN Option ROM to enable startup from an integrated network device UEFI IPv4 Network Stack for UEFI Only boot mode or Both with UEFI first Disabled Enabled Enable or disable Internet Protocol Version 4 IPv4 network stack for the UEFI environment UEFI IPv6 Network Stack for UEFI Only boot mode or Both ...

Страница 84: ...ble the built in TrackPoint is enabled If you select Disable the built in TrackPoint is disabled Trackpad Disabled Enabled If you select Enable the built in Trackpad is enabled If you select Disable the built in Trackpad is disabled Fn and Ctrl Key swap Disabled Enabled Enable exchanges of Fn and Ctrl key action at the bottom left of the keyboard Disabled Fn key and Ctrl key behavior is as printed...

Страница 85: ...password prompt and ThinkPad Setup Shared Display Priority HDMI Display on dock Select the priority between shared display outputs HDMI and Dock displays share a single display output This option chooses which one is prioritized Total Graphics Memory 256MB 512MB Allocate total memory which Intel internal graphics device shares If you select 512MB the maximum usable memory might be reduced on the 3...

Страница 86: ...educe microprocessor throttling Balanced Balance sound temperature and performance Note Each scheme affects fan sound temperature and performance CPU Power Management Disabled Enabled Enable or disable the power saving feature that stops the microprocessor clock automatically when there are no computer activities Normally it is not necessary to change the setting Power Power On with AC Attach Disa...

Страница 87: ...Extension MEBx Setup If you select Permanently Disabled you will never be able to enable it again Be cautious when you want to use this option Note You can enter the MEBx Setup menu by pressing the Ctrl P key combination in the Startup Interrupt Menu window To display the Startup Interrupt Menu window press the black button or Enter key during the power on self test POST CIRA Timeout 0 255 Note Th...

Страница 88: ...page 52 Lock UEFI BIOS Settings Disabled Enabled Enable or disable the function that protects items in ThinkPad Setup from being changed by a user who does not have the supervisor password By default this is set to Disabled If you set the supervisor password and enable this function no one but you can change items in the ThinkPad Setup program Password at Unattended boot Disabled Enabled If you se...

Страница 89: ...ser action required Password Count Exceeded Error Disabled Enabled Select Enabled to show the POST 0199 error and prompt for the Security password Select Disabled to hide the POST 0199 error and proceed without any user action required Set Minimum Length Disabled Password length options Specify a minimum length for the power on password and hard disk password By default this is set to Disabled If ...

Страница 90: ...d Enable or disable password authentication This item is displayed only if you have selected High for the Security Mode option Fingerprint Reset Fingerprint Data Enter This option is used to erase all fingerprint data stored in the fingerprint reader and reset settings to the factory state As a result any power on security features previously enabled will not be able to work until they are re enab...

Страница 91: ...p Enabled Disabled This option is displayed if Security Chip Selection is Intel PTT Enable Security chip is functional Disabled Security chip is hidden and is not functional Clear Security Chip Enter Clear the encryption key Note This item is displayed only if you have selected Active for the Security Chip option Intel TXT Feature Disabled Enabled Enable or disable the Intel Trusted Execution Tech...

Страница 92: ...rms If after choosing Enabled you find that a program does not run correctly select Disabled and reset the setting Intel Virtualization Technology Disabled Enabled If you select Enabled a Virtual Machine Monitor VMM can utilize the additional hardware capabilities provided by Virtualization Technology Virtualization Intel VT d Feature Disabled Enabled Intel VT d is Intel Virtualization Technology ...

Страница 93: ...the fingerprint reader Internal Device Access Bottom Cover Tamper Detection Disabled Enabled Enable Enables the tamper detection Disabled Disables the tamper detection If the tamper detection is enabled a supervisor password is required to boot the system Bottom Cover Tamper Detection will not take effect unless the supervisor password is enabled Anti Theft Computrace Module Activation Disabled En...

Страница 94: ...ed to clear the current platform key and put the system into Setup Mode You can install your own platform key and customize the Secure Boot signature databases in Setup Mode Secure Boot mode will be set to Custom Mode Restore Factory keys Yes No This option is used to restore all keys and certificates in Secure Boot databases to factory defaults Any customized Secure Boot settings will be erased a...

Страница 95: ...mputer from starting once detects the change of startup sequence To change the startup sequence temporarily so that the computer starts from a desired drive do the following 1 Restart the computer When the logo screen is displayed press the F12 key 2 Select the device that you want the computer to start from Note The Boot menu will be displayed if the computer cannot start from any devices or the ...

Страница 96: ...n during the POST Quick The logo screen is displayed Diagnostics Test messages are displayed Note You can also enter Diagnostic mode by pressing Esc during POST Option Key Display Disabled Enabled If you select Disabled then the message To interrupt normal startup press Enter is not displayed during the POST Boot Device List F12 Option Disabled Enabled If you select Enabled the F12 key is recogniz...

Страница 97: ...onfigured and operational you can manage it by using the software and the manageability features that are already integrated into the client computer and the network Desktop Management Interface The UEFI BIOS of your computer supports an interface called System Management BIOS SMBIOS Reference Specification version 2 6 1 SMBIOS provides information about the hardware components of your computer It...

Страница 98: ...the Wake on LAN feature do the following 1 Start the ThinkPad Setup program See Using the ThinkPad Setup program on page 65 2 Select Config Network The Network submenu is displayed 3 Select a corresponding option for the Wake on LAN feature 4 Press the F10 key to save and exit Defining a Network Boot sequence When the computer wakes on LAN the computer boots from the device as specified on the Net...

Страница 99: ...nstall unused application programs Note You also might want to look for program duplication or overlapping versions Clean out your Inbox Sent and Trash folders from your e mail client program Back up your data at least once a week If critical data is present it is a good idea to perform a daily backup operation Lenovo has many backup options available for your computer Rewritable optical drives ar...

Страница 100: ...driver for a component if you notice poor performance from that component or if you added a new component This might eliminate the driver as the potential cause of a problem Getting the latest drivers from the Web site You can download and install updated device drivers from the Lenovo Web site by doing the following 1 Go to http www lenovo com ThinkPadDrivers 2 Select the entry for your computer ...

Страница 101: ...n electrostatic charge above a certain limit however can increase the risk of ESD Therefore when using the computer close to an appliance that can produce negative ions give special attention to the following Avoid directly exposing your computer to the air from an appliance that can produce negative ions Keep your computer and peripherals as far as possible from such an appliance Wherever possibl...

Страница 102: ...ng the fingerprint reader with a dirty finger If you notice any of the following conditions gently clean the surface of the fingerprint reader with a dry soft lint free cloth The surface of the fingerprint reader is dirty or stained The surface of the fingerprint reader is wet The fingerprint reader often fails to enroll or authenticate your fingerprint Registering your computer Register your Thin...

Страница 103: ...th a brush or cool air from a hair dryer Cleaning your computer display To clean the computer display do the following 1 Gently wipe the display with a dry soft lint free cloth If you see a scratchlike mark on your display it might be a stain transferred from the keyboard or the TrackPoint pointing stick when the cover was pressed from the outside 2 Wipe or dust the stain gently with a soft dry cl...

Страница 104: ...88 ThinkPad T460p User Guide ...

Страница 105: ...y default state For more information see Creating and using a recovery media on page 109 To run the Lenovo Solution Center program see Accessing Lenovo programs on page 12 For additional information refer to the Lenovo Solution Center help system Note If you are unable to isolate and repair the problem yourself after running Lenovo Solution Center program save and print the log files created by th...

Страница 106: ... consult the user manual for other customer replaceable components that are attached to your computer If the computer still does not start up call the Customer Support Center and a Customer Support Specialist will assist you Spills on the keyboard With a mobile computer there are increased chances of spilling liquids on the keyboard Because most liquids conduct electricity liquid spilled on the ke...

Страница 107: ...and try again To clear the error enter the ThinkPad Setup program Message 1802 Unauthorized network card is plugged in Power off and remove the network card Solution The wireless network card is not supported on this computer Remove it Message 1820 More than one external fingerprint readers are attached Solution Power off and remove all but the reader that you set up within your main operating sys...

Страница 108: ...ue Solution Replace the battery with the correct Lenovo battery for this computer If you still see the same error message contact Lenovo service to have the computer serviced Errors without messages Problem My screen keeps blanking when I do not want it to Solution If your computer is preinstalled with the Windows 7 operating system you can disable any system timers such as the LCD turn off timer ...

Страница 109: ...ibernation mode Beep errors Table 5 Beep errors Beeps Solution One short beep pause three short beeps pause three more short beeps pause and one short beep 1 3 3 1 beeps Memory problem Shut down the computer immediately and have the computer serviced One long and two short beeps Video problem Shut down the computer immediately and have the computer serviced Three short beeps pause one short beep p...

Страница 110: ...ce Manager If you are prompted for an administrator password or confirmation type the password or provide confirmation 2 If the exclamation mark is displayed next to the adapter name under Network adapters you might not be using the correct driver or the driver might have been disabled To update the driver right click the highlighted adapter 3 Click Update Driver Software and then follow the instr...

Страница 111: ...his case sensitive information A wireless WAN problem Problem A message is displayed indicating that an unauthorized WAN card is installed Solution The WAN card is not supported on this computer Remove the WAN card Note Some models do not have a wireless WAN card Bluetooth problems Note Check your connection anytime and make sure that no other Bluetooth enabled device is searching for the device t...

Страница 112: ...ointing device setting window Keyboard problems Problem All or some keys on the keyboard do not work Solution If an external numeric keypad is connected 1 Turn off the computer 2 Remove the external numeric keypad 3 Turn on the computer and try using the keyboard again If the keyboard problem is resolved carefully reconnect the external numeric keypad and the external keyboard Make sure that you h...

Страница 113: ...monitor click the Detect button 4 Select the external monitor and set Resolution 5 Do one of the following For Windows 7 Click Advanced settings For Windows 10 Click Display adapter properties 6 Click the Monitor tab Check the monitor information to make sure that the monitor type is correct If the monitor type is correct click OK to close the window otherwise proceed with the following steps 1 If...

Страница 114: ...onitor supports the same resolution as the computer display or a higher resolution view output on the external monitor or on both the external monitor and the computer display If the external monitor supports a lower resolution than the computer display view output on the external monitor only If you view output on both the computer display and the external monitor the external monitor screen will...

Страница 115: ...s click OK to close the window otherwise do the following 7 If more than one monitor type is displayed select Generic PnP Monitor or Generic Non PnP Monitor 8 Click Properties If you are prompted for an administrator password or confirmation type the password or provide confirmation 9 Click the Driver tab 10 Click Update Driver 11 Click Browse my computer for driver software and then click Let me ...

Страница 116: ...d do one of the following For Windows 7 Click Screen resolution For Windows 10 Click Display settings show the displayed window in full screen and then click Advanced display settings Note If your computer cannot detect the external monitor click the Detect button 4 Click the Monitor 2 icon 5 Select Extend these displays for multiple displays 6 Click the Monitor 1 icon for the primary display the ...

Страница 117: ...to the setup menu For details see the documentation that comes with the monitor Audio problems Problem Wave or MIDI sound does not play correctly Solution Make sure that the built in audio device is configured correctly 1 Go to Control Panel 2 Click Hardware and Sound 3 Click Device Manager If you are prompted for an administrator password or confirmation type the password or provide confirmation ...

Страница 118: ...gain be sure to set those speakers as the default device The procedure is as follows 1 Go to Control Panel and then change the view of Control Panel from Category to Large icons or Small icons 2 Click the SmartAudio icon The SmartAudio window opens 3 Look at the playback devices If you have attached headphones the headphones will be automatically set as the default device and the icon for that hea...

Страница 119: ...er and the working electrical outlet but the power adapter power plug icon is not displayed in the Windows notification area Solution Do the following 1 Make sure that the connection of the ac power adapter is correct For instructions on connecting the ac power adapter see Safety Warranty and Setup Guide that comes with your computer 2 If the connection of the ac power adapter is correct turn off ...

Страница 120: ...orks in this computer A power button problem Problem The system does not respond and you cannot turn off the computer Solution Turn off the computer by pressing and holding the power button for 4 seconds or more If the system is still not reset remove the ac power adapter and the battery Boot problems Print these instructions now and keep them with your computer for reference later If you receive ...

Страница 121: ... off your computer is in power off state or hibernation mode Connect the ac power adapter to the computer then press the power button to resume operation If the system still does not return from sleep mode your system might stop responding and you might not be able to turn off the computer In this case you need to reset the computer If you have not saved your data it might be lost To reset the com...

Страница 122: ...connector is firmly connected to the computer If you use an option that has a bay for installing the drive make sure that the option is firmly connected to the computer and works properly Make sure that the drive tray is firmly closed Make sure that the device drivers are correctly installed Problem You hear a noise from the drive when the CD DVD or CD RW disc is spinning Solution If the disc is n...

Страница 123: ... application works when it is run on some other computer If an error message is displayed while you are using the application refer to the manuals supplied with the application If the application still does not run correctly contact your place of purchase or a service representative for help Problems with ports and connectors The following are the most common problems with ports and connectors A U...

Страница 124: ...108 ThinkPad T460p User Guide ...

Страница 125: ...tart the Symantec Norton Ghost program do the following 1 Click Start Run The Run window opens 2 Type cmd in the field Then click OK 3 Type ghost align 1mb and press Enter Acronis True Image 2010 or later Paragon Backup Recovery 10 Suit or later Paragon Backup Recovery 10 Home or later Creating and using a recovery media You can use recovery media to restore the hard disk drive or hybrid drive to ...

Страница 126: ... Microsoft Office or Microsoft Works preinstalled If you need to recover or reinstall your Microsoft Office or Microsoft Works programs you must use the Microsoft Office CD or Microsoft Works CD These discs are provided only with computers preinstalled with Microsoft Office or Microsoft Works Performing backup and recovery operations The Rescue and Recovery program enables you to back up all your ...

Страница 127: ...es from a Rescue and Recovery backup located on your local hard disk drive or hybrid drive a USB device or a network drive Restore your hard disk drive or hybrid drive from a Rescue and Recovery backup If you have backed up your hard disk drive or hybrid drive using the Rescue and Recovery program you can restore the hard disk drive or hybrid drive from a Rescue and Recovery backup even if you can...

Страница 128: ...osoft Office or Microsoft Works Creating and using a rescue medium With a rescue medium such as a disc or a USB hard disk drive you can recover the computer from failures that prevent you from gaining access to the Rescue and Recovery workspace on your hard disk drive or hybrid drive Notes 1 The recovery operations you can perform using a rescue medium vary depending on the operating system 2 The ...

Страница 129: ...the APPS folder The folder contains several subfolders named for the various preinstalled applications 4 Open the subfolder for the application you want to reinstall 5 Double click Setup and then follow the on screen steps to reinstall the application Reinstalling preinstalled device drivers Attention When you reinstall device drivers you are changing the current configuration of your computer Rei...

Страница 130: ...or permanently change the startup device sequence see Startup menu on page 79 It is important to create a rescue medium and a set of recovery media as early as possible and store them in a safe place for future use Recovery overview for the Windows 10 operating system The Windows recovery programs enable you to reset your computer or use advanced startup options It is recommended that you create a...

Страница 131: ...aged Creating a recovery USB drive The USB drive that you use to create the recovery USB drive must be at least 16 GB of storage The actual USB capacity that is required depends on the size of the recovery image Attention The creation process deletes anything stored on the USB drive To avoid data loss make a backup copy of all the data that you want to keep To create a recovery USB drive do the fo...

Страница 132: ...out 5 Click Troubleshoot to display the optional recovery solutions 6 Select a corresponding recovery solution according to your situation Then follow the instructions on the screen to complete the process 116 ThinkPad T460p User Guide ...

Страница 133: ...apters memory modules and other circuit boards by the edges Never touch exposed circuitry Prevent others from touching components When you install a static sensitive option or CRU touch the static protective package that contains the part to a metal expansion slot cover or other unpainted metal surface on the computer for at least two seconds This reduces static electricity in the package and your...

Страница 134: ...ctured by Lenovo or an authorized builder The system does not support unauthorized batteries or batteries designed for other systems If an unauthorized battery or a battery designed for another system is installed the system will not charge Attention Lenovo has no responsibility for the performance or safety of unauthorized batteries and provides no warranties for failures or damage arising out of...

Страница 135: ... battery do the following 1 Turn off the computer Then disconnect the ac power adapter and all cables from the computer 2 Close the computer display and turn the computer over 3 Slide the battery latch 1 to the unlocked position and detach the battery 2 from the base cover on the left 4 Slide the other battery latch 1 to the unlocked position and detach the battery 2 from the base cover on the rig...

Страница 136: ... print these instructions Read the important safety information first See Important safety information on page vi Note Depending on the model your computer might look slightly different from the illustrations in this topic To replace the bottom cover do the following 1 Turn off the computer Then disconnect the ac power adapter and all cables from the computer 2 Remove the battery See Replacing the...

Страница 137: ...3 Remove the rubber caps 4 Loosen the screws that secure the bottom cover 1 and then remove the bottom cover 2 3 Chapter 10 Replacing devices 121 ...

Страница 138: ...art print these instructions Read the important safety information first See Important safety information on page vi To replace the coin cell battery do the following 1 Turn off the computer Then disconnect the ac power adapter and all cables from the computer 2 Close the computer display and turn the computer over 3 Remove the battery See Replacing the battery on page 118 4 Remove the bottom cove...

Страница 139: ...n Connect the ac power adapter and all cables After you replace the coin cell battery reset the system date and time in the ThinkPad Setup program See Date and Time menu on page 72 Replacing the keyboard Before you start print these instructions Read the important safety information first See Important safety information on page vi To remove the keyboard do the following 1 Turn off the computer Th...

Страница 140: ...r over 3 Remove the battery See Replacing the battery on page 118 4 Remove the rubber caps 5 Find the keyboard multi tool in the shipping package of the new keyboard The following illustration shows a keyboard multi tool 124 ThinkPad T460p User Guide ...

Страница 141: ...the keyboard frame use the flat end of the multi tool in the shipping package of the new keyboard to slide the keyboard forward by 2 5 mm 0 1 inch 7 Use the cross end of the multi tool to loosen the screws Chapter 10 Replacing devices 125 ...

Страница 142: ... can see the connectors on the bottom side of the keyboard Then turn over the keyboard as shown by arrow 2 9 Put the keyboard on the palm rest and detach the connectors Then remove the keyboard To install the new keyboard do the following 126 ThinkPad T460p User Guide ...

Страница 143: ... turn over the keyboard 2 Insert the keyboard into the keyboard bezel as shown Ensure that the front edge of the keyboard the edge that is close to the display is under the frame of the keyboard bezel Chapter 10 Replacing devices 127 ...

Страница 144: ...ed completely Otherwise reveal the screw heads by sliding the keyboard frame forward with the flat end of the multi tool 4 Tighten the screws with the cross end of the multi tool to secure the keyboard in place 128 ThinkPad T460p User Guide ...

Страница 145: ...ding the keyboard frame otherwise the keyboard frame cannot be moved 6 Insert the flat end of the multi tool into the sides of the keyboard as shown to push the keyboard frame backward Ensure that there is no gap between the keyboard frame and keyboard bezel Note Do not press and hold the keys while sliding the keyboard frame otherwise the keyboard frame cannot be moved Chapter 10 Replacing device...

Страница 146: ...he storage drive are not designed for frequent changes or drive swapping Do not drop the drive or subject it to physical shocks Put the drive on a material such as soft cloth that absorbs any physical shocks Do not apply pressure to the cover of the drive Do not touch the connector Before removing the storage drive make a backup copy of all the information on it and then turn off the computer Neve...

Страница 147: ...5 Remove the screw that secures the storage drive 6 Remove the storage drive Chapter 10 Replacing devices 131 ...

Страница 148: ...s Replacing a wireless WAN card Before you start print these instructions Read the important safety information first See Important safety information on page vi Note This information is only for the user installable modules Attention Before you start installing a wireless WAN card touch a metal table or a grounded metal object This action reduces any static electricity from your body Static elect...

Страница 149: ...ge 118 4 Remove the bottom cover See Replacing the bottom cover on page 120 5 If a tool is provided with the new card to help you disconnect cables use the tool to disconnect the cables from the old card 1 If no such a tool is provided hold the cable connector and gently disconnect each cable from the old card Then remove the screw 2 The card pops up 6 Remove the card Chapter 10 Replacing devices ...

Страница 150: ...acing a memory module Before you start print these instructions and read Important safety information on page vi Increasing memory capacity is an effective way to make programs run faster Note The operating speed of a memory module has dependency on the system configuration In some conditions the memory module in your computer might not be able to operate at the maximum speed Attention Before you ...

Страница 151: ...r display and turn it over 3 Remove the battery See Replacing the battery on page 118 4 Remove the bottom cover See Replacing the bottom cover on page 120 5 Open the film and hold it when you are replacing the memory module 6 Open the latches on both sides of the memory slot at the same time 1 Then remove the memory module 2 Chapter 10 Replacing devices 135 ...

Страница 152: ...y module is firmly installed in the slot and cannot be moved easily Then release the hand holding the film Attention Do not touch the contact edge of the memory module Otherwise the memory module might get damaged 8 Reinstall the bottom cover See Replacing the bottom cover on page 120 9 Reinstall the battery See Replacing the battery on page 118 10 Turn the computer over again Connect the ac power...

Страница 153: ...r computer Recording problem symptoms and details Collect the answers to the questions below before you call for help Then you will be able to get help as quickly as possible What is the problem Is it continuous or intermittent Is there an error message What is the error code if any What operating system are you using Which version Which software programs were running at the time of the problem Ca...

Страница 154: ...nformation or the diagnostic programs might tell you that you need additional or updated device drivers or other software You can get the latest technical information and download device drivers and updates from the Lenovo Web site at http www lenovo com support Lenovo Support Web site Technical support information is available on the Lenovo Support Web site at http www lenovo com support This Web...

Страница 155: ...ur computer monitor and other components or your proof of purchase Description of the problem Exact wording of any error messages Hardware and software configuration information for your system Telephone numbers For a list of the Lenovo Support phone numbers for your country or region go to http www lenovo com support phone or refer to the Safety Warranty and Setup Guide that comes with your compu...

Страница 156: ...140 ThinkPad T460p User Guide ...

Страница 157: ...formation about how to use the Ubuntu operating system To access the help system from the Unity move your pointer to the Launch bar and then click the Help icon If you cannot find the Help icon from the Launch bar click the Search icon and type Help to search for it To learn more about the Ubuntu operating system go to http www ubuntu com Getting support information If you need help service techni...

Страница 158: ...ess feature Integrated wireless local area network LAN WPA WPA2 PSK The following section lists components and features supported by some computer models running the Ubuntu operating system Bluetooth audio profiles Display 3D graphics Multiple display Keyboard Function keys Trackpad Horizontal scrolling Vertical scrolling Micro SIM card The following list provides information about components and ...

Страница 159: ... Surround audio Modems Smart card reader Docking station connector Secure Digital eXtended Capacity SDXC Appendix A Supplemental information on the Ubuntu operating system 143 ...

Страница 160: ...144 ThinkPad T460p User Guide ...

Страница 161: ...ned to be interoperable with any wireless LAN product that is based on Direct Sequence Spread Spectrum DSSS Complementary Code Keying CCK and or Orthogonal Frequency Division Multiplexing OFDM radio technology and is compliant to The 802 11b g Standard 802 11a b g 802 11n or 802 11ac on Wireless LANs as defined and approved by the Institute of Electrical and Electronics Engineers The Wireless Fide...

Страница 162: ...proprietor of a building or responsible representatives of an organization For example these situations and areas might include the following On board of airplanes in hospitals or near petrol stations blasting areas with electro explosive devices medical implants or body worn electronic medical devices such as pace makers In any other environment where the risk of interference to other devices or ...

Страница 163: ...mission notices Federal Communications Commission Declaration of Conformity The following information refers to the ThinkPad T460p machine type 20FW and 20FX This equipment has been tested and found to comply with the limits for a Class B digital device pursuant to Part 15 of the FCC Rules These limits are designed to provide reasonable protection against harmful interference in a residential inst...

Страница 164: ...22 The limits for Class B equipment were derived for typical residential environments to provide reasonable protection against interference with licensed communication devices EU contact Lenovo Einsteinova 21 851 01 Bratislava Slovakia German Class B compliance statement Deutschsprachiger EU Hinweis Hinweis für Geräte der Klasse B EU Richtlinie zur Elektromagnetischen Verträglichkeit Dieses Produk...

Страница 165: ...eichen CE zu führen Verantwortlich für die Konformitätserklärung nach Paragraf 5 des EMVG ist die Lenovo Deutschland GmbH Meitnerstr 9 D 70563 Stuttgart Informationen in Hinsicht EMVG Paragraf 4 Abs 1 4 Das Gerät erfüllt die Schutzanforderungen nach EN 55024 und EN 55022 Klasse B Korea Class B compliance statement Japan VCCI Class B compliance statement Japan compliance statement for products whic...

Страница 166: ...Brazil audio notice Ouvir sons com mais de 85 decibéis por longos períodos pode provocar danos ao sistema auditivo 150 ThinkPad T460p User Guide ...

Страница 167: ...to indicate that the product is not to be thrown away but rather put in the established collection systems for reclaiming these end of life products Users of electrical and electronic equipment EEE with the WEEE marking must not dispose of end of life EEE as unsorted municipal waste but use the collection framework available to them for the return recycle and recovery of WEEE and to minimize any p...

Страница 168: ...e substances To properly dispose of disused components such as a printed circuit board or drive use the methods described above for collecting and recycling a disused computer or monitor Disposing of disused lithium batteries from Lenovo computers A button shaped lithium battery is installed inside your Lenovo computer to provide power to the computer clock while the computer is off or disconnecte...

Страница 169: ...dance with European Directive 2006 66 EC concerning batteries and accumulators and waste batteries and accumulators The Directive determines the framework for the return and recycling of used batteries and accumulators as applicable throughout the European Union This label is applied to various batteries to indicate that the battery is not to be thrown away but rather reclaimed upon end of life pe...

Страница 170: ...of a lithium battery insulate it with vinyl tape contact your place of purchase or a waste disposal operator and follow their instructions Disposing of battery packs from Lenovo products Your Lenovo device might contain a lithium ion battery pack or a nickel metal hydride battery pack You can find details on the battery pack in the product documentation If you need to dispose of a battery pack ins...

Страница 171: ...ardous substances in electrical and electronic equipment RoHS recast or RoHS 2 For more information about Lenovo worldwide compliance on RoHS go to http www lenovo com social_responsibility us en RoHS_Communication pdf Turkish RoHS The Lenovo product meets the requirements of the Republic of Turkey Directive on the Restriction of the Use of Certain Hazardous Substances in Waste Electrical and Elec...

Страница 172: ...China RoHS 156 ThinkPad T460p User Guide ...

Страница 173: ...novo encourages you to make efficient use of energy an integral part of your day to day operations To help in this endeavor Lenovo has preset the following power management features to take effect when your computer has been inactive for a specified length of time By using ENERGY STAR qualified products and taking advantage of the power management features of the computer you can help reduce the c...

Страница 174: ...n and prolong the time in sleep mode by disabling the setting of Wake on LAN for sleep mode To disable the setting of Wake on LAN for sleep mode do the following 1 Go to Control Panel and click Hardware and Sound Device Manager 2 In the Device Manager window expand Network adapters 3 Right click your network adapter device and click Properties 4 Click the Power Management tab 5 Clear the Allow thi...

Страница 175: ... U S and or other countries Microsoft Windows Direct3D BitLocker and Cortana are trademarks of the Microsoft group of companies Mini DisplayPort mDP and DisplayPort are Trademarks of the Video Electronics Standards Association The terms HDMI and HDMI High Definition Multimedia Interface are trademarks or registered trademarks of HDMI Licensing LLC in the United States and other countries Other com...

Страница 176: ...160 ThinkPad T460p User Guide ...

Страница 177: ...blication Lenovo may make improvements and or changes in the product s and or the application s described in this publication at any time without notice The products described in this document are not intended for use in implantation or other life support applications where malfunction may result in injury or death to persons The information contained in this document does not affect or change Len...

Страница 178: ...icense including any Linux agreement s which may accompany software included with this product Lenovo may update this document at any time without notice To obtain the most up to date documentation for your computer go to http www lenovo com support 162 ThinkPad T460p User Guide ...

Страница 179: ......

Страница 180: ......

Отзывы: