


Figure 24. Removing the microprocessor
7. Make sure that the small handle is in the raised position and the microprocessor retainer is fully open.
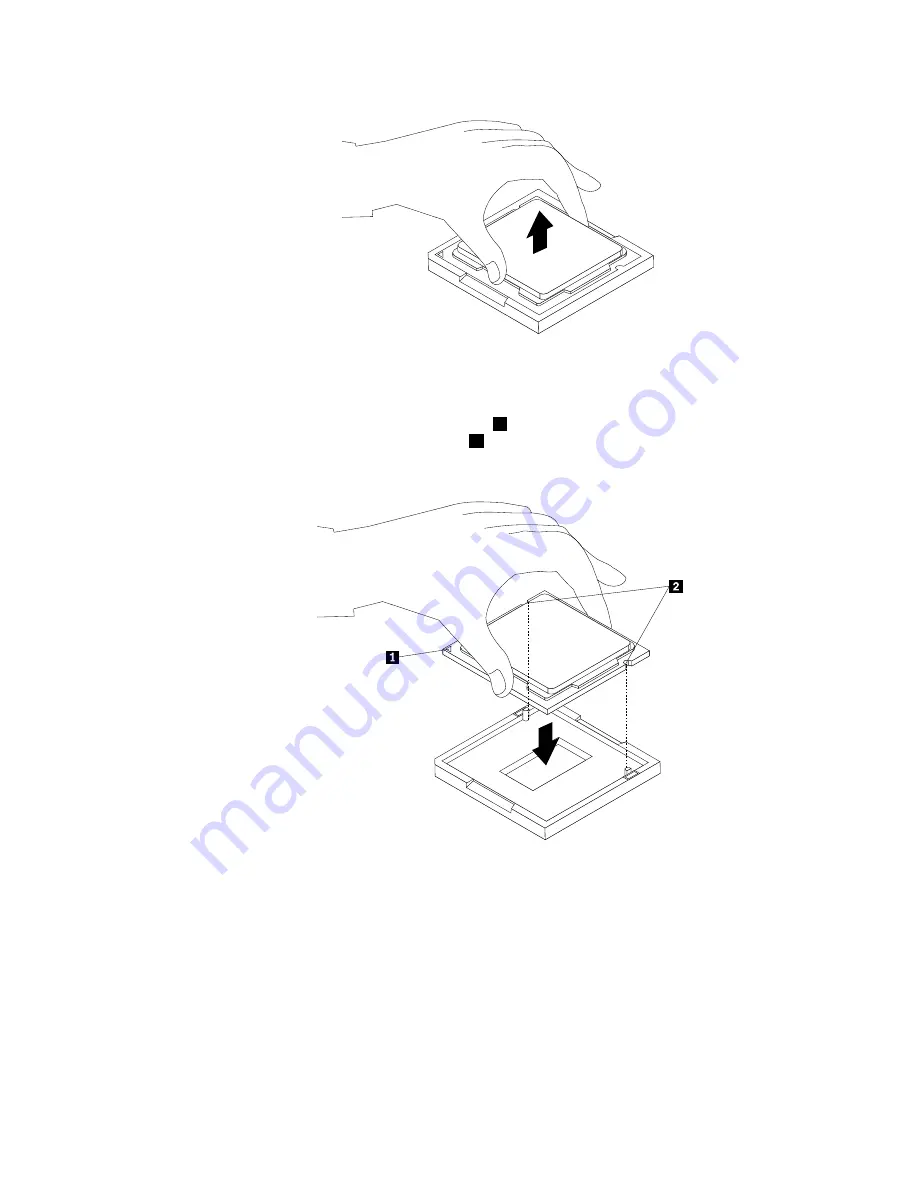
8. Hold the new microprocessor and align the notches
2
on it with the alignment keys in the
microprocessor socket, or align the small triangle
1
on one corner of the new microprocessor with the
corresponding beveled corner of the microprocessor socket.
Figure 25. Installing the microprocessor
9. Lower the new microprocessor straight down into the microprocessor socket on the system board.
10. Close the microprocessor retainer and lock it into position with the small handle to secure the new
microprocessor in the socket.
11. Reinstall the heat sink and the fan duct. See “Replacing the heat sink” on page 83.
12. Reinstall any other parts or reconnect any other cables you removed.
13. To complete the installation or replacement, go to “Completing the parts replacement” on page 110.
Chapter 8
.
Replacing FRUs
87
Содержание ThinkCentre M90z
Страница 2: ......
Страница 8: ...2 ThinkCentre Hardware Maintenance Manual ...
Страница 15: ...Chapter 2 Safety information 9 ...
Страница 16: ... 18 kg 37 lbs 32 kg 70 5 lbs 55 kg 121 2 lbs 1 2 PERIGO 10 ThinkCentre Hardware Maintenance Manual ...
Страница 19: ...Chapter 2 Safety information 13 ...
Страница 20: ...1 2 14 ThinkCentre Hardware Maintenance Manual ...
Страница 21: ...Chapter 2 Safety information 15 ...
Страница 27: ...Chapter 2 Safety information 21 ...
Страница 31: ...Chapter 2 Safety information 25 ...
Страница 38: ...32 ThinkCentre Hardware Maintenance Manual ...
Страница 72: ...66 ThinkCentre Hardware Maintenance Manual ...
Страница 118: ...112 ThinkCentre Hardware Maintenance Manual ...
Страница 278: ...272 ThinkCentre Hardware Maintenance Manual ...
Страница 282: ...276 ThinkCentre Hardware Maintenance Manual ...
Страница 287: ......
Страница 288: ...Part Number 89Y8064 Printed in USA 1P P N 89Y8064 89Y8064 ...


