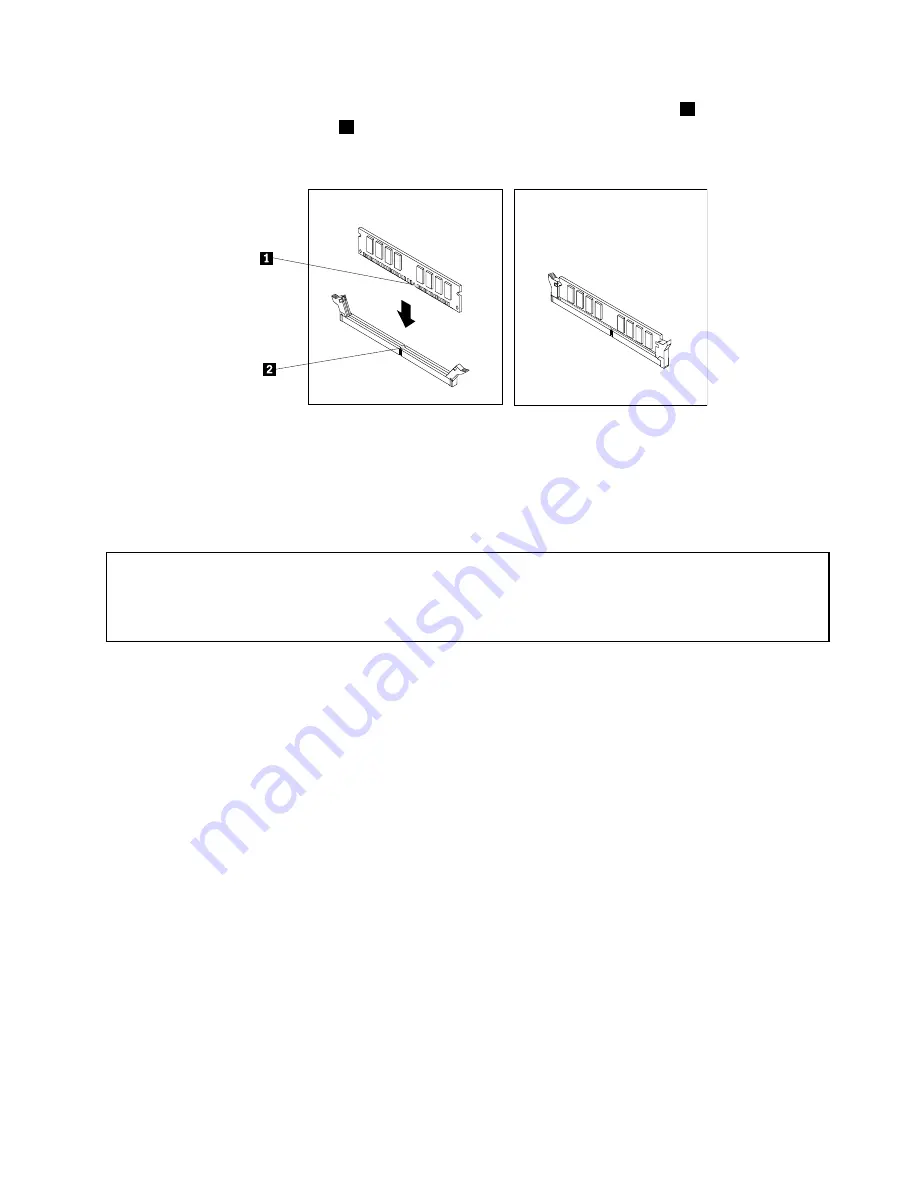
7. Position the new memory module over the memory slot. Make sure that the notch
1
on the new memory
module is aligned with the key
2
in the memory slot. Then, press the new memory module straight down
into the memory slot until the retaining clips close and the new memory module snaps into position.
Figure 50. Installing the memory module
8. Reinstall any parts and reconnect any cables that have been removed or disconnected.
9. To complete the installation or replacement, go to “Completing the parts replacement” on page 138.
Replacing the battery
Attention:
Do not open your computer or attempt any repair before reading and understanding the “Important safety information”
in the
ThinkCentre Safety and Warranty Guide
that came with your computer. To obtain a copy of the
ThinkCentre
Safety and Warranty Guide
, go to:
http://www.lenovo.com/support
Your computer has a special type of memory that maintains the date, time, and configuration information for
built-in features. The battery keeps this information active when you turn off the computer.
The battery normally requires no charging or maintenance throughout its life; however, if the battery fails,
the date, time, and configuration information, including passwords, are lost. An error message is displayed
when you turn on the computer.
Before performing the following procedure, be sure to read and understand the information about replacing
and disposing of the battery in the “Batteries” and “Lithium battery notice” sections of the
ThinkCentre
Safety and Warranty Guide
.
To replace the battery, do the following:
1. Remove all media from the drives and turn off all attached devices and the computer. Then, disconnect
all power cords from electrical outlets and disconnect all cables that are connected to the computer.
2. Remove the computer cover. See “Removing the computer cover” on page 107.
3. Pivot the drive bay assembly upward. See “Accessing the system board components and drives” on
page 109.
4. Locate the battery. See “Locating parts on the system board” on page 104.
5. Remove any parts and disconnect any cables that might prevent your access to the battery.
Chapter 9
.
Installing or replacing hardware: 7181, 7189, 7239, 7492, 7507, 7513, and 7529
115
Содержание ThinkCentre M80
Страница 2: ......
Страница 8: ...vi ThinkCentre Hardware Maintenance Manual ...
Страница 17: ...Chapter 2 Safety information 9 ...
Страница 18: ... 18 kg 37 lbs 32 kg 70 5 lbs 55 kg 121 2 lbs 1 2 PERIGO 10 ThinkCentre Hardware Maintenance Manual ...
Страница 21: ...Chapter 2 Safety information 13 ...
Страница 22: ...1 2 14 ThinkCentre Hardware Maintenance Manual ...
Страница 23: ...Chapter 2 Safety information 15 ...
Страница 29: ...Chapter 2 Safety information 21 ...
Страница 33: ...Chapter 2 Safety information 25 ...
Страница 40: ...32 ThinkCentre Hardware Maintenance Manual ...
Страница 74: ...66 ThinkCentre Hardware Maintenance Manual ...
Страница 108: ...100 ThinkCentre Hardware Maintenance Manual ...
Страница 148: ...140 ThinkCentre Hardware Maintenance Manual ...
Страница 268: ...260 ThinkCentre Hardware Maintenance Manual ...
Страница 272: ...264 ThinkCentre Hardware Maintenance Manual ...
Страница 281: ......
Страница 282: ...Part Number 0A22504 Printed in USA 1P P N 0A22504 0A22504 ...


