background image

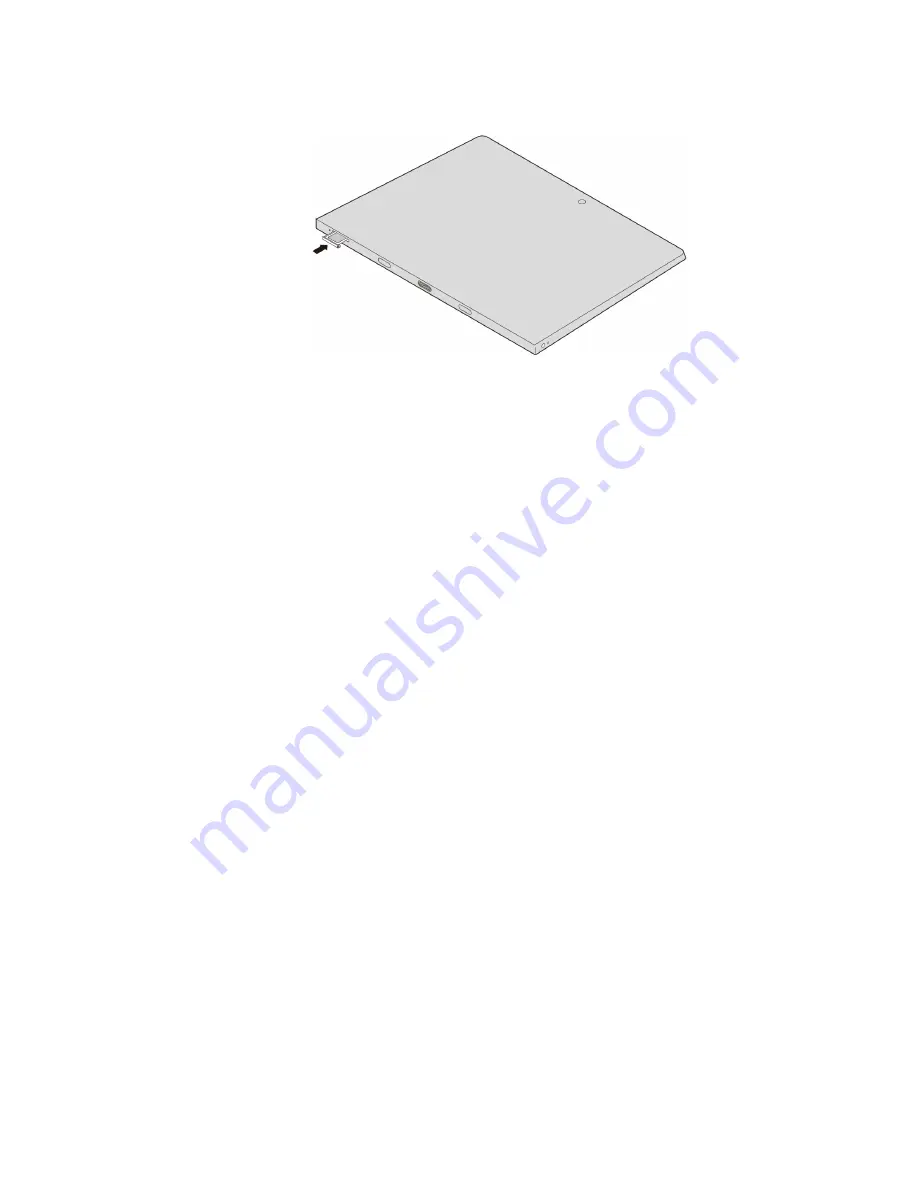
Step 5.  Reinsert the card tray. 

Removing card(s)

Step 1.  Turn off the tablet, and disconnect the AC adapter and any cable(s) from the tablet.

Step 2.  Insert a prying pin into the tiny hole on the card tray. Press firmly and push it straight in until the 

card tray pops out.

Step 3.  Gently pull the card tray out of the card reader.

Step 4.  Remove card(s) from the card tray, then reinsert the card tray.

Notes: 

•  Do not insert or remove cards while the computer is turned on. Doing so may damage the card reader.

•  Before removing the memory card, disable it by using the Windows safely remove hardware and eject 

media utility to avoid data corruption.

Chapter 1

.

Getting to know your computer

5

Содержание D330-10IGL

Страница 1: ...User Guide Lenovo ideapad D330 ...

Страница 2: ...ide Read the safety notices and important tips in the included manuals before using your computer First Edition July 2020 Copyright Lenovo 2020 LIMITED AND RESTRICTED RIGHTS NOTICE If data or software is delivered pursuant to a General Services Administration GSA contract use reproduction or disclosure is subject to restrictions set forth in Contract No GS 35F 05925 ...

Страница 3: ...n battery 12 Chapter 2 Starting to use Windows 10 13 Configuring the operating system for the first time 13 Operating system interfaces 13 Putting the computer to sleep or shutting it down 15 Putting your computer to sleep 15 Shutting down the computer 15 Touch screen operation 16 Multi touch gestures 16 Connecting to a wireless network 18 Get help from Windows 18 Chapter 3 Recovery system 19 Intr...

Страница 4: ...ii User Guide ...

Страница 5: ...ndows operating system some operations may be slightly different If you are using other operating systems some operations may not apply to you The features described in this guide are common to most models Some features may not be available on your computer or your computer may include features that are not described in this user guide The illustrations in this manual may differ from the actual pr...

Страница 6: ...iv User Guide ...

Страница 7: ...onnect to a wireless WAN adapter to send and receive wireless radio signals Note The GPS antenna is included here 4 Multi touch screen Functions as the visual display as well as touchpad input Note For details see Touch screen operation on page 16 5 Speaker Provides audio output Screen orientation You can rotate the display panel to your preferred orientation The orientation of the display automat...

Страница 8: ... can disconnect and reconnect the device without performing any additional steps Note Typically Windows detects a new device after it has been connected and then installs the driver automatically However some devices may require you to install the driver before connecting Check the documentation provided by the device s manufacturer before connecting the device Before disconnecting a USB storage d...

Страница 9: ...blet to the dock keeping the tablet secured in place Note For details see Combination of tablet and keyboard dock on page 9 2 Keyboard dock connector Connects the tablet to the keyboard dock 3 Nano SIM card and microSD card tray Accept micro SD card not supplied and Nano SIM card not supplied Notes Select models may not have the Nano SIM card slot please refer to the actual product For details see...

Страница 10: ...efer to the actual product This card reader does not support SDIO devices e g SDIO Bluetooth and so on The illustrations are for reference only please refer to the actual product Inserting card s Step 1 Turn off the tablet and disconnect the AC adapter and any cable s from the tablet Step 2 Insert a prying pin not supplied into the tiny hole on the card tray Press firmly and push it straight in un...

Страница 11: ... until the card tray pops out Step 3 Gently pull the card tray out of the card reader Step 4 Remove card s from the card tray then reinsert the card tray Notes Do not insert or remove cards while the computer is turned on Doing so may damage the card reader Before removing the memory card disable it by using the Windows safely remove hardware and eject media utility to avoid data corruption Chapte...

Страница 12: ...Rear View 1 Rear camera Use the camera for video communication or taking photos 6 User Guide ...

Страница 13: ...et to the keyboard dock 3 Touch pad The touch pad functions as a conventional mouse Touch pad To move the pointer on the screen slide your fingertip over the pad in the direction in which you want the pointer to move Touch pad buttons The functions of the left right side correspond to those of the left right mouse button on a conventional mouse Note You can enable disable the touch pad by pressing...

Страница 14: ... Airplane mode Fn PgUp Activates the home key function Fn PgDn Activates the end key function Fn Increases the display brightness Fn Decreases the display brightness Fn Decreases the volume level Fn Increases the volume level Fn B Activates the break function Fn P Activates the pause function Fn S Activates the system request Fn K Enables Disables the scroll lock Fn I Activates the insert function...

Страница 15: ... devices Combination of tablet and keyboard dock The Lenovo ideapad D330 is not only a tablet It can be combined with a keyboard dock and used as a notebook computer Attaching the tablet Align the connector of the keyboard dock with the tablet and then attach thetablet in the direction shown by the arrow Chapter 1 Getting to know your computer 9 ...

Страница 16: ...een the display panel and thekeyboard Otherwise the display panel may be damaged Detaching the tablet Carefully detaching the tablet in the direction shown by the arrow Notes Be careful not to damage the connector when attaching or detaching the tablet The illustrations above are for reference only please refer to the actual product 10 User Guide ...

Страница 17: ...utton and tap the screen in supported applications 3 Bottom barrel button To erase text or drawings hold the button to erase the object in supported applications 4 Pen tip Write or draw on the touch screen Notes The default function of each pen button might vary in different apps You can view or change functions of pen buttons in the Lenovo Pen Settings For more information refer to the User Guide...

Страница 18: ...Install pen battery Note AAAA alkaline battery may not be included in some countries and regions 12 User Guide ...

Страница 19: ...user account Operating system interfaces The return of the Start menu Windows 10 comes with a powerful and useful start menu To open the start menu do one of the following Select the Start button in the lower left corner the Start menu is displayed Press the Windows key on the keyboard The power button is on the Start menu click it you can choose to shut down or restart the computer or put the com...

Страница 20: ...Windows and your apps Moreover you can change common settings quickly Task View in taskbar In Windows 10 you can add a new desktop and switch between different desktops To add a new desktop do the following Click the Task View icon in the taskbar area Click New desktop To switch between desktops click the Task View icon then select your desired desktop 14 User Guide ...

Страница 21: ...orner and then select the Start button Select Power Sleep Note Put your computer to sleep before you move it Moving your computer while the hard disk drive is spinning can damage the hard disk causing loss of data To wake up the computer perform the following Press any key on the keyboard Shutting down the computer If you are not going to use your computer for a long time shut it down To shut down...

Страница 22: ...e on an item Performs an action such as starting an app opening a link or performing a command Similar to left clicking with a mouse Press and hold Press your finger down and leave it there for a moment Enables you to see detailed information before selecting an action Can also open a menu with more options Similar to right clicking with a mouse Zoom Move two fingers together or apart while touchi...

Страница 23: ...olls through lists and pages Can also move an object or be used to draw or write depending upon the app Similar to pressing and holding to pan and to scrolling with a mouse Swipe Start from any edge of the screen then swipe inwards toward the center Swiping in from the left edge can Bring in and open an app currently running in the background Swipe from the right edge can open the ACTION CENTER Ch...

Страница 24: ...omatically scan for available wireless networks and display them in the wireless network list To connect to a wireless network click the network name in the list and then click Connect Note Some networks require a network security key or passphrase for connection To connect to one of those networks ask the network administrator or the Internet service provider ISP for the security key or passphras...

Страница 25: ...ton until the Novo Menu appears on the screen Novo Menu System Recovery Troubleshoot Reset this PC Windows PC settings Windows PC settings Update security Recovery Reset this PC Start For more instructions see the Windows Help and Support file on your computer When I purchased my computer it included a copy of Windows How can I determine whether the copy of Windows is preinstalled by Lenovo On the...

Страница 26: ...abled computer If the Recovery Partition is deleted or modified you may not be able to restore Windows to the factory status For computer models on which Compact technology is enabled deleting the Recovery Partition may cause Windows to fail to start How can I determine whether the Windows running on my computer is Compact technology enabled Compact technology is normally enabled on copies of Wind...

Страница 27: ...ou can find hardware specification for your computer on the printed flyers which came with your computer Where can I find warranty information For the warranty applicable to your computer including the warranty period and type of warranty service see the Lenovo limited warranty flyer that came with your computer Drivers Where can I find drivers for the various hardware devices of my computer You c...

Страница 28: ...board Sleep problems The critical low battery error message appears and the computer immediately turns off The battery power is getting low Connect the AC power adapter to the computer The computer enters sleep mode immediately after Power on Make sure that The battery is charged The operating temperature is within the acceptable range See Chapter 2 Use and care Information in the Lenovo Safety an...

Страница 29: ...olor quality are correctly set The monitor type is correct Incorrect characters appear on the screen Is the operating system or programs installed correctly If they are installed and configured correctly have the computer serviced Sound problems No sound can be heard from the speakers even when the volume is turned up Make sure that The Mute function is off The combo audio jack is not being used S...

Страница 30: ...ration Disable the sleep timer when you are working on the network The connected external device does not work Do not connect or disconnect any external device cables other than USB while the computer power is on Otherwise you might damage your computer When using high power consumption external devices such as an external USB optical drive use an external device power adapter Otherwise the device...

Страница 31: ...ks of Lenovo in the United States other countries or both Lenovo Microsoft and Windows are trademarks of Microsoft Corporation in the United States other countries or both Other company products or service names may be trademarks or service marks of others Copyright Lenovo 2020 25 ...

Страница 32: ...26 User Guide ...

Страница 33: ...a certified computer an ENERGY STAR mark may be affixed to the product the product packaging or displayed electronically on the E label screen or the power settings interface By using ENERGY STAR compliant products and taking advantage of the power management features of your computer you reduce the consumption of electricity Reduced electrical consumption contributes to potential financial saving...

Отзывы: