background image

1.

Introduction

Destinator OP

 is a full-featured 

mobile satellite navigation system.
It utilizes GPS (Global Positioning
System) satellites to pinpoint your
location utilizing the latest mapping
data technology to get you to your
destination in the most efficient and
timely manner.  

Destinator OP

assists you in

planning your route and it provides
Turn by Turn, Voice and Visual
instructions for getting to your
destination.

2. Getting Help

An abbreviated Help
file with basic
Destinator OP
navigational
definitions and
instructions is
available.  
At the map screen, 

press the

button, cycle to the

Options Menu by

pressing the

button,

and select

.

3. Technical Support

In Europe

For answers to common questions
and quick assistance see the

Destinator FAQ for Registered Users
online at:

http://www.destinatoreurope.com

,

click Community, login and choose
FAQ.
If you have other questions about
Destinator OP, please contact your
supplier or Destinator Technical 
Support via email at

[email protected]

or

telephone
+49 (0) 1805 12 30 12 *.

* for fees in your country please ask your

telephone service provider

In North America

For answers to common questions
and quick assistance see the
Destinator FAQ for Registered Users
online at:

http://www.destinator1.com/

,

click Community, login and choose
FAQ.
If you have other questions about
Destinator OP, please contact your
supplier or Destinator Technical 
Support via email at

[email protected]

  or

telephone

1-866-798-0905 **.

** toll free

4. Getting Started

Your MO device comes with the
Destinator OP application already
installed.  Turn on the MO device,
and from the main MO screen, press

to launch

Destinator OP.
For information about changing the
MO device settings, see Appendix D
– MO Settings.

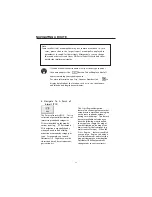
WELCOME TO DESTINATOR OP

1

6

Содержание NAV-400

Страница 1: ...OWNER S MANUAL Global Positioning System NAV 400 ...

Страница 2: ... 14 Software Installation On Your PC 15 Installing Microsoft ActiveSync 15 Welcome to Destinator OP 16 Navigating a route 17 Options 29 Setting 32 Changing map views 37 Auto favorites Alerts 39 Favorites importing 40 GLOSSARY 41 Appendix A Favorites Importing file Structure 42 Appendix B Destinator OP Console 43 Appendix C Installing and activating Additional maps 51 Appendix D MO Setting 55 CONTE...

Страница 3: ...order to avoid damage Data Security Every time you update your data make backup copies on an external storage mediums The supplier does not assume liability for data loss or damage to data storage units and no claims can be accepted for damages resulting from the loss of data or for consequential damages Operating Environment Keep your navigation system and all connected devices away from moisture...

Страница 4: ...Transport If you wish to transport the appliance follow the instructions below Following transport of the appliance wait until the unit has acclimatized before using it In the case of wide fluctuations in temperature or humidity condensation or moisture may form inside the appliance and this can cause and electrical short circuit In order to protect the appliance from dirt knocks and scratching us...

Страница 5: ...ubt about the power source in your car contact your car manufacturer Cabling Arrange cables so that no one can tread on them or trip over them Do not place any items on the cable WARNING When the unit is not in use for a long time please recharge the battery every other time otherwise the battery s lifetime would be shortened 5 SAFETY INFORMATION ...

Страница 6: ...th the help of the network adapter By means of the car adapter The battery charge indicator lights red until the navigation system is charged Don not interrupt the charging before the battery is fully charged It will take a few hours for the navigation system to be fully charged When the battery is fully charged the battery indicator will turn to green Note You can use the navigation system during...

Страница 7: ...r transfer will be achieved Resetting The Navigation System There are two options for resetting the navigation system Soft Reset This option restarts the navigation system without reinstallation being necessary A soft reset is often used in order to reorganize the memory In doing so all programs that are running are interrupted and the working memory is reinitialized Choose this option if your nav...

Страница 8: ...The power plug will consume power even if no device is connected Remove it when not in use to avoid draining the battery Check all safety equipment in your car after installation Additional Notes for Use on A Bicycle Or A Motorcycle Pay attention during installation that the ability to steer is not impaired Do not cover any instruments during installation Mounting The Navigation Set In A Car Atten...

Страница 9: ...ottom of your navigation system 2 Insert the power adapter 2 now into the cigarette lighter socket and ensure that it will not lose contact while driving This could cause a malfunction 3 Hint Remove the power adapter from the cigarette lighter socket when ending a trip or when parking the car for a extended period of time Otherwise the car 3 Fix the complete holding device with the supplied screw ...

Страница 10: ... or moisture Take care that the navigation system does not exposed to moisture This may damage the electronic parts When you use the navigation system make the navigation system upright with the GPS antenna 13 will get a strong signal If the signal is not good please adjust the direction of the GPS antenna to receive the signal 10 INSTALLATION ...

Страница 11: ...2 Battery Charge Indicator When the battery is charging the Indicator is red When the battery is fully charged the Indicator will turn to green 3 Touch Screen Display the output of your appliance Tap the screen with the stylus to select menu commands or enter information 1 2 3 ...

Страница 12: ...der to use it and replace it after use The pointer pen is required for operating the touch screen 5 Loudspeaker Plays back language statements and warnings 6 GPS antenna Receives the signals of the GPS satellite 7 External aerial interface Interface for an optional second aerial ...

Страница 13: ...ates the device from the battery completely also Hard Reset 10 SD Accepts an optional SD Secure Digital Card for removable storage 11 USB Interface Interface for connecting to a PC by means of the ActiveSync Cable for data matching 12 Headphone Connects to a pair of stereo headphones 13 AC Adaptor Port Connection to external power supply 13 ...

Страница 14: ...fter a short time without carrying out the pre installation on a PC The initial setting up must be carried out as described on page 16 in any case The following installation limits the Navigation to the area which is pre installed on your memory card You must carry out these steps to put the navigation into operation in your car 1 Read and adhere to the safety instructions on p 2 and following and...

Страница 15: ...nding navigation software on your PC 1 Before installing the navigation software ensure that ActiveSync is installed and your navigation system is connected with your PC via the ActiveSync cable 2 Place the CD 1 with the navigation software in your CD drive The installation will start automatically 3 Follow the program instructions Contents of The Navigation CDs It is possible for several CDs to b...

Страница 16: ...t http www destinatoreurope com click Community login and choose FAQ If you have other questions about Destinator OP please contact your supplier or Destinator Technical Support via email at support destinatoreurope com or telephone 49 0 1805 12 30 12 for fees in your country please ask your telephone service provider In North America For answers to common questions and quick assistance see the De...

Страница 17: ...elp you to define and plan a route You will be able to select a destination set your origin or plan a journey The route calculated in real time is from your current GPS position There are several ways to determine your destination using the Menu button You can navigate to An Address An Intersection A AIP Postal Code A POL Point Of Interest An Address in Favorites An Address in Favorites There are ...

Страница 18: ... in Pedestrian mode By positioning yourself so that the shadow that you cast is in the same position as the shadow on the screen you can be assured that you are walking in the right direction The cursor shadow disappears during night driving Map Screen Buttons Toggles between Turn by Turn details and a complete list of Driving Directions Toggles between 2D 2D Night 3D and 3D Night views The icon i...

Страница 19: ...s Lets you exit from the Destinator OP application Menu Button This button is shared by two functions Vehicle Mode and Pedestrian Mode You can toggle between these two modes by holding down this button for several seconds In Pedestrian Mode the navigation radius is restricted to 10 kilometres 6 miles Press the Menu Button to open theDestination Menu Pressing the and buttons at the bottom of the sc...

Страница 20: ... the same continent without having to switch maps This feature becomes available only when you have the following maps installed the map of your origin the map of your destination and a map of the major roads for that continent e g major roads of Europe When the Cross Region feature is enabled you can press Region to display a list of installed maps and select the map pertaining to your destinatio...

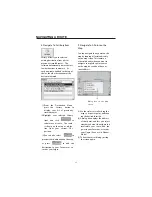
Страница 21: ...ame The scroll list will update accordingly You can also change your keyboard from uppercase to lowercase by pressing the button 3 Press Street to display a list of street names for the selected city Select the street name by entering the first few characters or by scrolling down the list eg Birch Ave 4 Not all cities towns are mapped to the street level In such cases the software will display Str...

Страница 22: ... major roads for that continent e g major roads of Europe When the Cross Region feature is enabled you can press Region to display a list of installed maps and select the map pertaining to your destination Destinator OP will automatically change maps as you travel across If you don t know the entire name of a city or street type in part of the name and press the button This will display a list of ...

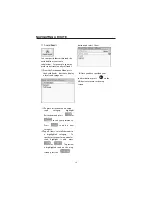
Страница 23: ...ighlighted tap Items to display a list of Restaurants in your area The POIs are listed in order of distance To sort them alphabetically press the button 5 Highlight your choice and click to calculate your route The route is shown on the map as a blue line from your current GPS position 6 You can select to preview your destination on the map or press to add the destination to your Favorites or to s...

Страница 24: ...te The route is shown on the map as a blue line from your current GPS position You can also select to preview your destination on the map or press to edit or delete your choice or to set it as your Origin 7 Save To Favorites When selecting a Destination which you may use regularly you can save it to your personalized Favorites list 1 At the map screen press the button to open the Destination menu ...

Страница 25: ...our destination on the map or press to add the destination to your Favorites or to set it as your Origin 9 Navigate To A Point on the Map You can navigate to any point on the map by tapping its location directly on the map screen This feature is especially handy when you want to navigate to a specific point you see on the map but you don t have its street address 1 Use the stylus to scroll or drag...

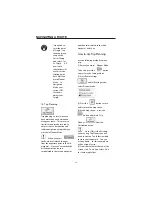
Страница 26: ...to the Settings Menu 2 Press Route Settings and for Routing mode select Planner mode 3 Press the button to save and return to the map screen 4 At the map screen press the button and select Trip Planner from the Destination menu Note If this is the first time you are using Trip Planner you will need to create a Trip Folder in which to store your trip details You can use any name For this example we...

Страница 27: ...f the waypoint Press Save to add to your trip Repeat steps 6 to 9 to enter all the waypoints 11 Select the Show button to view the complete route The first part of the route is shown as double blue lines The remaining parts of the route are shown in a series of single line vectors 12 Using or you can change the order of your waypoints to suit your purposes 13 You can also click on Tools Optimize w...

Страница 28: ...rictions on a desired road category highlight Restrictions and press or to suit your preference Press to add a new category 3 Tap on Items to list all the roads in a highlighted category To specify restrictions for a particular road highlight it and press or To preview a highlighted road on the map screen press the button and select Show 4 Once you have specified your road restrictions press on th...

Страница 29: ...basic navigation 3 Show Route This option displays your route on the map screen in its entirety plus details such as the address of and distance to your destination the ETA Estimated Time of Arrival and the ETR Estimated Time Remaining 4 Driving Directions This function displays a visual list of your route distances to each maneuver and street names By using the scroll bar on the right hand side y...

Страница 30: ...l recalculate your route to exclude this particular turn or maneuver 5 Turn By Turn This view indicates the distance to your next turn and the name of the next street immediately after completing the previous turn Voice and visual prompts are displayed at varying intervals to indicate your next turn or change of direction 6 Cancel Route Cancels and clears the route from the map screen 7 Play This ...

Страница 31: ...ur route according to whether you are traveling by car or on foot This button lets you switch to Pedestrian Mode or Vehicle Mode In Pedestrian Mode the navigation radius is restricted to 10 kilometres 6 miles 10 Help This button launches an abbreviated help file with basic navigational definitions and instructions 11 About Displays software version and details about your Destinator OP application ...

Страница 32: ...Status And Settings Destinator OP uses GPS signals to pinpoint your location In Navigation mode the software automatically acquires GPS signals and constantly updates your vehicle s location and position The GPS may take a few minutes to find its current location initially For best results ensure that the GPS has a clear view of the sky To view your GPS configuration click on the button You can ac...

Страница 33: ...button In the Home Button Settings screen select either POI Mode or Address Mode to set your desired destination Press the button to save and return to the map screen Now when you press the button Destinator OP will automatically calculate a route to this destination 5 General Settings The General Settings screen allows you to choose the unit of measurement for your route All distances are display...

Страница 34: ...e instructions as you drive This mode is the one you will use most frequently Destinator OP uses the satellite based global positioning system GPS to constantly detect your current position As you drive your location is compared to the destination you have chosen and you will be constantly provided with accurate driving directions Even if you accidentally drive course Destinator OP will direct you...

Страница 35: ...he map screen 8 Alert Settings This screen displays warnings and alerts which when selected will provide voice prompts Voice Prompts 1 Speed Limit Gives you a voice prompt when your car exceeds the speed limit on this section of the road 2 Route Recalculation If you deviate from the original route Destinator OP automatically recalculates a new route and updates ETA and distances 3 Low Signal Warns...

Страница 36: ...is displayed in written form 2 Symbols Visual notification is displayed in pictorial form as an arrow diagram 3 None No visual prompts are displayed Press the button to save your selections and return to the map screen SETTING 36 ...

Страница 37: ...eral seconds of inactivity When Automatic Zoom is not selected you can zoom in or zoom out manually and it will remain at that level You can scroll the map by holding your stylus on the screen and dragging the image in any direction 3 Types of View The button on the map screen toggles between 4 types of views 2D 2D Night 3D and 3D Night The icon indicates the next view to be displayed 2D View The ...

Страница 38: ... simplified three dimensional view showing the map in a basic 3D relief It shows the basic relief outline and details of the surrounding roads and general area Figure 1 3D View 3D Night View The 3D night view is a simplified three dimensional view with high contrast colorization optimized for night driving or adverse weather conditions CHANGING MAP VIEWS 38 ...

Страница 39: ... category check the box to the left of the category name just as you would to display map positions of items in any other category 7 Select Save to complete the 3 Auto AlertsItems You can change the name comment and category of any item in Auto Alerts 1 or Auto Alerts 2 Note that if you change the category of an item to something other than Auto Alerts 1 or Auto Alerts 2 it will no longer function...

Страница 40: ...or Console 3 On the Destinator Console click on a Standard Map This will enable the Installing Map and Favorites Importer features 4 Click the Favorites Importer button The converter dialog is displayed 5 Select the file csv format containing the automatic alert 6 About the csv file Appendix A describes csv format Basically the csv file contains addresses and longitude and latitude values for loca...

Страница 41: ...satellites that orbit the Earth and make it possible for Vehicles people assets enabled with GPS receivers to pinpoint their location Lat Latitude An imaginary parallel circular line East West around the earth the same distance north or south from the equator expressed in degrees Long Longitude An imaginary circular line on the surface of the earth passing through the North and South poles at righ...

Страница 42: ...ABLE 1 Name 2 Comment 3 Long 4 Lat 5 ZIP Postal Code 6 City 7 Street 8 Number Favorite place 1 Destinator Favorites Convertor Comment 1 39 21370 38 78903 8033 Munich Ariboweg 173 Favorite place 2 Destinator Favorites Convertor Comment 2 24 85091 34 33012 1070 Brussels Moutstraat Weg 183 Favorite place 3 Destinator Favorites Convertor Comment 3 44 80999 38 16141 1096 Amsterdam Joop Geesinkweg 9003 ...

Страница 43: ...to a installation directory click Browse and follow the onscreen instructions 4 Select the default Destinator language for your MO Click Next 5 An installation rmation window is displayed Click Next 6 A status window indicates the progress of the installation Click Finish to exit installer program Toolbar Figure 2 Destinator Console Toolbar 1 Install Remove Map Dual function of installing new or s...

Страница 44: ...reserved foradditional maps 4 About Destinator Console Version of Destinator Console Creating Your Own Maps You can create your own maps by cutting out sections of existing maps This lets you work with maps that are smaller and take up less memory 1 From Standard Maps window select the map s you wish to load by clicking on the map image or selecting them from the list represents a selected map to ...

Страница 45: ...k Cut Ma p to create that selected zone map 2 Enter a unique name as the new map name Note No spaces between words are allowed but you can use underscores to separate the words 16 character maximum FAVORITES IMPORTING 45 ...

Страница 46: ...eft hand pane 3 Click on Route Notice the additional window that is displayed in the right hand pane 4 To establish a point on your route click on the desired position on the map A description of the point is displayed in the right hand pane To more precisely select a point you can click on Address or POI as the next section describes The first point you define is considered the starting point of ...

Страница 47: ...wn If you modify the route you will have to recreate the route by simply clicking on the Create Route icon again 7 To create a map of the route click on Cut Map You will be prompted to give the map a name The map will be displayed in the My Maps section on the Destinator Console Then you can download the map to your MO just as you would download any other map Selecting Pre Cut Maps Selecting by Ad...

Страница 48: ... you need to map On the In Destinator Cutter on the Toolbar select Address POI zoom or sub region to Cut 3 If you have an address choose the Address button select by City Street and Home or City Intersection 4 Click Show Address FAVORITES IMPORTING 48 ...

Страница 49: ...t is centered 5 From Toolbar Crop then on the map select where to draw rectangular zone to be cut 6 Click Cut Map to cut the selected zone Selecting Map by Points of Interest POI 1 From the Toolbar click 2 Select the POI eg Golf Courses 3 Select your Golf Course Ensure that it is highlighted 4 From Toolbar Crop On the map select with the mouse where to draw Rectangular zone to be cut 5 Click Cut M...

Страница 50: ...e appears Press OK Removing Map s from Memory If you do not have Destinator Console launched 1 Insert the Destinator Disk 1 into the CD ROM in your desktop computer this automatically launches the Destinator Console 2 In Target device click Change select from where which memory to remove map s This will update the Installed Map Window 3 The Installed Map Window displays a list of all the loaded ma...

Страница 51: ...s displayed Press the OK button to install the map s or the Cancel button to exit map installation and return to select map s A status window will indicate the progress of the map installation 3 When the map installation has completed a Successfully loaded message appears Press OK Activating Additional Maps After you have installed the additional maps they must be activated before you can use them...

Страница 52: ... 6 The User Information screen is displayed Fill in the required information to create your account on Destinator Community and click on Next FAVORITES IMPORTING 52 ...

Страница 53: ...license key and select your device type Click on Finish 8 The message Congratulations your Destinator license key has been successfully activated is displayed Click on Done to close the screen FAVORITES IMPORTING 53 ...

Страница 54: ...FAVORITES IMPORTING 54 ...

Страница 55: ...ings Launches the Destinator OP application Opens the Settings Menu for your MO device You can change the default user settings for the MO device by pressing on the main screen FAVORITES IMPORTING 55 Power Settings The Power Settings screen indicates the battery status of the MO device Press to return to the Settings menu ...

Страница 56: ... screen displays and voice prompts Press to return to the Settings menu System Information The System Information screen displays the software version of your Destinator OP application and information about your MO device You can also calibrate the position of the display Press to return to the Settings menu FAVORITES IMPORTING 88 G3741 07 56 If at any time in the future you should need to dispose...

Отзывы: