3. Installing and recharging your unit:
Open the package and remove the protective sleeve from the unit. Screw in the stand
to the stand screw hole on the back of the photo frame,
Adjust the frame position for
vertical or horizontal placement, Plug in the AC adapter into power outlet. Plug the
other end into the unit. Insert your memory card and the unit starts the slideshow digital
photos automatically.
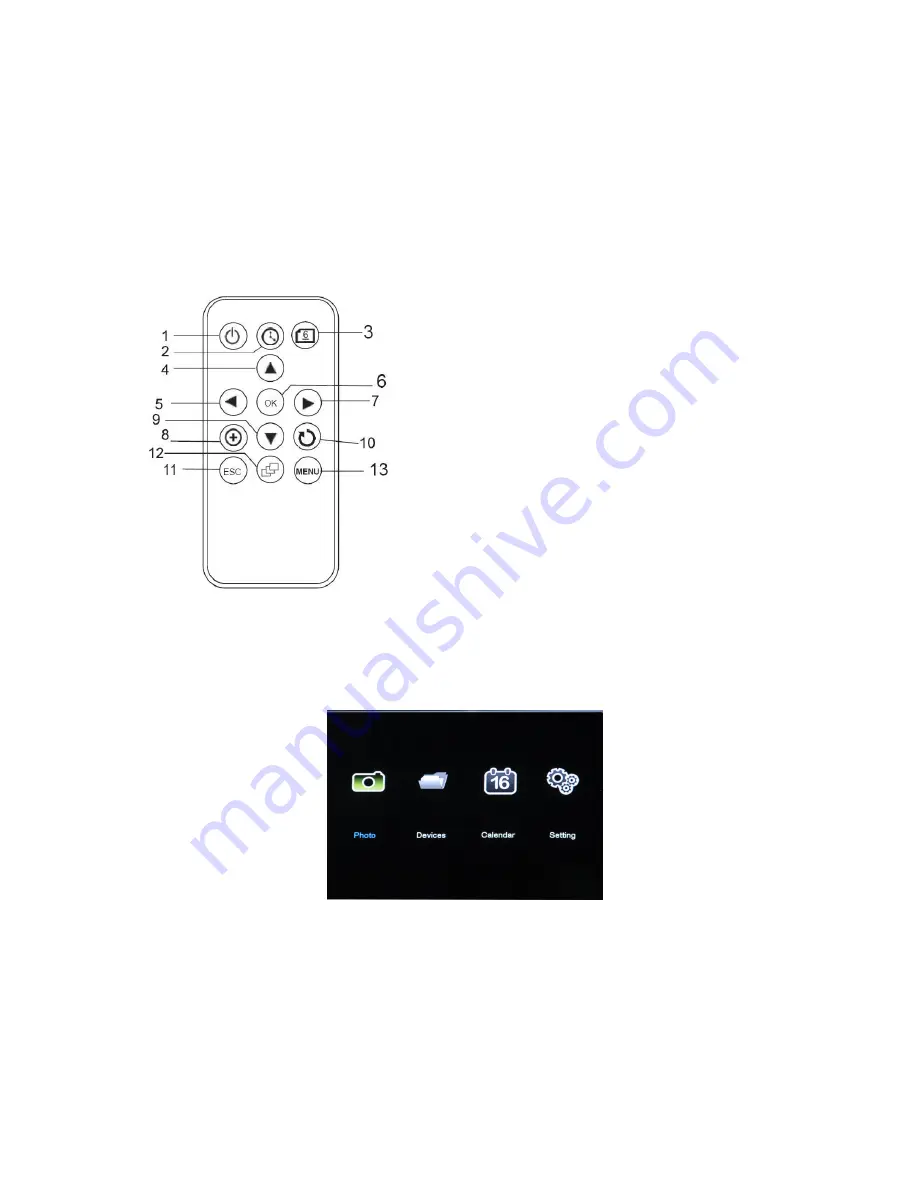
4. Understanding the remote:
Understanding the MENU:
1. Function Navigation
Power on the unit, the unit will display the following menu if there is no card inserted.
Figure 1
You can use the function navigation above to change all aspects of your photo frame from the
transitions sytle of your slideshows to the colour balance of the display. To bring up the menu on
screen just press the MENU button on board or the ESC button on the remote to go to the above
interface.
1. Power On / OFF
2. Clock
3. Calendar
4. Go up
5. Go Left / Previous Picture
6. Confirm
7. Go Right
8. Zoom in/out
9. Go Down
10. Rotate
11. Exit / go to previous menu
12. Slideshow
13. Setup


