
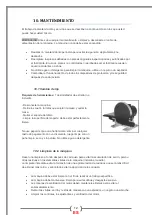


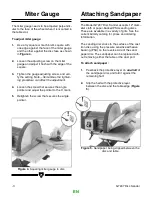


Miter Gauge
The miter gauge needs to be adjusted perpendic-
ular to the face of the wheel when it is mounted in
the table slot.
To adjust miter gauge:
Attaching Sandpaper
The Model G7297 Disc Sander accepts 12" diam-
eter cloth or paper-backed PSA sanding discs.
These are available in a variety of grits. See the
current Grizzly catalog for prices and ordering
information.
1.
2.
Use a try square or machinist’s square with
one edge against the face of the miter gauge
and the other against the disc face as shown
in
Figure 4.
Loosen the adjusting screw on the miter
gauge and adjust it flush with the edge of the
The sanding disc sticks to the surface of the cast
iron disc, using the pressure sensitive adhesive
backing (PSA) on the reverse side of the sand-
paper disc. The sandpaper can be replaced with-
out removing either the table or the dust port.
To attach sandpaper:
square.
1.
Peel back the protective layer on
one-half
of
3.
Tighten the gauge adjusting screw, and veri-
fy the setting. Note—
Sometimes the tighten-
the sandpaper disc and fold it against the
remaining half.
ing procedure can affect the adjustment.
2.
Slip the half with the protective layer
4.
5
.
Loosen the screw that secures the angle
pointer and adjust the pointer to the 0˚ mark.
Retighten the screw that secures the angle
between the disc and the table edge (
Figure
5
).
pointer.
Figure 5.
Sandpaper being slipped between the
disc and table.
Figure 4.
Squaring miter gauge to disc.
-7-
G7297 Disc Sander
EN
Содержание PON306
Страница 2: ......
Страница 3: ...Manuel d utilisation 02 06 2013 MODÈLE PON306 FR ...
Страница 22: ...Manual de instrucciones MODELO PON306 ES ...
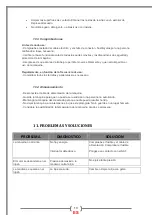
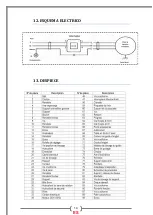
Страница 35: ...14 12 ESQUEMA ELECTRICO 13 DESPIECE ES ...
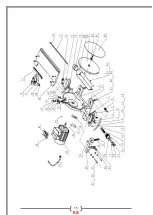
Страница 36: ...15 ES ...
Страница 40: ...Owner s Manual 12 Disc Sander Model DS C EN ...
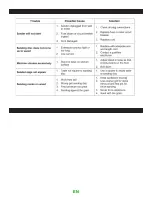
Страница 50: ...Troubleshooting EN ...
Страница 51: ...Notes ...
Страница 52: ......