background image

7

TREADMILL OPERATION

GROUNDING INSTRUCTIONS.

This product must be grounded.  No plug adapter should be used with this product.

WARNING:

  Improper connection of the equipment grounding conductor can result in a risk of an electric

shock.  Check with a qualified electrician if you are in doubt as to whether the product is properly grounded.
Do not modify the plug provided with the product, if it will not fit the outlet; have a proper outlet installed by a
qualified electrician.  The use of an extension cord with this product is not recommended.  If an extension cord
is needed, use a short (less than 10 feet) heavy gauge (14 gauge or better) extension cord with a three prong
(grounded) plug and receptacle.

Note:

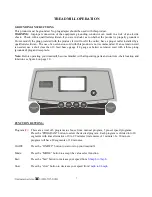
  Before operating your treadmill, become familiar with all operating parts and controls - their location and

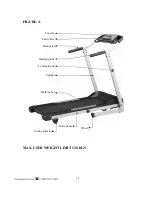
function see figure 4 on page 10.

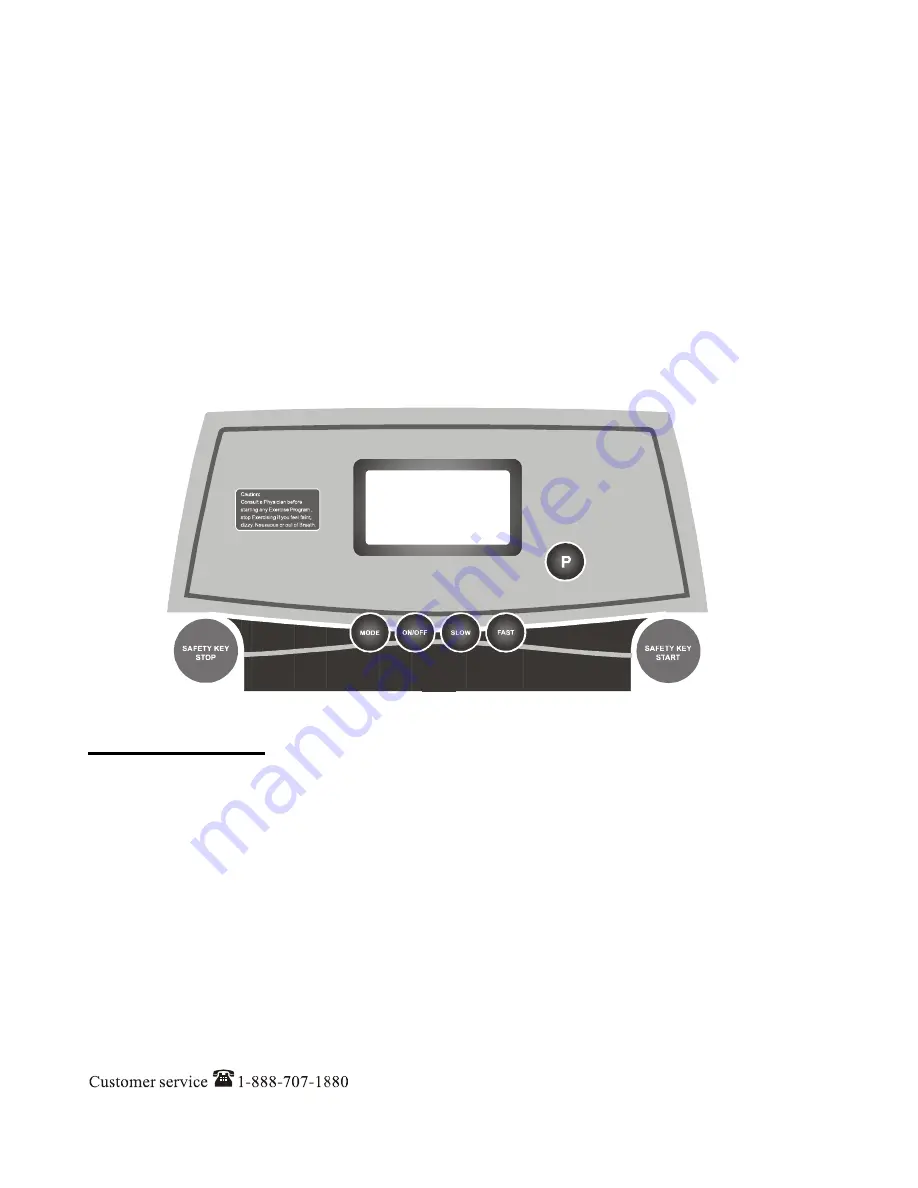
FUNCTION BUTTONS:

Program

 (P)

:   There are a total of 6 programs to choose from:  manual program, 5 pre-set speed programs.

Press the “PROGRAM” button to select the desired program.  Each program is divided into 20
segments with time alternative of 0 to 99 minutes (increments of 1 minute). Ie:  20 minute
program will have 20 segments of 1.0 minutes.

On/Off: 

Press the “ON/OFF” button to start or stop your treadmill.

Mode: 

Press the “MODE” button to accept the value select function

Fast:  

Press the “fast” button to increase your speed from

0.6mph to 7mph.

Slow:  

Press the “slow” button to decrease your speed from

7mph to 0.6mph.

Содержание 1610636-1

Страница 1: ...Retain For Future Reference Owner s Manual Model No 1610636 1 Assembly Operation Adjustments Parts Warranty CAUTION Read and understand this manual before operating unit...

Страница 2: ...fety Precautions 3 Hardware checklist 4 Assembly 5 6 Treadmill Monitor Operation 7 10 Folding 11 Parts list 12 14 Overview Drawing 15 16 Trouble Shooting 17 Adjustment 18 19 Maintenance 20 Important S...

Страница 3: ...ial or other income producing purpose or 2 subject to misuse neglect accident or unauthorized repairs and alterations This warranty provided herein is in lieu of all other express warranties Any impli...

Страница 4: ...not use outdoors or near water 7 Do not insert any objects into any openings 8 Keep children and pets away from this equipment at all times while exercising 9 Handicapped individuals should have medic...

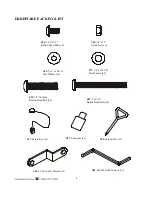
Страница 5: ...37 Safety Key x1 55 3 8 x46m m Button Head Bolt x2 71 3 8 x19x1 5T Flat Washer x2 84 5 16 x1 2 Button Head Bolt x2 87 Lubricant x1 65 3 8 x7T Nylon Nut x2 83 5 16 x3 Button Head Bolt x4 94 Screwdrive...

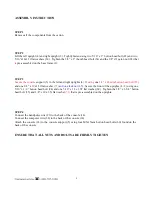
Страница 6: ...6m m button head bolt 55 and one 3 8 x 19 x1 5t flat washer 71 and one lock nut 65 Secure the front of the uprights 4 3 using one 5 16 x 1 2 button head bolt 84 and one 5 16 x 18 x 1 5T flat washer 69...

Страница 7: ...6 ASSEMBLY DIAGRAM...

Страница 8: ...e or better extension cord with a three prong grounded plug and receptacle Note Before operating your treadmill become familiar with all operating parts and controls their location and function see fi...

Страница 9: ...ill disappear TO OPERATE TREADMILL CAUTION To avoid injury hold onto Handrail while mounting and dismounting treadmill Hold onto handrail and place feet on side rails before starting Step onto treadbe...

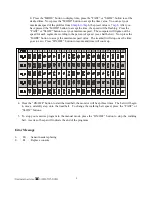
Страница 10: ...cording to the percent of speed see chart below Now press the MODE button to accept the maximum speed value The treadmill will stop once the time goes to zero Press ON OFF button to resume and time wi...

Страница 11: ...10 FIGURE 4 MAX USER WEIGHT LIMIT 120 KGS Safety Key Handgrip tube Handpulse Locking Knob Console Incline adjustor Upright Main frame Walking bel t Wheel...

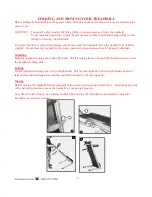
Страница 12: ...he storage position in temperatures above 85 degrees Fahrenheit Unfolding Hold the treadmill running deck with right hand Pull the locking knob with your right hand and slowly lower the treadmill runn...

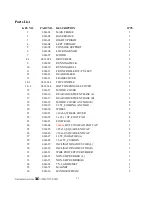
Страница 13: ...COVER 1 16 063616 REAR ADJUSTMENT BASE L 1 17 063617 REAR ADJUSTMENT BASE R 1 18 063618 MOTOR COVER ANCHOR E 4 19 063619 22 5T_FOLDING ANCHOR 2 20 063620 WHEEL 2 21 063621 30x60_WHEEL COVER 2 22 0636...

Страница 14: ...63654 3 8 x 2 FLAT HEAD BOLT 2 55 063655 3 8 x 46 m m BUTTON HEAD BOLT 4 56 063656 5 16 x 1 BUTTON HEAD BOLT 2 57 063657 5 16 x 1 3 4 BUTTON HEAD BOLT 2 58 063658 1 4 x 75m m SOCKET HEAD CAP SCREW 2 5...

Страница 15: ...EW 2 82 063682 4x38m m SELF TAPPING SCREW 2 83 063683 5 16 x 3 BUTTON HEAD BOLT 4 84 063684 5 16 x 1 2 BUTTON HEAD BOLT 2 85 063685 M5 M6 ALLEN WRENCH 1 86 063686 13 14m m WRENCH 1 87 063687 LUBRICANT...

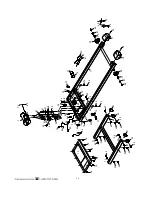
Страница 16: ...ng 35 11 15 33 32 23 23 12 4 3 37 6 75 75 75 75 79 79 79 79 74 74 58 58 78 78 78 78 59 59 79 79 79 79 59 59 52 62 26 87 85 86 55 55 71 71 26 54 54 83 69 50 50 14 2 65 65 69 84 69 84 38 83 69 31 94 47...

Страница 17: ...39 1 42 18 18 18 16 17 21 21 48 20 20 48 64 64 57 57 76 76 76 76 76 76 79 79 76 76 56 91 29 30 91 56 22 92 22 92 92 22 92 22 71 65 71 65 77 77 76 76 76 76 18 34 80 76 80 76 51 51 61 61 68 61 68 53 68...

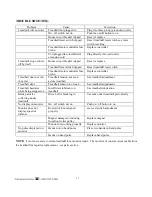
Страница 18: ...n not even across treadbelt See treadbelt adjustment Treadbelt slips Treadbelt tension too loose See treadbelt adjustment Treadbelt hesitates while being stepped on Insufficient lubricant on treadbelt...

Страница 19: ...is centered Treadbelt shifts too far to the left a Set the treadmill speed to 3 5 M P H b Tighten the left adjusting bolt a 1 4 turn clockwise using allen wrench c Wait 15 seconds if no change turn t...

Страница 20: ...g bolts one full turn counterclockwise This will loosen the treadbelt 2 Lift one side of the treadbelt 3 Pour one half of the lubricant bottle under the center of the treadbelt on the top surface of t...

Страница 21: ...ct dust or finger prints The use of harsh chemicals will destroy the protective coating and cause a static build up that will damage the components This surface may be cleaned with specially prepared...

Страница 22: ...the heart and lungs Aerobic Fitness The largest amount of oxygen that you can use per minute during exercise is called your maximum oxygen uptake MVo2 This is often referred to as your aerobic capaci...

Страница 23: ...a measure of the required intensity of exercise You need to exercise hard enough to condition your circulatory system and increase your pulse rate but not enough to strain your heart Your initial lev...

Страница 24: ...experience major discomfort you may be on a program that is too advanced or you have increased your program too rapidly If you experience PAIN during or after exercise your body is telling you someth...

Страница 25: ...intensity aerobic activity or callisthenic type exercise Movements should be performed slowly and smoothly with no bouncing or jerking Move into the stretch until slight tension not pain is felt in th...

Страница 26: ...25...
Отзывы: