background image

Leica IC90 E User Manual 

Get Set! 23

HDMI Mode – Capturing Images Without a Computer or Without a Wireless 
Device (Continued)

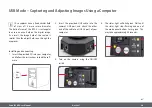
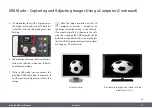
5.  Insert the SD memory card into the slot 

on the side of the Leica IC90 E until the 
card clicks into place. The Leica IC90 E is 
now ready to capture images onto the SD 
memory card.

Capturing an image

• 

It is critical to properly set the micro-
scope eyepieces’ diopters to ensure that 

the images on the SD memory card are in focus 
when the image is in focus through the micro-
scope’s eyepieces. Refer to the microscope’s 
user manual for proper diopter setting. Focus 
the microscope at high magnification, then 
change to the magnification at which you wish 

to capture the image. Do not refocus the micro-
scope. You can also use the HDMI output and 
an HD display (not provided) as a focusing aid. 

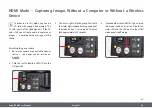
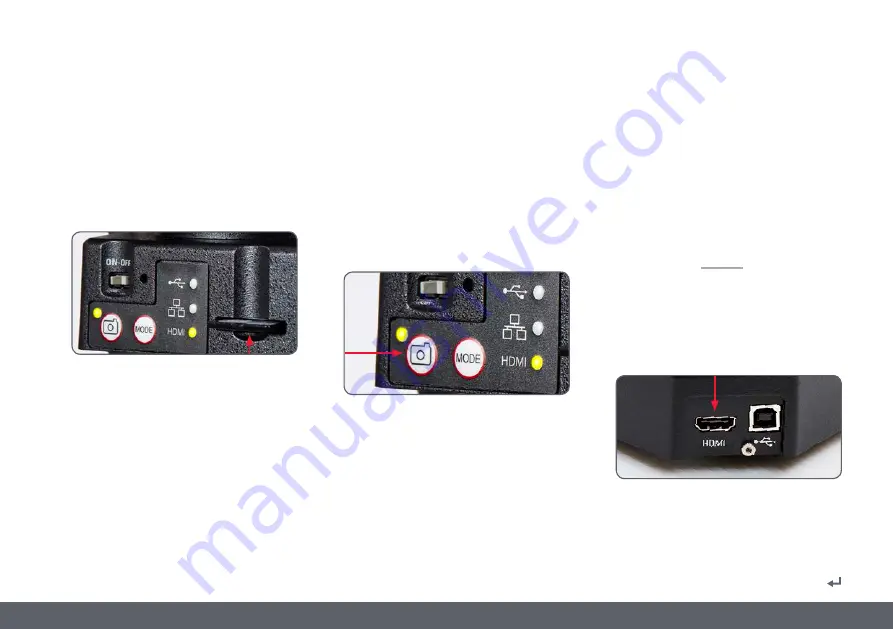
6.  To capture an image onto SD card, press the 

capture button, located on the side of the 
Leica IC90 E camera.


O

You will hear a beep to acknowledge the 
button was pressed.


O

The status LED flashes green while the 
image is being captured.


O

You will hear another beep when the Leica 
IC90 E has completed capturing the image 
and the status LED will return to steady green.

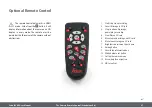
The image is now saved on the SD card. Images 
which are on the SD card can be viewed using 
the optional remote control. See "Camera 
Remote Control" on page 26.

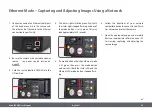
7.  While in HDMI mode, you can connect the 

provided HDMI cable from the camera to 
an HD monitor or HD projector to share the 
image. 

Содержание IC90 E

Страница 1: ...Leica IC90 E User Manual ...

Страница 2: ... Ready Set Go 40 Specifications Leica IC90 E 42 Dimensional Drawings 44 Contents General Notes Safety Concept 4 Symbols Used 5 Safety Instructions 6 Care and Maintenance Care and Maintenance 10 The Leica IC90 E Introduction 12 The Basics 13 Leica IC90 E Overview 14 Camera Kit and Accessories 16 Get Ready Assembling the Camera Get Set USB Mode Capturing and Adjusting Images Using a Computer 20 HDMI...

Страница 3: ...Leica IC90 E User Manual General Notes 3 General Notes ...

Страница 4: ...vice work requirements and the handling of the stereo microscope electrical and other acces sories as well as general safety instructions You can combine individual system articles with articles from external suppliers e g cold light sources etc Please read the user manual and the safety requirements of the supplier Before installing operating or using the instru ments read the user manuals listed...

Страница 5: ...nnel O O Functional disturbances or damaged instruments Warning of hazardous electrical voltage This symbol indicates especially impor tant information that if not observed can cause the following O O Hazards to personnel O O Functional disturbances or damaged instruments Danger due to hot surface This symbol warns against touching hot surfaces e g those of light bulbs Important information This s...

Страница 6: ...ever use chemicals to clean colored surfaces or accessories with rubberized parts This could damage the surfaces and specimens could be contaminated by abraded particles O O In most cases we can provide special solu tions on request Some products can be modified and we can offer other accesso ries for use in clean rooms Servicing O O Repairs may only be carried out by Leica Microsystems trained se...

Страница 7: ...alterations to the instrument or noncompliant use shall void all rights to any warranty claims Installation location O O Refer to the Safety concept booklet included with your camera O O Electrical components must be placed at least 10 cm away from the wall and from flammable substances O O Avoid large temperature fluctuations direct sunlight and vibrations These condi tions can distort measuremen...

Страница 8: ...r to the Safety concept booklet included with your camera Disposal O O Refer to the Safety concept booklet included with your camera Legal requirements O O Refer to the Safety concept booklet included with your camera EC Declaration of Conformity O O Refer to the Safety concept booklet included with your camera Health risks Workplaces equipped with stereo microscopes make it easier to examine extr...

Страница 9: ...Leica IC90 E User Manual Care and Maintenance 9 Care and Maintenance ...

Страница 10: ...cal surfaces should be cleaned using a lint free cloth lens cloth or cotton swab soaked in methanol or a commercially available glass cleaner Do not use alcohol O O Avoid excessive use of solvents The lint free cloth lens cloth or cotton swab should be soaked with solvent but not so wet that solvent runs over the lens Danger of electric shock Risk of electric shock Removing the cover of the Leica ...

Страница 11: ...Leica IC90 E User Manual The Leica IC90 E 11 The Leica IC90 E ...

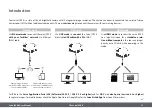
Страница 12: ... LAS Software LAS 4 9 LAS X 3 0 or higher and for MAC use Leica Aquire version 3 3 or higher to capture images For mobile devices check the Apple App Store or Google Play for the Leica AirLab App from Leica Microsystems Use USB mode to connect the Leica IC90 E directly via USB cable with a PC or MAC Use HDMI mode to connect the Leica IC90 E to a large HD screen for a standalone solu tion without c...

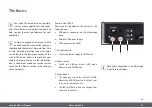
Страница 13: ...se the information box in stand alone mode see section remote control or the About section in the software on the computer Power Leica IC90 E Power can be provided to the camera in the following ways O O USB power connector on the microscope stand O O External USB power supply O O USB connectors on the PC 1 Capture button O O Used to capture an image in HDMI mode 2 Mode switch O O Switch into diff...

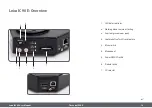
Страница 14: ... Leica IC90 E Overview 1 LED status indicator O O Flashing when camera is starting O O Constant green means ready 2 Capture button for SD card capture 3 Mode switch 4 Mode panel 5 Power ON OFF switch 6 Pinhole switch 7 SD card slot 1 2 3 4 5 6 7 ...

Страница 15: ...IC90 E 15 1 Socket for hand foot switch 2 Socket for Ethernet cable 3 Socket for the HDMI cable 4 Socket for the USB cable Front Infrared sensor Receives the signal from the optional remote control Leica IC90 E Overview Continued 1 3 2 4 ...

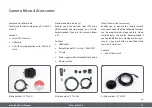
Страница 16: ... use the camera without a PC Content O O HDMI cable O O Remote Control RC3 art no 10 450 805 O O SD card O O Power supply with international connectors O O Ethernet cable Hand foot switch accessory Enables you to operate the camera remotly with your hand or foot The following functions can be programmed image capture video white balance and overlay Recommended if you need both hands to manipulate ...

Страница 17: ...Leica IC90 E User Manual Get Ready 17 Get Ready ...

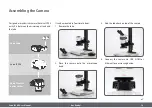
Страница 18: ...tube 2 Place the camera onto the microscope stand Designed as a sandwich camera the Leica IC90 E easily fits between the microscope stand and the tube 3 Add the tube back on top of the camera 4 Connect the camera via USB HDMI or Ethernet to your viewing device Leica tube Leica IC90 E Leica M series optics carrier ...

Страница 19: ...Leica IC90 E User Manual Get Set 19 Get Set ...

Страница 20: ...g and connecting 1 Insert the provided CD into your computer and follow the instructions to load the soft ware 2 Insert the provided USB cable into the camera s USB port and attach the other end of the cable to a USB 2 0 port of your computer 3 Turn on the camera using the ON OFF switch 4 The status light will blink green Wait until the status light stops flashing and one of the mode panel buttons...

Страница 21: ... camera to an HD monitor or HD projector to share the image Note the image resolution on the HD projector or monitor is limited to the live image resolution setting in the software If an aspect ratio of 4 3 is choosen in the soft ware the image on the HDMI monitor will be distorted as shown below This is due to the fact that the HDMI montior interprets every signal as having an 16 9 aspect ratio U...

Страница 22: ...e SD card is full you will not be able to capture any images a corresponding message will be shown Attaching the power cable 1 Be sure the camera is connected to a power source see power source section on page 43 2 Click the switch labelled ON OFF into the ON position 3 The status light will blink green Wait until the status light stopped flashing and one of the mode button s is also green This ma...

Страница 23: ...hange to the magnification at which you wish to capture the image Do not refocus the micro scope You can also use the HDMI output and an HD display not provided as a focusing aid 6 To capture an image onto SD card press the capture button located on the side of the Leica IC90 E camera O O You will hear a beep to acknowledge the button was pressed O O The status LED flashes green while the image is...

Страница 24: ...t a standard illumina tion is available when you reset the camera Press and hold the capture button for 5 seconds Wait for the beep A new white balance is set It is recommended to set a new white balance each time you change the type or color temperature of the illumination This is especially needed when you work with halogen light which can be turned from low intensity yellow to a high intensity ...

Страница 25: ...tion 4 The status light will blink green Wait until the status light stopped flashing and one of the mode button s is also green This may take approximately 30 seconds 5 If a mode button other than Ethernet mode is lit green then press the mode button and wait until both the status LED and the Ethernet LED mode button stopped flash ing 6 Follow the directions of your network compatible device to c...

Страница 26: ...it The remote control is designed to work only when the camera is in HDMI mode and when the camera is used in combination with an HD display The only function which works in any mode is the Info function which shows details about the camera Leica IC90 E User Manual The Camera Remote Control Standalone Kit 26 ...

Страница 27: ... stop video recording 2 Save still image to SD card 3 Stop continue live image pause play movie clip 4 View files on SD card 5 Move to previous image on SD card 6 Move to next image on SD card 7 Brightness adjustment up or down 8 Pairing button 9 Show hide information box 10 White balance set button 11 Call up the camera menu 12 Arrow keys for navigation 13 OK to confirm Optional Remote Control Le...

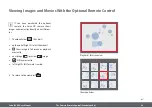
Страница 28: ...ail view first press O O up down left right select thumbnail O O Show image in full screen or playback movie clip O O next image previous image O O Play movie clip O O left right fast forward rewind 2 To return to live view press Viewing Images and Movies With the Optional Remote Control Thumbnail view Playback fullscreen view Leica IC90 E User Manual The Camera Remote Control Standalone Kit 28 ...

Страница 29: ...a menu 1 Point the remote control towards the camera 2 Press the key on the remote control to show the camera menus on the monitor 3 Press the and buttons to select a menu item 4 Press the button to confirm a menu item 5 Press the button again to hide the camera menus Calling up the Camera Menu Leica IC90 E User Manual The Camera Remote Control Standalone Kit 29 ...

Страница 30: ... and BLUE cannot be adjusted if the WB MODE setting is set to AUTO COLOR COLOR Automatic White Balance EXPOSURE RESOLUTION SETUP CAMERA SETUP USER SETUP ETHERNET SET WB WB MODE RED LEVEL BLUE LEVEL BLACK LEVEL HUE PRESS OK AUTO SATURATION The COLOR function makes it possible to adapt the camera chip to the ambient light so that color neutral images can be acquired Leica IC90 E Leica IC90 E User Ma...

Страница 31: ...llumina tion is seen 2 Press the button on the remote control 3 Call up the COLOR entry 4 Set the WB MODE to MANUAL 5 If necessary correct the values for RED and BLUE until the image shows a uniform gray area 6 Press the button to exit the menu COLOR Manual White Balance Leica IC90 E User Manual The Camera Remote Control Standalone Kit 31 COLOR EXPOSURE RESOLUTION SETUP CAMERA SETUP USER SETUP ETH...

Страница 32: ...mote control 2 Call up the command for manual exposure see diagram at the left 3 Set the value for EXP MODE to MANUAL 4 Correct the values for EXPOSURE ms GAIN and GAMMA until you obtain the desired results for the image EXPOSURE Leica IC90 E User Manual The Camera Remote Control Standalone Kit 32 COLOR EXPOSURE RESOLUTION SETUP CAMERA SETUP USER SETUP ETHERNET EXP MODE EXPOSURE ms GAIN BRIGHTNESS...

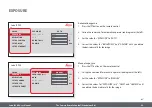
Страница 33: ...age CAPTURED resolution of the captured image Defines the resolution of the captured image on the SD card MOVIE resolution of videos Indicates the resolution of the captured videos on the SD card NETWORK STREAM Defines the resolution of the image transmitted over the Ethernet port RESOLUTION Leica IC90 E User Manual The Camera Remote Control Standalone Kit 33 COLOR EXPOSURE RESOLUTION SETUP CAMERA...

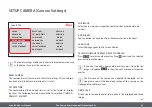
Страница 34: ... Select the language of the On Screen Display SELECTING IMAGE OVERLAYS SELECT OVERLAY Press to select another overlay Press to activate the selected overlay and leave the menu If you want to quickly display other overlays press when the live image is displayed to show the next or previous respective overlay The firmware of the camera can updated For detailed instruc tion please consult the downloa...

Страница 35: ...y time of the menu bar You can select between 10 seconds and infinity The menu can still be deactivated if you press the camera menu button FOOT SWITCH Allows you to select the function that should be triggered through the hand foot switch The following function can be programmed image capture video white balance and overlay SETUP USER COLOR EXPOSURE RESOLUTION SETUP CAMERA SETUP USER SETUP ETHERN...

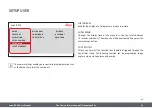
Страница 36: ...IP address This menu allows you to customize parameters relevant to working in Ethernet mode Consult with your local IT expert for information relating to your local network SETUP ETHERNET Leica IC90 E User Manual The Camera Remote Control Standalone Kit 36 COLOR EXPOSURE RESOLUTION SETUP CAMERA SETUP USER SETUP ETHERNET IP ADDRESS MODE IP ADDRESS IP SUBNET MASK DHCP Dynamic Leica IC90 E GATEWAY I...

Страница 37: ...nfiguration 1 Open camera configuration panel on your PC 2 In the top right corner find the Ethernet setting section 3 Find the dropdown menu labelled IP ADDRESS MODE and select STATIC 4 Enter the IP address in the relevant boxes IP ADDRESS IP SUBNET MASK GATEWAY IP ADDRESS 5 Camera should be recognized ...

Страница 38: ...conds press the Pair button again to start the process 2 Press and hold the button on your remote control representing the channel that you want to assign to the connection see image to the right channel selection until a corresponding confirmation is displayed on the HD monitor All of the buttons except the button can be used for this 3 The microscope only responds to the remote control commands ...

Страница 39: ...Leica IC90 E User Manual Go 39 Go ...

Страница 40: ...Leica IC90 E User Manual Go 40 Now all you need to do is properly set up your microscope capture your images and enjoy Ready Set Go ...

Страница 41: ...ifications 41 Specifications Due to the technology of the camera the speci fications are changing regularly Please visit our website www leica microsystems com for the latest brochure downloads to find the up to date specifications ...

Страница 42: ...CMOS O O Gain 1 20 O O Color depth 24 bit O O File formats JPEG MP4 Software Operating systems Windows 7 LAS 4 9 Windows 10 LAS X 3 0 MacOs Leica Acquire iOs Android AirLab Mechanical and optical interfaces O O Fits between tube and optics carrier via standard Leica dovetail O O Light distribution optical 50 camera 50 O O Internal video magnification 0 5 Electronic interfaces O O Compatibility USB...

Страница 43: ... O O Storage Temperature 20 C to 55 C 4 F to 131 F O O Installation category II overvoltage category O O Pollution degree 2 O O Relative humidity for operation storage 10 to 90 noncondensing O O Altitude operating 0 m to 2 000 m 0 ft to 6 561 ft O O Altitude non operating 0 m to 10 668 m 0 ft to 35 000 ft Other O O Power supply via USB 2 0 O O External power supply optional O O Minimum computer co...

Страница 44: ...Leica IC90 E User Manual Specifications 44 Dimensional Drawings ...

Страница 45: ......

Отзывы: