background image

Leica DM750 P User Manual 

Get Ready! 23

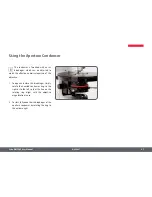
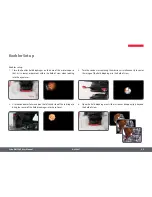
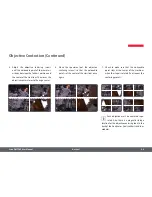
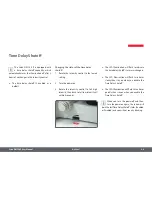
Substage Condenser

Substage condenser


The Leica DM750 P has an open sub-
stage condenser mount. Therefore, the 

condenser needs to be installed.

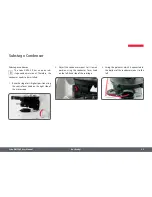
1.  Raise the stage to its highest position using 

the coarse focus knob on the right side of 
the microscope.


2.  Adjust the condenser mount to its lowest 

position using the condenser focus knob 
on the left-hand side of the substage.

3.  Swing the polarizer, which is connected to 

the bottom of the condenser mount, to the 
left.

Содержание DM750 P

Страница 1: ...Leica DM750 P User Manual...

Страница 2: ...2 Published in January 2015 by Leica Microsystems Schweiz AG Max Schmidheiny Strasse 201 CH 9435 Heerbrugg Switzerland In case of questions please contact the hotline sms support leica microsystems co...

Страница 3: ...Leica DM750 P User Manual 3 Chapter Overview Safety regulations 5 The Leica DM750 P 16 Get Ready 19 Get Set 25 Go 37 Care of the Microscope 39 Dimensions 42...

Страница 4: ...l data and ambient conditions 15 The Leica DM750 P Introduction 17 Unpacking 18 Get Ready Attaching Analyzer Module or Analyzer Bertrand Lens Module 20 Viewing Tube 21 Installing Objectives 22 Substag...

Страница 5: ...Leica DM750 P User Manual Safety Regulations 5 Safety Regulations...

Страница 6: ...for their operational safety main tenance and accessories The Safety concept booklet contains addi tional safety information regarding the service work requirements and the handling of micro scope acc...

Страница 7: ...ly impor tant information that is mandatory to read and observe Failure to comply can cause the following O O Hazards to personnel O O Functional disturbances or damaged instruments Danger due to hot...

Страница 8: ...and readily accessible to the user User manu als and updates are also available for you to download and print from our website at www leica microsystems com Accessories from third party suppliers You...

Страница 9: ...doors Install electrical devices at least 10 cm from the wall and away from flam mable substances Avoid large temperature fluctuations direct sunlight and vibrations These conditions can distort measu...

Страница 10: ...e life please contact Leica Service or Sales about disposal Please observe and ensure compliance with the national laws and regulations that implement for example the EC Directive WEEE Like all electr...

Страница 11: ...croscopy series are intended to reduce the exertion of the user to a minimum Danger of infection Direct contact with eyepieces is a potential transmission method for bacterial and viral infections of...

Страница 12: ...5 Heerbrugg Switzerland immediately of any product defect that could potentially cause injury or harm O O If you use accessories made by third party manufacturers with the Leica DM750 P microscope be...

Страница 13: ...parts and plastic parts O O Dust and dirt particles should be removed with a soft brush or lint free cotton cloth O O Remove coarse debris with a moistened disposable cloth O O Acetone xylene or nitro...

Страница 14: ...ly werecommend that you take the precaution of contacting the responsible service organization You can arrange for periodic inspections or if appropriate conclude a mainte nance contract with them O O...

Страница 15: ...ree fall Transport vibrations unpacked 5 200 Hz 1 5 g Atmospheric pressure in use and for storage 500 1 060 mBar Humidity in use and for storage 20 90 Installation Category II Overvoltage Category Pol...

Страница 16: ...Leica DM750 P User Manual The Leica DM750 P 16 The Leica DM750 P...

Страница 17: ...asing the Leica DM750 P Polarizing Microscope System from Leica Microsystems The Leica DM750 P is a highly adaptable instrument with superior optics and precision engineering for educational and basic...

Страница 18: ...nned configuration O O Optional items such as contrast accessories camera adapters cameras and carrying cases are not shipped as part of the stan dard equipment These items are delivered in separate p...

Страница 19: ...Leica DM750 P User Manual Get Ready 19 Get Ready...

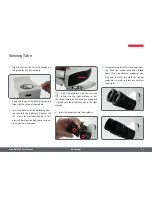
Страница 20: ...sert the dovetail of the module into the stand Analyzer Bertrand Lens Module shown Attaching Analyzer Module or Analyzer Bertrand Lens Module Tools used O O Allen key 1 Slightly unscrew the set screw...

Страница 21: ...rcing it This precisely positions the body onto the opti cal axis of the microscope Install the eyepiece with the crossline reticle into the right eyetube so that the raised feature on the eyepiece al...

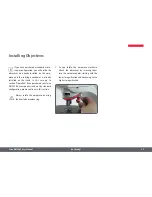
Страница 22: ...stalling Objectives If you have purchased a standard micro scope configuration you will notice the objectives are already installed on the nose piece and the substage condenser is already installed on...

Страница 23: ...ondenser needs to be installed 1 Raise the stage to its highest position using the coarse focus knob on the right side of the microscope 2 Adjust the condenser mount to its lowest position using the c...

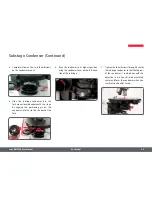
Страница 24: ...the positioning pin on the condenser into the slot on the back of the fork 6 Raise the condenser to its highest position using the condenser focus on the left hand side of the substage 7 Tighten the t...

Страница 25: ...Leica DM750 P User Manual Get Set 25 Get Set...

Страница 26: ...sed to power some Leica cameras or other devices requiring 5 V 1 5 A Power 1 If the power cord is not already attached attach it securely to the back of the micro scope 2 Plug the microscope power cor...

Страница 27: ...ure of the objective 1 To open and close this diaphragm simply rotate the knurled condenser ring to the right or to the left so that the line on the rotating ring aligns with the objective magnificati...

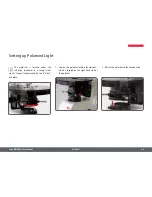
Страница 28: ...he substage condenser in a swing in out mount Swing it into place and be sure it clicks into place 1 Loosen the polarizer locking thumbscrew which is located on the right hand side of the polarizer 2...

Страница 29: ...Lens module swing in the Analyzer by flipping the lower rocker of the module to the right the A position Analyzer in while ensuring the upper rocker of the Analyzer Bertrand Lens Module is flipped to...

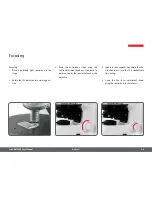
Страница 30: ...posi tion 3 Raise the microscope stage using the coarse adjustment knob until you reach its positive stop or the specimen touches the objective 4 Look into the eyepieces and adjust the illu mination...

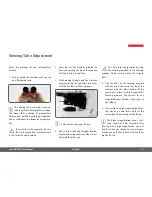
Страница 31: ...the microscope It may help to cover your left eye 4 Now switch to look only through the other eyepiece focusing eyepiece without cross hair with the other eye This time focus the specimen by using th...

Страница 32: ...looking into the eyepieces 2 Use the condenser focus knob on the left hand side of the substage to bring the leaves of the field diaphragm into sharp focus 3 Turn the condenser centering thumbscrews...

Страница 33: ...ntering tools into the set screws which are hidden in the centering holes 2 Focus the polarizing sample 3 Move a noticeable point of the sample to the center of the crosslines 4 Loosen the stage brake...

Страница 34: ...not the objective centering screws so that the noticeable point is at the center of the crosslines once again 7 Check to make sure that the noticeable point stays at the center of the crosslines when...

Страница 35: ...Bertrand Lens by flipping the upper rocker of the Analyzer Bertrand Lens module to the B position Be sure the Polarizer and Analyzer are also in position You can now view the conoscopic image through...

Страница 36: ...intensity control to full high intensity then back to full low intensity all within 5 seconds O O The LED Illumination will flash to indicate the time delay shutoff status was changed O O The LED Illu...

Страница 37: ...Leica DM750 P User Manual Go 37 Go...

Страница 38: ...a DM750 P User Manual Go 38 Now all you need to do is change objectives set the aperture condenser and field diaphragm appropriately for the objective magnification in use and enjoy the view Ready Set...

Страница 39: ...Leica DM750 P User Manual Care of the Microscope 39 Care of the Microscope...

Страница 40: ...be covered with the plastic dust cover provided with the instrument when it is not in use O O If any optical surface becomes coated with dust or dirt clean the surface by blowing it off with a syringe...

Страница 41: ...l concave front lens of fairly short radius or curvature The surface of this front lens can be readily cleaned with a toothpick covered with a cotton tip or with a small cotton swab Moisten the cotton...

Страница 42: ...Leica DM750 P User Manual Dimensions 42 Dimensions...

Страница 43: ...Leica DM750 P User Manual Dimensions 43...

Страница 44: ...Leica DM750 P User Manual Dimensions 44...

Страница 45: ...Leica DM750 P User Manual Dimensions 45...

Отзывы: