Useful TIPS for the Leica A6
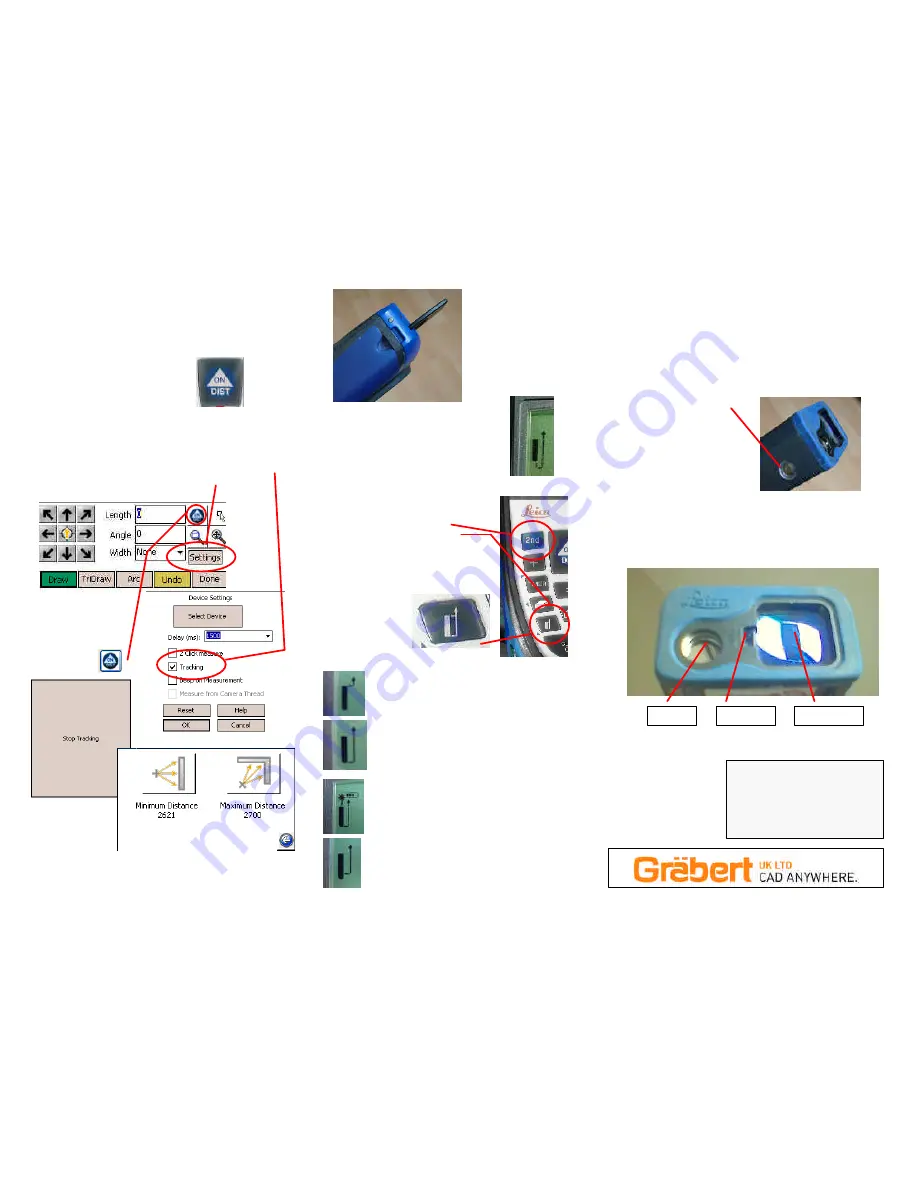
Using Tracking…MAX/MIN On theA6
Method 1….
Simply press and hold the DIST button until the Disto starts
beeping….then let go…press again to stop the tracking. The
measurements will be on the Disto
screen…
type the one you want into the
SiteMaster dialogue box
.
Or
Method 2….
There is another way to do the max/min on the Leica A6….
Working in Tracking mode FIRING the Laser from the
DEVICES touch sensitive screen….
1.
Switch on the ‘Tracking’ feature (While in most
commands you will see a ‘Settings’ button…select this to
access the ‘Device Settings’ dialogue box)
2.
Now only use the
DIST icons on the
screen in
SiteMaster to ‘fire’
the
Laser.
3.
Use the on
screen
‘STOP
TRACKING’
option to
stop taking
measurements.
4.
Select the Maximum or Minimum option as required.
5.
When finished switch OFF the tracking.
Whichever method you
use…utilize the fold out aid
in the base of the Disto.
Flick it out to the 90 degree
position, and then apply
slight sideways pressure to
flick it to the extended
position…the only position
for measuring across
corners accurately
NOTE that the display will change to
indicate the measure position.
As you can see the arrow is connected to
the image of the aid.
Measuring from the Front or Back of the A6…
To switch to the front measure
position…
1.
switch off the 2
nd
2.
press the front/back button
3.
switch back on the 2
nd
.
When the front/back button is pressed,
the disto will beep in a lower tone than
usual, it will also beep in a lower tone
when you take the measurement.
WATCH OUT…
the next
measurement
you take, it will
automatically
reset to measuring from the base.
(Using the higher audible beep)
Display when set to front of Disto
Display when set to foot of Disto
Display when Disto is first switched on showing
the battery status.
Also shows the laser as being ON.
Display when set to TRI-POD mounting position.
To set the TRI-POD measure point…
For the tri-pod mount…
1.
Switch off 2
nd
mode
2.
Press the MENU button 3 times
3.
Press the = (equals) button twice to set the measure
point.
4.
Switch back on the 2nd
Repeat this procedure to clear the measuring point.
WARNING…Once set in this position the A6 does NOT
automatically reset to the base measuring point.
For longer distances use the
Sight…
Setting the Disto Units…
1.
Make sure 2
nd
is OFF
2.
MENU
3.
=
4.
+ OR – BUTTON
5.
= to save the setting
The Leica A6 can measure down to a distance of 50mm, below this
use the measurements on the back sides of the Disto, a tape
measure or ruler.
The serial number that appears in the SiteMaster software can be
found on the back of the Disto.
Not always so obvious…don’t cover the receptor when taking
measurements.
Also, don’t cover the Laser
Sight
Laser
Receptor
Site
Master
Building
CE/Pocket PC
Quickstart Guide
Leica A6 Tips


