

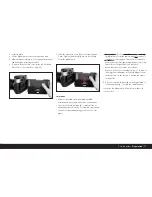


After charging is complete – approx. 2 hours
1
– the red
LED goes out and the charging current is disconnected.
There is therefore no risk of overcharging. Nevertheless,
the charger should then be disconnected from the
mains.
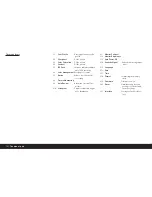
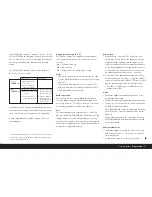
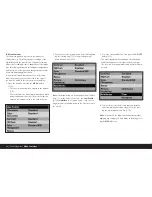
The following LED displays indicate that charging is
defective or is not possible:
If a fault cannot be resolved by eliminating the causes
stated in the above table, you should contact your dealer,
the Leica office in your country or Leica Camera AG.
A fully charged battery provides approx. 3 hours of
operating time.
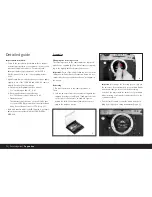
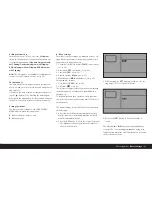
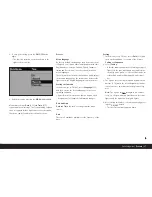
Charge level displays (2.2.6)
The battery’s charge level appears in the data panel
(1.21) (unless the mains unit is connected, see next
section).
= Sufficient capacity
= Low capacity
= Replacement or recharging necessary
Notes:
• Remove the battery if you will not be using the cam-
era/the Digital-Modul-R for a long time. Turn off both
units first.
• The date and time will have to be reset (see p. 87)
within 10 days after the capacity of a battery left in
the Digital-Modul-R is exhausted.
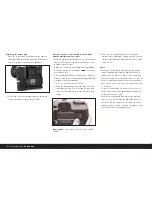
Mains operation
You can operate the camera/Digital-Modul-R unit
from the mains using the mains unit available as an
accessory (order no. 14 452), so that you can contin-
ue working regardless of the battery capacity.
Use
The mains adapter allows stationary use of a LEICA
R8/9 with LEICA DIGITAL-MODUL-R attached over any
length of time. For studio photography or very long
exposures, for example, this can make working signifi-
cantly easier compared to the standard power supply
using the reechargeable battery.
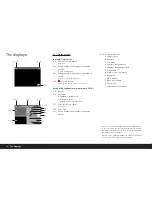
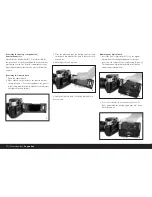
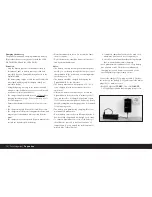
Connection:
1. Plug the 8-pin connector (1.57 a) into the corre-
sponding socket (1.46) on the supply unit for the
Digital-Modul-R, ensuring that the guides on the
connector and the socket are aligned (a white dot
on the Digital-Modul-R’s housing indicates the cor-
rect position 1.46 a). Then secure the connection
by tightening the union nut on the connector.
2. Next connect the appropriate mains cable (1.59)
for the system you are using, i.e. plug the smaller
connector on the mains cable (1.60 a) into socket 2
and the mains plug (1.60 b) into a mains socket.
• The LED 1.59 lights up to confirm the correct
mains connection.
Notes
• The mains adapter automatically switches to the
prevailing mains voltage.
• The battery is not charged during mains operation.
• The battery does not need to be left in the Digital-
Modul-R for mains operation.
• The Digital-Modul-R can get warm during operation
from the mains – this is normal and is not a mal-
function.
• During mains operation, the connection between
the Digital-Modul-R and the mains adapter should
not be interrupted.
Safety instructions
• The mains adapter may only be connected to suit-
able voltage sources, i.e. only those described in
these instructions.
• It may only be used in enclosed, dry rooms.
Detailed guide /
Preparation
/ 79
1
If the battery temperature is too low or the battery is old, this time
can be up to 3 hours; if the battery is still partially charged it can
also be (significantly) shorter.
Green /
a. Mains connection
–
POWER
LED
not correct
b. Connected battery
cannot be charged
Red /
Battery is not charged
a. Battery outside tem-
CHARGE
LED
a. Battery not connected
perature range speci-
correctly
fied above (0°–35°)
b. Connected battery
b. Battery totally dis-
already fully charged
charged, pulsed
precharging will be
carried out first
LED not lit
LED flashing
Содержание Digital-Modul R
Страница 1: ...LEICA DIGITAL MODUL R Anleitung Instructions ...
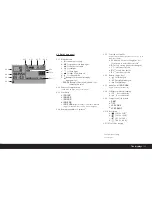
Страница 4: ...1 50 1 49 1 52 1 53b 1 51 1 48 1 47 1 53a 1 53 1 56 1 55 1 54 1 57a 1 57 1 58 1 59 1 60a 1 60 1 60b ...
Страница 5: ...LEICA DIGITAL MODUL R Anleitung English instructions pages 59 114 ...
Страница 7: ...3 ...
Страница 61: ...57 ...
Страница 62: ...58 ...
Страница 63: ...LEICA DIGITAL MODUL R Instructions Illustrations inside front and rear covers ...