

3
Recording Scenes
The LMRH-105 comes from the factory with scenes 1-4 pre-recorded.
By default, scenes 1-4 control all loads on the DLM local network. The
default light levels are shown in the Default Functionality: Plug n’ Go
section.
To change the recorded light levels for any of the scenes, simply adjust
the lights in the room to the desired levels and then press and hold the
desired scene button for 5 seconds.
•
If there are lights in the room that you want turned
OFF
for a
particular scene, make sure that those lights are
OFF
when you record the scene.
•
If there are lights in the room that you want to be unaffected by the scene, then you will need to unbind those lights from the scene
button by following the instructions listed above in this section.reset process
Load binding clear – To un-bind the rocker paddle from all loads:
1.
Do not point the LMRH-105 toward any DLM IR enabled device.
2.
Press and hold the configuration button in the battery compartment until the red LED goes solid
ON
(approximately 10 seconds).
Device reset – To re-bind the LMRH-105 rocker paddle to all loads (its default PnG state):
1.
Do not point the LMRH-105 toward any DLM IR enabled device.
2.
Press and hold the configuration button in the battery compartment for 20 seconds.
System Reset
This reset returns ALL DLM devices to their factory default PnG settings. All system settings will be reset; all customized binding
relationships will be lost. All PnG functionality will be restored. To return all devices on the DLM local network to PnG using the
LMRH-105:
1.
Point the LMRH-105 at an IR-enabled DLM local network device.
2.
Press and hold the configuration button in the battery compartment until the red LED starts blinking to put the DLM local network
into PnL (see Step 1 in the ADJUSTMENT section for details).
3.
Press and hold the configuration button for approximately 20 seconds, until the red LED on the DLM devices resume blinking
rapidly (approximately 2x/second).
4. Release the configuration button.
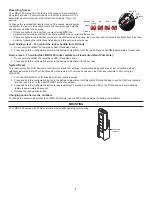
Changing controlled scene numbers
To change the scene numbers that the LMRH-105 controls, use the DIP Switches inside the battery compartment.
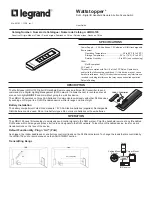
MOUNTING
The LMRH-105 comes with a holster, screws, and an adhesive strip for mounting.
Mounting
Holster
DIP
Switches
Red LED
1-4
(default)
off off
1 2
Scenes
Setting
Switch #
5-8
off on
1 2
9-12
on off
1 2
13-16
on on
1 2


