Dominion LX II Quick Setup Guide
2
QSG-DLX2-v3.0.0-0A-E
255-62-0024-00
2.
Slide the LX II between the side brackets, with its rear panel facing the cable-support bar, until its front panel is flush with the "ears" of the
side brackets.
3.
Secure the LX II to the side brackets using the remaining included screws (three on each side).
4.
Mount the entire assembly in your rack and secure the side brackets' ears to the rack's front rails with your own screws, bolts, cage nuts, and
so on.
5.
When connecting cables to the rear panel of the LX II, drape them over the cable-support bar.
Rear Mount
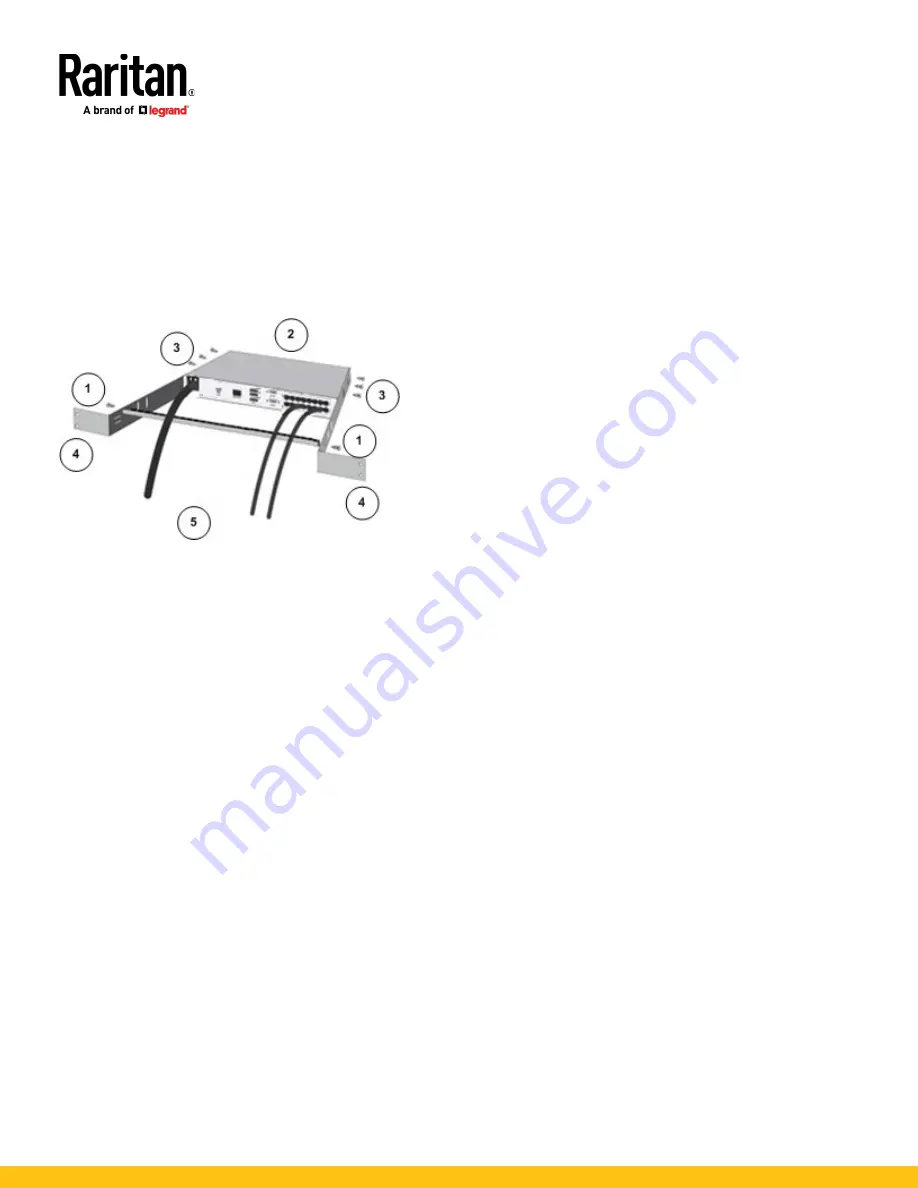
The steps in the table correspond to the numbers shown in the rear rackmount diagrams.
1.
Secure the cable-support bar to the front end of the side brackets, near the side brackets' "ears," using two of the included screws.
2.
Slide the LX II between the side brackets, with its rear panel facing the cable-support bar, until its front panel is flush with the back edges of
the side brackets.
3.
Secure the LX II to the side brackets using the remaining included screws (three on each side).
4.
Mount the entire assembly in your rack and secure the side brackets' ears to the rack's front rails with your own screws, bolts, cage nuts, and
so on.
5.
When connecting cables to the rear panel of the LX II, drape them over the cable-support bar.
QS Rule
Step 1: Configuring Network Firewall Settings
TCP Port 5000
Enable remote access to LX II by allowing network and firewall
communication on TCP Port 5000.
Alternatively, configure LX II to use a different TCP port, and allow
that port network and firewall communication.
TCP Port 443
Allow access to TCP Port 443 (Standard HTTPS) so you can access LX
II via a web browser.
TCP Port 80
Allow access to TCP Port 80 (Standard HTTP) to enable automatic
redirection of HTTP requests to HTTPS.
QS Rule
Step 2: Configuring KVM Target Servers
Mouse Settings
Absolute Mouse Synchronization is recommended to minimize
mouse settings on target servers.
In this mode, absolute coordinates are used to keep the client and
target cursors in synch, even when the target mouse is set to a
different acceleration or speed.
This mode is supported on servers with USB ports and is the default
mode for virtual media CIMs.
•
Absolute Mouse Synchronization requires the use of a virtual
media CIM - D2CIM-VUSB, D2CIM-DVUSB, D2CIM-DVUSB-DVI,
D2CIM-DVUSB-HDMI, D2CIM-DVUSB-DP
Target Server Video Resolutions
See
Supported Target Server Video Resolutions
in
Online Help
.
QS Rule


