background image

www.kenall.com  |  P: 800-4-Kenall  |  F: 262-891-9701  |  10200 55th Street Kenosha, Wisconsin 53144, USA         

This product complies with the Buy American Act: manufactured in the United States with more than 50% of the component cost of US origin. It may be covered by patents 
found at www.kenall.com/patents. Content of specification sheets is subject to change; please consult www.kenall.com for current product details. ©2019 Kenall Mfg.Co. 

4

INSTALLATION INSTRUCTIONS

MRIMAS_F-3166_012918

CUSTOMER SERVICE

For warranty information visit www.kenall.com/Resources/Certified-Performance-Warranties

WARRANTY

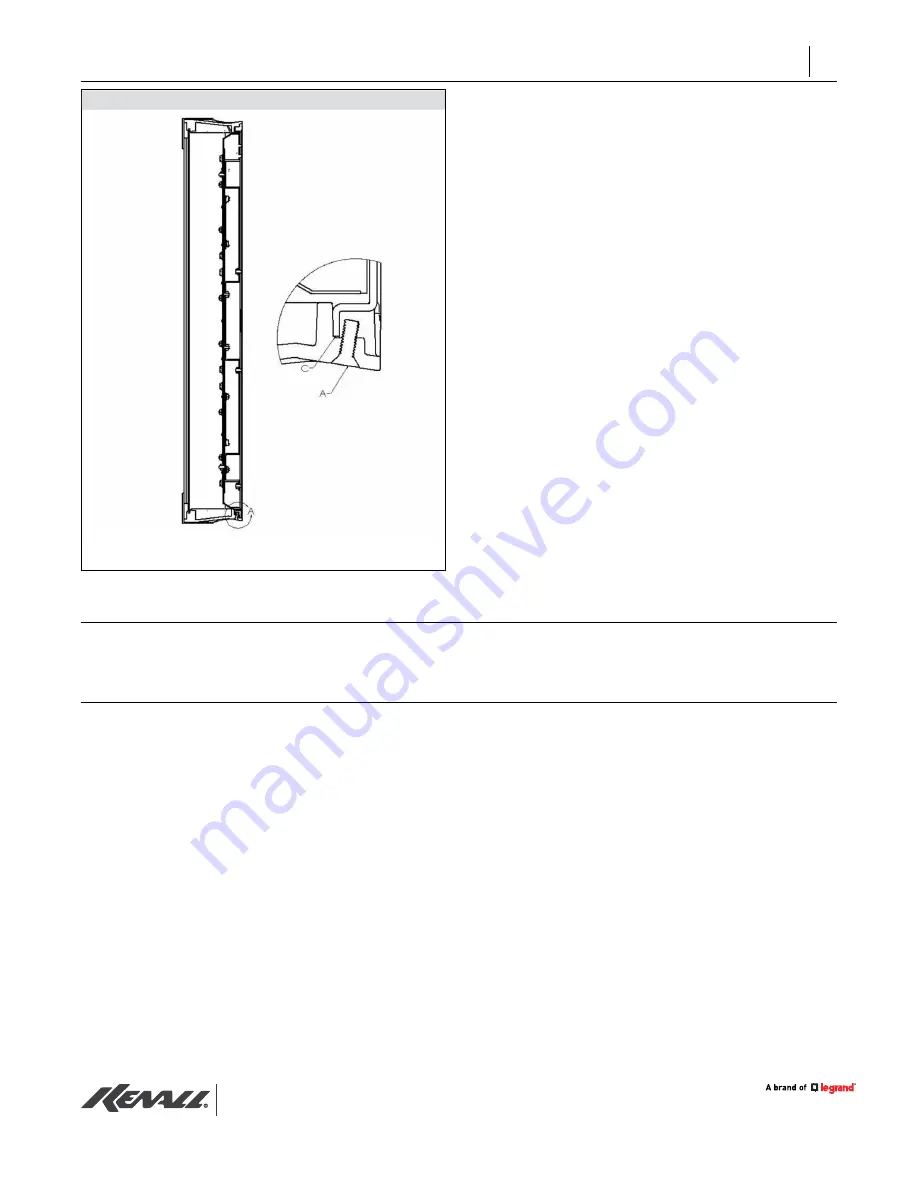
Figure 8

Standard Luminaire Screw Detail

Conclusion of Luminaire Mounting Procedure

19. Reattach the LED tray (F) to the baseplate (C).
20. Reattach the reflector/wireway with the screws that 

were removed in step 3.

21. Hook the front housing (B) onto the angle bracket 

hook (D) shown in Figure 8.

22. Replace the screw(s) removed in step 1. NOTE: Do 

not push on the outer lens when mounting the 
front housing. 

23. Standard luminaire only: Check to make sure the 

housing is locked in place. This is achieved when 
screw (A) is behind the baseplate flange (C). NOTE: 
Do not push on outer lens when mounting the 
front housing.

For technical assistance, call 1-800-4KENALL (1-800-453-6255).

Содержание Kenall MRIMAS Series

Страница 1: ... sheet applies for the MRI MedMaster Auracyl Sconce MRIMAS Series A separate instruction sheet is provided in the MRIPSF 480 external power supply system Both sheets are intended to provide comprehensive instructions on fixture installation and wiring The MRI MedMaster Sconce lighting system contains sensitive electronics Take care to avoid damage by improper handling or static electricity dischar...

Страница 2: ... closed or wrapped in copper foil tape 10 If a 0 10V dimming circuit is to be connected install at this time The 0 10V dimmer must be installed outside the shielded MRI environment with the Kenall MRIFD 1A dimming line filter or equivalent installed in accordance with the supplied installation instructions Kenall recommends the Lutron Diva DVSTV and Lutron Nova T NTSTV DV series to ensure the full...

Страница 3: ... or wrapped in copper foil tape Special attention should be paid to the wiring entry point into the shielded space Class 1 wiring methods are required 13 Run the dimming signal wiring equal in specification to the filter input wiring between the filter output cables and the first luminaire within the shielded room Maintain polarity between input and output sides of the filter and follow wiring rec...

Страница 4: ...w kenall com Resources Certified Performance Warranties WARRANTY Figure 8 Standard Luminaire Screw Detail Conclusion of Luminaire Mounting Procedure 19 Reattach the LED tray F to the baseplate C 20 Reattach the reflector wireway with the screws that were removed in step 3 21 Hook the front housing B onto the angle bracket hook D shown in Figure 8 22 Replace the screw s removed in step 1 NOTE Do no...

Отзывы: