background image

28

4. Installation

Содержание Archimod HE 240

Страница 1: ...Archimod HE 240 480 Installation and maintenance manual Item LE09392AA 12 16 01 CT ...

Страница 2: ...2 EN ENGLISH 3 Archimod HE 240 480 ...

Страница 3: ...ns on the equipment 10 2 6 General warnings 10 2 7 How to proceed in an emergency 12 2 7 1 First aid procedures 12 2 7 2 Fire procedures 12 3 Models 13 3 1 Archimod HE 240 13 3 2 Archimod HE 480 17 4 Installation 21 4 1 Safety Regulations 21 4 2 Electrical connections 21 4 2 1 Safety warnings 22 4 2 2 Preliminary operations 22 4 2 3 Connection of the cabinets Archimod HE480 22 4 2 4 Cabling 29 4 2...

Страница 4: ...Maintenance 55 6 1 Introduction 55 6 2 Preventive maintenance 55 6 3 Periodical checks 55 6 4 Ordinary maintenance 56 6 4 1 Power module hot swap replacement or inclusion of new modules 56 6 4 2 Maintenance procedure for the UPS in maintenance bypass mode 59 6 4 3 Maintenance procedure with UPS off 61 6 5 Replacing the fuses and surge arrester DIN busbar 61 6 6 Requirements for external battery un...

Страница 5: ...ng and in this case the written agreement will be attached to the installation and user manual This manual also makes reference to laws directives and standards that the skilled technician is required to be aware of and consult The original text of this publication drafted in Italian is the only reference for the resolution of disputes of interpretation linked to translations into other languages ...

Страница 6: ...he skilled technician and the operator shall scrupulously comply with the precautions indicated in the manuals In particular they must always work within the operating limits of the equipment always carry out constant and careful maintenance through a skilled technician who complies with all the procedures indicated in the maintenance section The Manufacturer declines all indirect or direct respon...

Страница 7: ...he UPS and relative parts All the repaired or replaced parts will remain LEGRAND s property LEGRAND is not responsible for costs such as losses of profits or earnings losses of equipment data or software claims by third parties any damage to persons or things due to improper use unauthorized technical alterations or modifications any damage to persons or things due to installations where the full ...

Страница 8: ...place The safety manager must ensure that all the people working on the equipment have received all the instructions concerning them in the manual with particular reference to those contained in this chapter 2 2 2 Operator The professional figure assigned to the equipment for normal use is called Operator This definition refers to people who know how to operate the equipment as defined in the user...

Страница 9: ...s that might cause a danger be worn The following sum up the Personal Protective Equipment to wear at all times Anti accident and non sparking shoes with rubber sole and reinforced toe Waterproof rubber gloves Protective garments Protective glasses 2 4 Hazard signs in the workplace The following signs must be exhibited at all points of access to the room where the equipment is installed Electric c...

Страница 10: ...e around dangerous areas marked by the appropriate warning notices on the equipment 2 6 General warnings DANGER The UPS works with dangerous voltages SKILLED TECHNICIANS shall perform the installation and ordinary maintenance operations No part of the UPS can be repaired by the operator Extraordinary maintenance operations must be carried out by LEGRAND Technical Support Service personnel DANGER B...

Страница 11: ... on output is the same as the neutral on input When the output load needs a different neutral status from the input status it is necessary to place downstream of the UPS a suitably scaled isolation transformer protected in compliance with the standards in force CAUTION Do not open the battery fuse holders of the external battery units while the UPS is powering the loads in stored energy mode WARNI...

Страница 12: ...vice and do not ignore any alarm warning message or notice no matter whether they are generated automatically or represented by plates fixed to the equipment Do not run the equipment with fixed protections not installed panels etc In case of breaking buckling or malfunctioning of the equipment or parts of it repair or replace immediately For no reason can the structure of the equipment the devices...

Страница 13: ...d maintenance manual 13 3 Models The UPSs Archimod HE 240 480 are sold without power modules It is necessary to buy them separately The model 3 108 74 is the only one admitted for installation 3 1 Archimod HE 240 all dimensions are in mm ...

Страница 14: ...14 3 Models ...

Страница 15: ...Archimod HE 240 480 Installation and maintenance manual 15 Block diagram ...

Страница 16: ...16 Block diagram of interconnections and distributions The bypass input terminals are represented according to the factory configuration bypass input line in common 3 Models ...

Страница 17: ...Archimod HE 240 480 Installation and maintenance manual 17 3 2 Archimod HE 480 all dimensions are in mm ...

Страница 18: ...18 3 Models ...

Страница 19: ...Archimod HE 240 480 Installation and maintenance manual 19 Block diagram ...

Страница 20: ...20 Block diagram of interconnections and distributions The bypass input terminals are represented according to the factory configuration bypass input line in common 3 Models ...

Страница 21: ...n all the mains disconnector switches installed away from the area of the UPS for the purpose of reminding the assistance personnel of the fact that the circuit is connected to a UPS The label must bear the following text or the equivalent 4 2 Electrical connections The electrical hook up of the UPS to the switchgear is part of the installation that is not normally performed by the UPS manufacture...

Страница 22: ...the UPS is off and no voltage is present Check that the battery disconnectors of the external battery units are open OFF position 4 2 2 Preliminary operations Before connecting the UPS check that the mains input voltage and frequency correspond with the values indicated in the technical data on the UPS rating plate the earthing has been carried out in compliance with IEC International Electrotechn...

Страница 23: ...Archimod HE 240 480 Installation and maintenance manual 23 ...

Страница 24: ...24 4 Installation ...

Страница 25: ...Archimod HE 240 480 Installation and maintenance manual 25 ...

Страница 26: ...26 4 Installation ...

Страница 27: ...Archimod HE 240 480 Installation and maintenance manual 27 ...

Страница 28: ...28 4 Installation ...

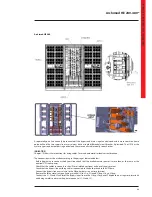
Страница 29: ...4 Cabling Archimod HE 240 480 has openings in the base for the passage of cables and fastening points for the cables themselves The cables must be tightly fixed to the fastening points after they have been connected to the equipment Archimod HE 240 Archimod HE 480 ...

Страница 30: ... circuits Install automatic differential and thermal magnetic circuit breakers upstream of the UPS on both the mains input line and the bypass input line if separate The circuit breakers must be sized according to the indications of the tables in Chapter 10 4 2 7 Backfeed protection Archimod HE has integrated backfeed protection for TN systems and an auxiliary contact to activate the external circ...

Страница 31: ...mum applicable voltage 250Vac Maximum applicable current 5A cosφ 1 INDICATION If during operation the UPS signals that the backfeed protection has been actuated contact the LEGRAND Technical Support Service TT distribution system and and backfeed protection circuit connection diagram with bypass line in common at the mains input S10 thermal magnetic differential circuit isolation switch specified ...

Страница 32: ...2 two pole isolation switch in series to the line to the EC9 connector of the relay interface card INDICATION By making the external backfeed protection as shown in the diagram it is possible to isolate the line from the outside and make it safe First switch on the S11 isolation switch in parallel to the contact coil and then switch off the S12 two pole isolation switch in series to the line to th...

Страница 33: ...Archimod HE 240 480 Installation and maintenance manual 33 Archimod HE 240 ...

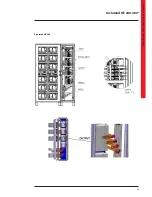
Страница 34: ...teries remove the plate and make the configuration from the control panel to the end of the UPS installation as described in the paragraph 5 5 The positive pole battery busbars are marked as follows 0 connected to the power modules controlled by the CM0 command board 1 connected to the power modules controlled by the CM1 command board 2 connected to the power modules controlled by the CM2 command ...

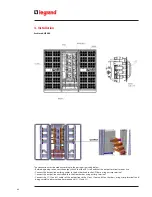
Страница 35: ...h external battery unit are off 2 Loosen the screws that hold the UPS distribution panels and the external battery units closed 3 Connect the UPS to the external battery units installed using the earthing cables yellow green 4 Connect the positive and negative terminals of the UPS with those of the external battery units 5 Close the external battery unit distribution panels The UPS cabinet having ...

Страница 36: ...36 Archimod HE 240 4 Installation ...

Страница 37: ...am and no voltage is present Check that the earthing cable from the low voltage switchgear panel is connected to the busbar fixed on the UPS base Connect the mains input neutral cable to the respective Nin mains busbar using a crimp terminal Connect cables L1 L2 and L3 of the mains input line to the L1in L2in and L3in busbars using crimp terminals and being careful to observe the phase sequence L1...

Страница 38: ...38 4 2 10 Bypass input line connection The default configuration has the bypass line in common to the mains input Archimod HE 240 4 Installation ...

Страница 39: ...n must be made according to the passages indicated below Before beginning to connect the bypass line check that the available mains power is more than or the same as the nominal UPS input power Check that the cables to connect to the UPS are isolated upstream and no voltage is present Check that the bypass line earthing cable is connected to the busbar fixed to the UPS base Connect the bypass line...

Страница 40: ...pter 10 shows the instructions for sizing the output cables Provide a separate switchgear for the load It is advisable to use switches or automatic breakers in line with IEC standards to protect the lines that originate from the switchgear Indicate the values reported below on the system switchgear by means of stickers or similar maximum nominal power of the total load maximum nominal power of the...

Страница 41: ...Archimod HE 240 480 Installation and maintenance manual 41 Archimod HE 240 ...

Страница 42: ...als are not live Connect the output line earthing cables to the busbar fixed to the UPS base using a crimp terminal Connect the output line neutral cable to the Nout busbar using a crimp terminal Connect the L1 L2 and L3 cables of the output line to the L1out L2out and L3out busbars using crimp terminals and being careful to observe the phase sequence L1 L2 and L3 4 Installation ...

Страница 43: ... remote bypass contact are the following voltage with open contacts less than 100 V current with closed contacts less than100 mA The figure below shows how the external bypass contact must be connected 4 3 Insertion of power modules Once all the electrical connections have been made all the UPS panels can be screwed up again and the power modules can be inserted in the UPS Insert the power modules...

Страница 44: ...ont part of the UPS which is only accessible to a skilled technician who has the key to open the doors CAUTION For the operator s safety it is essential the interfaces are connected in such a way that the maximum voltage between any two wires connected to the interface and between any one of these wires and the earth is less than 42Vpk or less than 60Vdc the isolation voltage between any wire conn...

Страница 45: ...ons and to update the equipment firmware The second serial port is called smart port serial RS232 Through a computer this port makes it possible to access a set of data relative to the functioning of the UPS as well as controlling the unmanned shutting down of the operating system The pinout of the RS232 interface is the following PIN FUNCTION 2 RX 3 TX 5 GND 1 4 6 connected together 7 8 connected...

Страница 46: ...ol panel see paragraph 6 4 2 path UPS Setup Dry contacts The contacts are available through 8 and 6 pole connectors The electric characteristics of the contact interface are the following VMAX 250 Vac 30 Vdc IMAX 5 A The pinout is the following CONNECTOR A 8 poles PIN FUNCTION 1 2 Contact 1 default battery mode functioning 3 4 Contact 2 default autonomy reserve 5 6 Contact 3 Default generic alarm ...

Страница 47: ... of the first terminal to pin 4 of the second terminal close the parallel on the normally closed NC external contact For the correct connection of the EPO the following requirements must be adhered to use a double insulation cable of up to 10 meters in length check that the switch used is galvanically isolated INDICATION It is not possible to connect the EPO circuits of different UPSs in parallel ...

Страница 48: ...he logic level interface are Logical output VMAX 12 Vdc impedance on output 2 2 kΩ in series Power supply 12 Vdc IMAX 700 mA not regulated Open collector outputs 30 Vdc IMAX 100 mA The pinout is the following PIN FUNCTION 1 GND 2 Mains Battery output active high 3 Autonomy reserve output active high 4 Power supply 7 Overload open collector active low 12 UPS in battery mode open collector active lo...

Страница 49: ...given below 4 4 6 Network card SNMP slot On each control panel there is a slot for the SNMP card optional By means of a network card it is possible to access to a series of UPS operation data The current taken from the SNMP slot for the functioning of the network card must be in total less than 700mA ...

Страница 50: ...es on output THREE SINGLE PHASE OUTPUTS this setting is necessary if three single phase output lines with the neutral in common have been created The UPS manages the three outputs completely independently of each other For example if an excessive load is applied to one of the three output lines the bypass only cuts in on the overloaded line while the power supply continues to be guaranteed on the ...

Страница 51: ...rchimod HE 240 480 Installation and maintenance manual 51 CAUTION If fewer power modules are inserted than the maximum protect the empty slots with the plastic covers of the kit 3 108 66 Archimod HE 240 ...

Страница 52: ...your choice with the ENTER key 4 Press the ESC key to leave the Language page The text Service Mode appears on the display For further information about Service mode and how the control panel works consult the user manual CAUTION Archimod HE 240 480 is able to recognise the presence of non aligned firmware among the power modules and therefore prevent the start up In Service Mode the status indica...

Страница 53: ...talling with independent strings of batteries the KB value must be entered for each command board Example if an Archimod HE 240 is connected to four external battery units in common each containing 21 94Ah batteries a value of 4 KB must be set If the four external battery units are independent set the value of 1 KB for each of the command board addresses 8 Follow the path UPS Setup Batteries Capac...

Страница 54: ...ains through the automatic bypass circuit inside the power modules If the output voltage leaves the window of tolerance 20 15 of the voltage set on output the UPS actuates its inverter stage and supplies the load with energy stored in the batteries When the input mains are back within the tolerance values the UPS is automatically taken back to the eco mode It is possible to change the functioning ...

Страница 55: ...ing fans on each power module are working correctly During a preventive maintenance inspection the skilled technician must carry out the following checks no alarm presence list of the memorised events correct function of the static and maintenance bypass integrity of the electrical installation flow of cold air battery status characteristics of the applied load conditions of the installation locat...

Страница 56: ...g power modules INDICATION To use the hot swap function it is necessary to have sized the UPS properly If the percentage of the load does not allow the hot swap without overload perform the manual bypass mode maintenance procedure The command boards CM and the power modules PM are identified by a unique address inside the system as shown below Archimod HE 240 CM 0 PM 0 PM 1 PM 2 PM 3 PM 4 PM 5 PM ...

Страница 57: ...M 53 PM 69 PM 70 PM 71 In the Archimod HE 240 UPS there are four command boards Each of them controls nine power modules In the Archimod HE 480 UPS there are four command boards Each of them controls eighteen power modules To change or add a power module all modules belonging to one command board are switched off The maximum power available becomes 75 of the nominal power for both UPS models Do th...

Страница 58: ...on At the end of the operations the UPS returns to operate with all the power modules 14 Close the UPS doors the keys must not be left at the operator s disposal INDICATION The procedure to add power modules is similar to the previous one At point 7 remove the plastic covers of the kit 3 108 66 which protect the empty slots where new power modules are to be added CAUTION Archimod HE 240 480 is abl...

Страница 59: ...isplay shows the text Forced on Bypass When the equipment is in forced bypass mode the status indicator flashes quickly The LEDs on the power modules flash quickly as well 3 Close the maintenance manual bypass disconnector by bringing it to the ON position The load is powered directly from the mains The display shows the text Maintenance Bypass 4 Open the output disconnector bringing it to the OFF...

Страница 60: ...that the output disconnector is open OFF position 2 Close all battery disconnectors of the external battery units 3 Close the mains input disconnector and bypass input disconnector by bringing them to the ON position 4 Press the ON OFF key to turn on the UPS When the display shows the text ENTER to confirm UPS turn ON press the ENTER key CAUTION Archimod HE 240 480 is able to recognise the presenc...

Страница 61: ...r from the mains If these operations are performed correctly there will be no voltage to the UPS It is now possible to proceed with the maintenance operations WARNING Inside the drawer where the command boards and the relay interface card are located there could be dangerous voltage due to the connection of the external backfeed control line Be careful of connector EC9 of the relay interface card ...

Страница 62: ...ICATION If the installation removal procedure changes the total number of KB installed it is necessary to update this setting from the control panel After concluding the installation replacement operations calibrate the batteries from the control panel to get precise indications regarding the total autonomy of the UPS To activate the function enter the main menu and follow the path Tools Batteries...

Страница 63: ... in an environment with a room temperature between 20 C 4 F and 50 C 122 F and humidity less than 90 not condensing 7 2 Batteries It is possible to store VRLA batteries without recharging them in the following conditions up to 6 months at 20 C 68 F up to 3 months at 30 C 86 F up to 2 months at 35 C 95 F Contact a skilled technician if the batteries must be recharged CAUTION The external battery un...

Страница 64: ...igh short circuit current When working on batteries the prescriptions indicated in chapter 2 must be adhered to 8 2 UPS dismantling The dismantling of the UPS must occur after the dismantling of the various parts it consists of For the dismantling operations it is necessary to wear the Personal Protective Equipment mentioned in paragraph 2 3 and to consult the instructions and diagrams in the inst...

Страница 65: ... Modular with power modules PM7 3 108 73 of 6 700 VA PF 1 Expandable redundant N X Waveform in normal mode Pure sine Waveform in stored energy mode Pure sine Bypass Automatic static and electromechanical Manual for maintenance Transfer time 0 ms INPUT ELECTRICAL CHARACTERISTICS 3 104 75 3 104 76 3 104 77 Maximum input current with minimum input voltage and battery charger active 462 A 924 A Nomina...

Страница 66: ...inear nominal load 0 5 Total harmonic distortion of output voltage on non linear nominal load 1 Efficiency in Normal Mode up to 96 Efficiency in Eco Mode 99 max Overload admitted 115 for 10 minutes without automatic bypass intervention 135 for 60 seconds without automatic bypass intervention ELECTRICAL OUTPUT CHARACTERISTICS STORED ENERGY MODE 3 104 75 3 104 76 3 104 77 Nominal output voltage 400 ...

Страница 67: ...ftware Free software for Windows and Linux environments is available to implement the following functions displaying all the functioning and diagnostic data in case of problems setup of special functions automatic shutdown of all the computers supplied by the UPS if connected to TCP IP network Visit us at http www ups legrand com to download a copy of the software free of charge Protections Electr...

Страница 68: ... 19 3 A Input power factor PF 0 99 Total harmonic distortion of the input current THDi 3 Nominal output voltage 240 252 Vdc Output voltage in maintenance phase 13 75 Vdc per battery Nominal output voltage 15 Adc max AC DC efficiency 93 at max rated output current Functioning status indications signalled by multicoloured LED on the module and indications on the UPS display Yellow LED fast flashing ...

Страница 69: ...ypass line OUTPUT CABLE 240 kVA 4 x 2 x 120 mm2 or 4 x 240 mm2 4 x 2 x 120 mm2 or 4 x 240 mm2 4 x 2 x 120 mm2 or 4 x 240 mm2 480 kVA 4 x 2 x 240 mm2 4 x 2 x 240 mm2 4 x 2 x 240 mm2 TABLE 2 Automatic breaker recommended for mains input and bypass line POWER AUTOMATIC CIRCUIT BREAKER RECOMMENDED 240 kVA 400A C curve 480 kVA 800A C curve TABLE 3 Residual current breaker recommended for mains input an...

Страница 70: ...70 ...

Страница 71: ...Archimod HE 240 480 Installation and maintenance manual 71 ...

Страница 72: ...ervice BP 30076 87002 LIMOGES CEDEX FRANCE www legrand com Legrand reserves at any time the right to modify the contents of this booklet and to communicate in any form and modality the changes brought to the same Installer stamp ...

Отзывы: