background image

M2T

LECTROSONICS, INC.

14

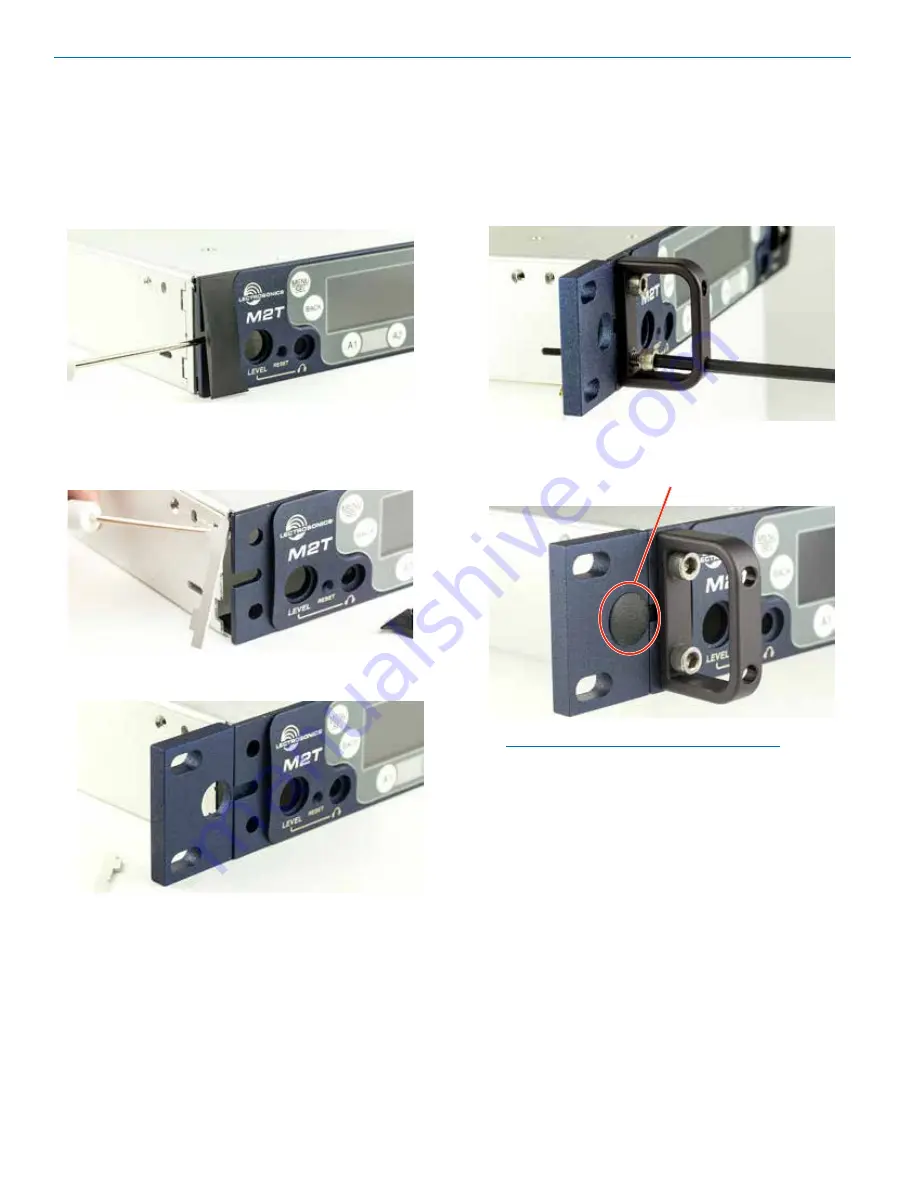
4. Insert two (2) cap screws (Part #28885) through the 

rack handle (Part #27082) holes and install the rack 

handle onto the flange bracket through the holes in 

the unit’s front panel. Firmly tighten the cap screws 

using the hex key (Allen wrench) as shown.

5. If antennas will NOT be mounted on the front 

panel of the transmitters, install the hole cap (Part 

#35959) by aligning the flat on the cap with the flat 

on the opening.

Installing two M2Ts into a Single Rack 

Space

The M2T transmitter occupies a half rack space, and 

comes with hardware to mount two transmitters into a 

single rack space.

1. Remove the Trim Cap (Part #P1330) from both 

sides of the front panel on both transmitters.

2. Remove the breakaway tabs on both sides of the 

chassis side panels. Use a flat blade screwdriver 

to pry the tabs outward and snap them off of the 

chassis.

3. Insert the flange bracket (Part #27076) into the 

open slot in the side of the chassis cover panel.

NOTE: The retaining nuts on the panel and tie 

brackets are “tensioning lock nut” types designed 

to prevent the screws from coming loose due to 

vibration. You will usually feel resistance as you 

tighten the screws - this is normal.

Содержание M2T

Страница 1: ...ND Digital IEM Transmitter INSTRUCTION MANUAL Rio Rancho NM USA www lectrosonics com Fill in for your records Serial Number Purchase Date M2T Dante M2T Non Dante This manual is for all 1 X versions of Duet Firmware ...

Страница 2: ...M2T LECTROSONICS INC 2 ...

Страница 3: ... Level 9 RF Tuning 9 Sync Scan 9 Sync Settings 9 Sync FlexList 9 Audio Level Trim 10 Audio Input Type 10 Audio Polarity 10 Headphone Monitor 10 Front Panel Setup 10 Network Settings 10 Edit Names 10 Restore Defaults 10 About 10 Links 10 Hardware Installation 11 Unpacking the Unit 11 Items Included in the Box 11 Installing two M2Ts into a Single Rack Space 12 Wireless Designer Software and USB Driv...

Страница 4: ...esult is crystal clear sound and extremely low distortion of 0 15 The M2T is designed and developed with the professional touring installation theater and broadcast customers in mind The transmitter chassis is all metal The front panel is an aluminum extrusion with a durable powder coat finish What is Dante Audinate s patent pending Dante technology is a flexible Internet Protocol IP and Ethernet ...

Страница 5: ...and scan RF spectrum on site 3 Sync Scan to transfer information from receiver to transmitter 4 Tune transmitter to unoccupied channels in scan 5 Sync receiver refer to receiver manual 6 Turn on transmitter RF 7 Send audio sources to transmitter WARNING Increasing the Pregain can make headphone volume excessively loud Use caution when setting and using ...

Страница 6: ...wer switch Return to previous screen Panels and Features IR Port Headphone Volume Adjustment Dante Ports optional Ethernet Port Antenna Jack Headphone Jack Reset Button M2T Front Panel M2T Back Panel Menu Select Channel Function Buttons Quick Sync XLR TRS Combo Analog Input Connectors ...

Страница 7: ...r B2 on the front panel initiates Quick Sync Two options are available SYNC ALL or SPLIT MONO The mode is selected prior to sync in the Front Panel Setup menu item NOTE See Front Panel Setup for more instruction on the Quick Sync function Power Screens When powering on the M2T there are three screens that appear in the following order Duet Lectrosonics RF On Off WARNING If RF ON is selected and th...

Страница 8: ...S Use arrow keys to select desired sync command Press SEL to select desired function Use arrow keys to adjust setting Press SEL to select desired function Use arrow keys to select desired audio setting Press SEL to select desired channel Use arrow keys to select desired channel Press SEL to engage function Use arrow keys to select desired audio setting Press SEL to select desired channel Use arrow...

Страница 9: ...FlexList FlexList allows the user to set up a list of profiles by name in the receiver This allows quick and easily ac cess to listen to any of the mixes on site After putting the receiver into Sync Flex mode choose the function and then use the transmitter to send the profile over IR Stereo Mix The current receiver settings are sent as is except the mix mode is set to stereo Mono Ch 1 Only The cu...

Страница 10: ...Startup RF state Quick Sync Mode Sync All A long 1 second press of either the A1 A2 B1 or B2 buttons sends all RX1 settings Split Mono A long press of the A1or B1 buttons sends all RX1 settings with the mix mode forced to Mono Ch 1 A long press of the A2 or B2 buttons sends all RX1 settings with the mix mode forced to Mono Ch 2 Network Settings Allows the user to set IP address or other network se...

Страница 11: ...ettings to the factory defaults About Displays general information about the M2T including serial number and the hardware FPGA and microcontroller firmware versions Links QR codes with links to the Lectrosonics website the M2T User Manual online and YouTube video tutorials ...

Страница 12: ...tems shipped to your location Items Included in the Box Instruction manual DCR15 4AU Power supply cable 21926 USB cable 35800 Hex L key wrench 25990 Bracket rear tie 25991 Bracket front tie 27076 Rack flange bracket 27082 Rack handle 28885 4 SCR10 cap screw 35664 4 Rubber foot large 35959 Hole plug A500RA20 2 Antenna 35800 Hex L key wrench 25991 Bracket front tie 27076 Rack flange bracket 27082 Ra...

Страница 13: ...Digital IEM Transmitter Rio Rancho NM 13 ...

Страница 14: ... M2T transmitter occupies a half rack space and comes with hardware to mount two transmitters into a single rack space 1 Remove the Trim Cap Part P1330 from both sides of the front panel on both transmitters 2 Remove the breakaway tabs on both sides of the chassis side panels Use a flat blade screwdriver to pry the tabs outward and snap them off of the chassis 3 Insert the flange bracket Part 2707...

Страница 15: ... tie bracket is installed Rear tie bracket Part 25990 Front tie bracket Part 25991 7 Remove the four cap screws from the adjacent rear panels and them use them to attach the rear tie bracket Do not tighten the screws completely 8 After front and rear tie brackets are installed place the receivers on a flat surface so the that the front panels are even with each other Hold the receivers in place an...

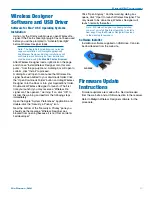
Страница 16: ...aller and follow the screen prompts I Agree on the EULA end user license agreement must be checked to continue the installation The installer includes USB drivers which only need to be installed once By default the boxes are unchecked in the installer because they are not required except for the very first time the software is installed on the computer being used If it is the first time the softwa...

Страница 17: ...o your Applications folder Double click Wireless Designer to launch it The first time you launch it you may receive a Wireless De signer can t be opened warning If so click OK to dismiss the warning and perform the following steps immediately Open the Apple System Preferences application and double click the Security Privacy icon Near the bottom of the Security Privacy pane you should see the mess...

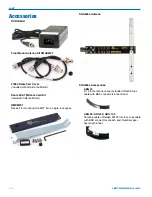
Страница 18: ...Kit Included in Dante Model RMPM2T 1 Rack kit for mounting one M2T into a single rack space SNA600a Antenna SNA600a Accessories ARG 15 A 15 foot antenna cable of standard RG 58 coax cable with BNC connectors at each end ARG 25 ARG 50 ARG 100 Antenna cable of Belden 9913F low loss coax cable with BNC connectors at each end Number speci fies length in feet ...

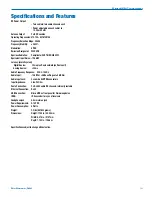
Страница 19: ...urce 1 0 ms plus Dante network on Dante unit Analog Source 1 4 ms Audio Frequency Response 20 Hz 15 kHz Audio Input 10 dBV or 4 dBu settings w 5 dB trim Audio Input Jack 4 x combo XLR TRS connectors Input impedance Line 2k Ohm Dante Connection 2 x RJ45 4 audio RX channels internally routable Ethernet Connection RJ45 USB Connection Micro USB on front panel for firmware updates IRDA IR transceiver f...

Страница 20: ...epair For timely service please follow the steps below A DO NOT return equipment to the factory for repair without first contacting us by email or by phone We need to know the nature of the problem the model number and the serial number of the equipment We also need a phone number where you can be reached 8 A M to 4 P M U S Mountain Standard Time B After receiving your request we will issue you a ...

Страница 21: ...Digital IEM Transmitter Rio Rancho NM 21 ...

Страница 22: ...M2T LECTROSONICS INC 22 ...

Страница 23: ...veuillez consulter le document CPC 2 1 28 d Industrie Canada intitulé Délivrance de licences sur une base volontaire pour les appareils radio de faible puissance exempts de licence et ex ploités dans les bandes de télévision Per RSS Gen This device complies with Industry Canada s license exempt RSSs Operation is subject to the following two conditions 1 This device may not cause interference 2 Thi...

Страница 24: ...l pay for the cost of returning your equipment to you This warranty applies only to items returned to Lectrosonics Inc or an authorized dealer shipping costs prepaid within one year from the date of purchase This Limited Warranty is governed by the laws of the State of New Mexico It states the entire liablility of Lectrosonics Inc and the entire remedy of the purchaser for any breach of warranty a...

Отзывы: