background image

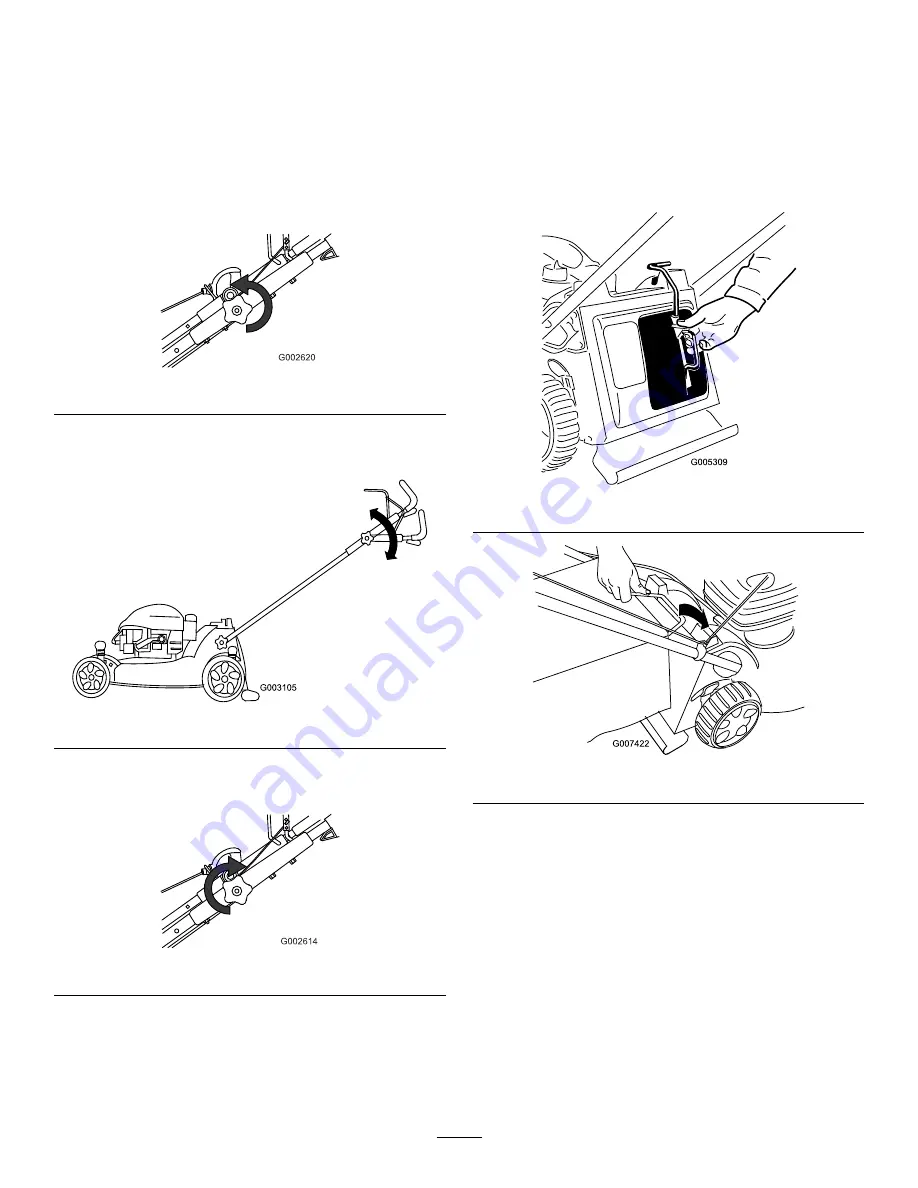
Adjusting the Upper Handle
Height

You may raise or lower the upper handle to a position
comfortable for you.

Note:

You cannot raise the upper handle higher than

the angle of the lower handle.

1. Loosen the upper handle knob (Figure 16).

Figure 16

2. Move the upper handle to the desired position

(Figure 17).

Figure 17

3. Tighten the upper handle knob as tight as you can

(Figure 18).

Figure 18

Starting the Engine

Important:

The mower has a safety switch that

prevents you from starting the mower unless you
first install the mulch plug or the grass bag securely
on the mower.

1. Install the mulch plug (Figure 19) or the grass bag

(Figure 20) on the mower.

Figure 19

Figure 20

2. Firmly push in the primer 3 times with your thumb,

holding the primer in for a second before releasing
it each time (Figure 21).

9

Содержание Insight 10683

Страница 1: ...l information worthy of special attention Warning CALIFORNIA Proposition 65 Warning The engine exhaust from this product contains chemicals known to the State of California to cause cancer birth defec...

Страница 2: ...atcher discharge guard rear guard or other safety protective devices in place and working Never leave a running machine unattended Stop the engine and wait until the blade comes to a complete stop bef...

Страница 3: ...p and tighten securely Exhaust contains carbon monoxide an odorless deadly poison that can kill you Do not run the engine indoors or in an enclosed area General Service Never operate machine in a clos...

Страница 4: ...rts 2 Thrown object hazard keep bystanders a safe distance from the machine 5 Cutting dismemberment hazard of hand or foot mower blade remove the ignition key and read the instructions before servicin...

Страница 5: ...not come with oil in the engine but it does come with a bottle of oil 1 Remove the dipstick Figure 6 Figure 6 2 Slowly pour oil into the oil fill tube until the oil level reaches the Full line on the...

Страница 6: ...the top of the mulch plug lever must lie fully in the bottom of the channel Figure 7 Figure 7 1 Top of mulch plug lever in switch channel 1 Insert the mulch plug into the mower if it isn t already ins...

Страница 7: ...s To prevent a static charge from igniting the gasoline place the container and or mower directly on the ground before filling not in a vehicle or on an object Fill the tank outdoors when the engine i...

Страница 8: ...ervice classification of SF SG SH SJ SL or higher 3 Install the dipstick Adjusting the Cutting Height Adjusting the cutting height may bring you into contact with the moving blade causing serious inju...

Страница 9: ...re 17 Figure 17 3 Tighten the upper handle knob as tight as you can Figure 18 Figure 18 Starting the Engine Important The mower has a safety switch that prevents you from starting the mower unless you...

Страница 10: ...e and blade should stop within 3 seconds If they do not stop properly stop using your mower immediately and contact an Authorized Service Dealer Figure 23 Mulching the Clippings Your mower comes from...

Страница 11: ...in serious personal injury Stop the engine and wait for all moving parts to stop before leaving the operating position Installing the Grass Bag 1 Remove the mulch plug Figure 25 Figure 25 2 Route the...

Страница 12: ...s you from starting the mower unless you first install the mulch plug securely on the mower refer to Mulching the Clippings Installing the Side Discharge Chute 1 Unlock the side discharge door Figure...

Страница 13: ...nly dry grass or leaves Wet grass and leaves tend to clump on the yard and can cause the mower to plug or the engine to stall Wet grass or leaves can cause serious injury if you slip and contact the b...

Страница 14: ...itional maintenance procedures Preparing for Maintenance 1 Stop the engine and wait for all moving parts to stop 2 Disconnect the spark plug wire from the spark plug Figure 35 before performing any ma...

Страница 15: ...used oil out through the oil fill tube Figure 38 Figure 38 4 Slowly pour oil into the oil fill tube until the oil level reaches the Full line on the dipstick Figure 39 Do not overfill Max fill 20 oz...

Страница 16: ...ade and all mounting hardware Figure 41 Important Position the curved ends of the blade to point toward the mower housing 6 Use a torque wrench to tighten the blade bolt to 60 ft lb 82 N m Important A...

Страница 17: ...onnect the wire onto the retaining post 6 Remove the spark plug add 1 oz 30 ml of oil through the spark plug hole and pull the starter rope slowly several times to distribute oil throughout the cylind...

Страница 18: ...Notes 18...

Страница 19: ...Notes 19...

Страница 20: ...ining Warranty Service If you think that your Lawn Boy product contains a defect in materials or workmanship follow this procedure 1 Contact any Authorized Lawn Boy Service Dealer to arrange service a...

Отзывы: