


12
USING AN OPTIONAL DETECTOR
•
Press and hold the
power
button for 3
seconds to enter into
pulse mode
. The laser
beam will flash 3 times to indicate that pulse
mode is active.
• Switch the detector on by pressing the
power button
. The
speaker
will beep
indicating the instrument is operating.
•
Move the detector into the path of the laser
beam.
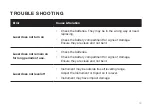
•
Hold the detector upright for horizontal
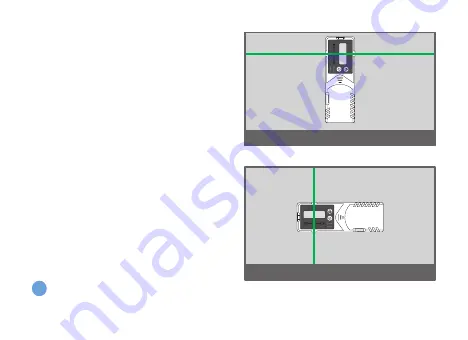
beams. Rotate the detector 90° for vertical
beams.
•
The
LED direction indicators
will indicate
the position of the laser beam. The
centre
LED
will indicate alignment with the beam.
The detector is an optional accessory
which can be purchased from your
retailer.
* Detector image shown is for illustrative
purposes only. Actual model may vary.
Detector position for horizontal beams*
Detector position for vertical beams*
USING YOUR LASER
(continued)
i
Содержание CX2G
Страница 1: ...I N S T R U C T I O N M A N U A L C X 2 G C R O S S L I N E L A S E R...
Страница 5: ...5 LASER OVERVIEW Laser port Locking switch 1 4 tripod thread Battery door cover Control panel...
Страница 6: ...6 LASER OVERVIEW CONTROL PANEL Power Pulse mode press and hold for 3 seconds...
Страница 7: ...7 MAGNETIC MOUNT OVERVIEW 1 4 thumb screw 1 4 thread Magnet Magnet...
Страница 19: ...19 NOTES...
Страница 20: ...www spoton com au...