


www.larius.com
8
PREHETAER
REV. 01 - 12/2021 - Cod. 150196
G
H
Fig. 1H
Fig. 3H
Fig. 2H
ELECTRICAL CONNECTION
ROUTINE MAINTENAINCE
• Always remember to clean the preheater after use to prevent
the fluid from solidifying inside it when it cools down.
• Disconnect the electrical connection and let the fluid circulate for
a few minutes until the preheater has cooled down before using
the solvent for washing, thus avoiding the sudden expansion of
the solvent inside the preheater due to the heat with consequent
increase of pressure.
Always disconnect the power supply before
carrying out any type of check or replacement
of the electrical components of the preheater.
C
E
C
A
B
2
1
P 1
D
F
Always disconnect the power supply before carrying out any type of check or replacement of the electrical
components of the preheater.
ELECTRICAL CONNECTIONS
• To access the inside of the preheater, remove the front cover
(
H1
).
• First of all, check the continuity of the electric cables and the
fuses.
• To replace the indicator light bulb, if necessary, do not try to
remove the front ring nut
(
H2
), but unscrew the glass locking ring
(
H3
)
.
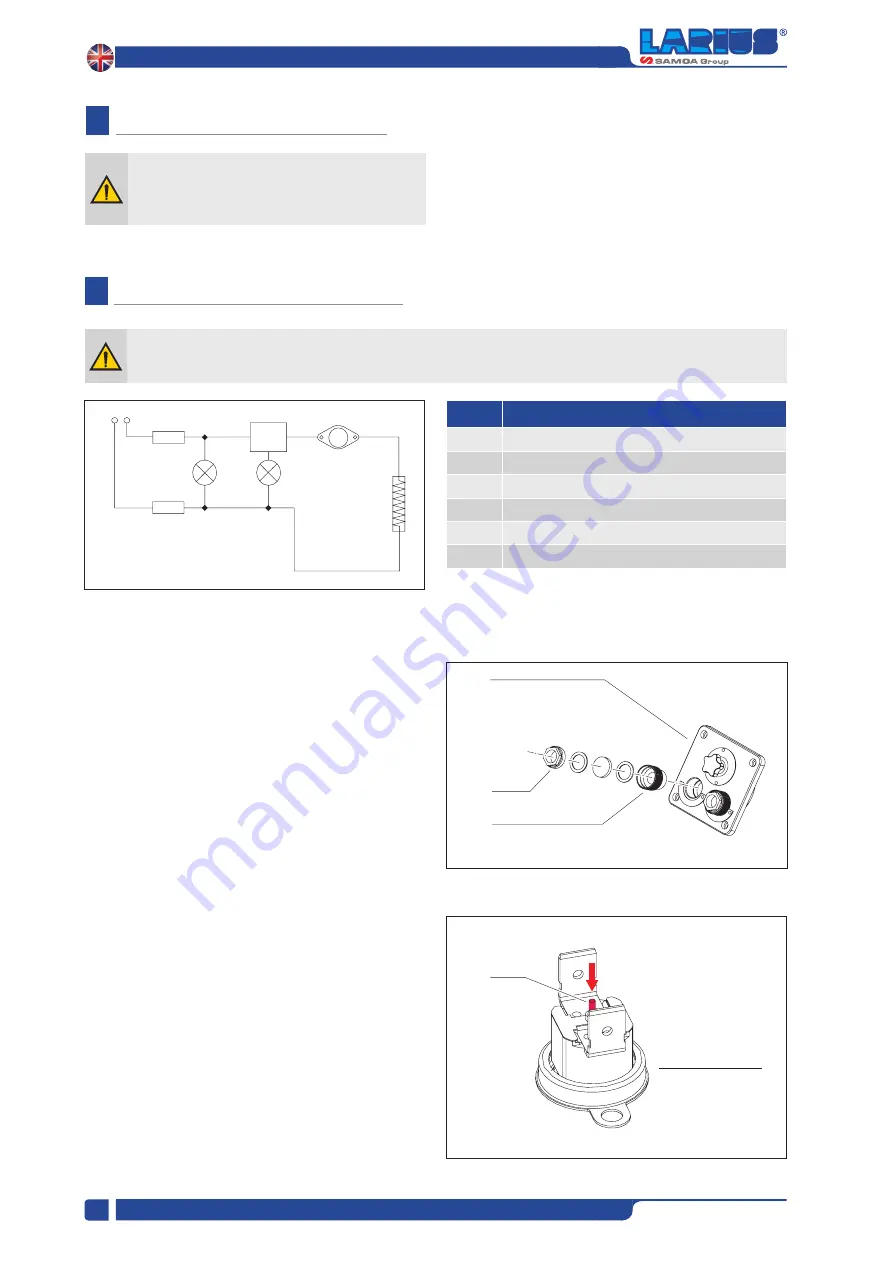
Push here
H4
H5
• To reset the safety thermostat (
H4
), press the special button
(
H5
). Check the cause of the trigger: check that the thermostat
probe has not come out of its seat and that the connection
cable to the thermostat is not damaged. If necessary, replace
the entire thermostat.
H1
H3
H2
Pos.
Description
A
Green indicatore light (entered temperature)
B
Red indicator light (temperature reached)
C
Fuse
D
Thermostat
E
Manual reset safety thermostat
F
Heating element


