


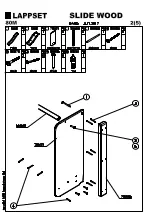


1. Use the parts list and the markings on the components to make sure that you have all of
the necessary parts.
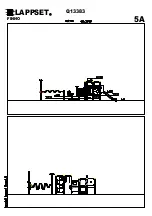
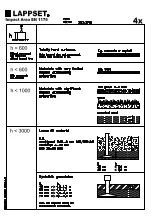
2. Choose a location for the product, taking into account the safety margins specified in
the mounting instructions. When deciding on the orientation of the product, pay attention
to potential sun and wind loads. Level the ground and prepare the foundations as
instructed. Make sure that the ground underneath the foundations is solidly packed. If
necessary, replace soil with wood chips or some other sturdy material. The thickness of
the safety surfacing should be calculated using the formula supplied with the mounting
instructions.
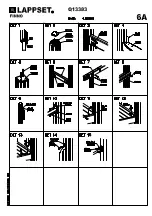
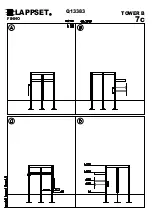
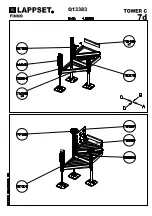
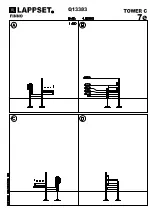
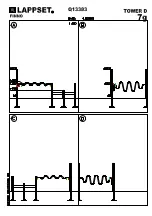
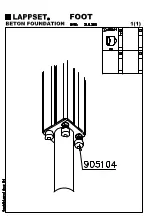
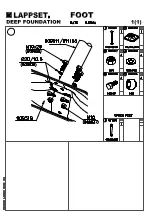
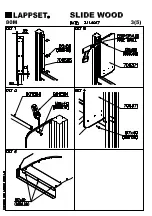
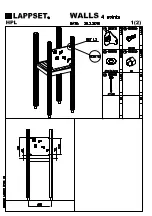
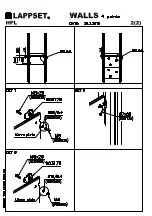
3. Assemble the frame of the product in accordance with the instructions on page 6.
Detailed instructions for the different mounting alternatives are shown in the
supplement. Separate instructions are provided for the modular components that will be
attached to the frame. Please follow the stated measurements carefully.
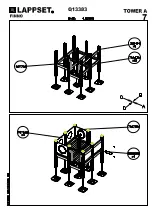
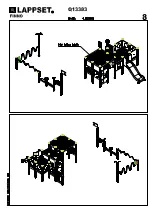
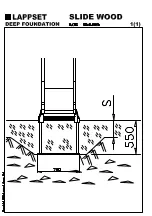
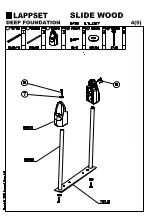
4. Make sure that the product is mounted straight and firmly into the ground. Remember to
pack the soil carefully when refilling the excavation around deep-mounted structures.
5. Inspect the installation thoroughly using the checklist provided. Document the
completed checklist carefully. Remember to stop children from using the product until it
has been fully built and safety-tested and all mounting equipment has been cleared
away.
TEXT PAGE
REF:
DATE:
27.4.2008
TEXT
2
FINNO
LAPPSET
C
o
p
yr
ig
h
t
La
p
p
se
t
G
o
u
p
L
td
Содержание NCLUSIVE PLAY TOWERS
Страница 1: ......
Страница 2: ......
Страница 3: ......
Страница 4: ......
Страница 5: ......
Страница 6: ......
Страница 7: ......
Страница 8: ...LAPPSET Q13383 FINNO 5A...
Страница 9: ......
Страница 10: ......
Страница 11: ......
Страница 12: ......
Страница 13: ......
Страница 14: ...LAPPSET Q13383 FINNO 7c TOWER B...
Страница 15: ......
Страница 16: ......
Страница 17: ......
Страница 18: ......
Страница 19: ......
Страница 25: ......
Страница 26: ......
Страница 27: ......
Страница 28: ......
Страница 29: ......
Страница 30: ......
Страница 31: ......
Страница 32: ......
Страница 33: ......
Страница 34: ......
Страница 35: ......
Страница 36: ......
Страница 37: ......
Страница 38: ......
Страница 39: ......
Страница 40: ......
Страница 41: ......
Страница 42: ......
Страница 43: ......
Страница 44: ......
Страница 45: ......
Страница 46: ......
Страница 47: ......
Страница 48: ......
Страница 49: ......
Страница 50: ......
Страница 51: ......
Страница 53: ......
Страница 54: ......
Страница 55: ......
Страница 56: ......
Страница 57: ......
Страница 58: ......
Страница 59: ......


