background image

www.lanpro.com

Active Products - Cameras - LP-355ir

Please go to the NIC card properties of your PC and change 

the  address  to  the  one  that  was    used  by  your  network 

PC´s I.E.: 192.168.100.2 subnet 255.255.255.0 or set it in 

Automatic if you have an ISP with DHCP service. 

Repeat  steps  1  and  2  for  each  camera  you  wish  to 

connect, remember to change the IP address for each 

camera that is in the same segment, taking care not to 

repeat them. I.E.: Camera 1: 192.168.10.100, camera 

2: 192.168.10.101 and so on.

9

Figure 11

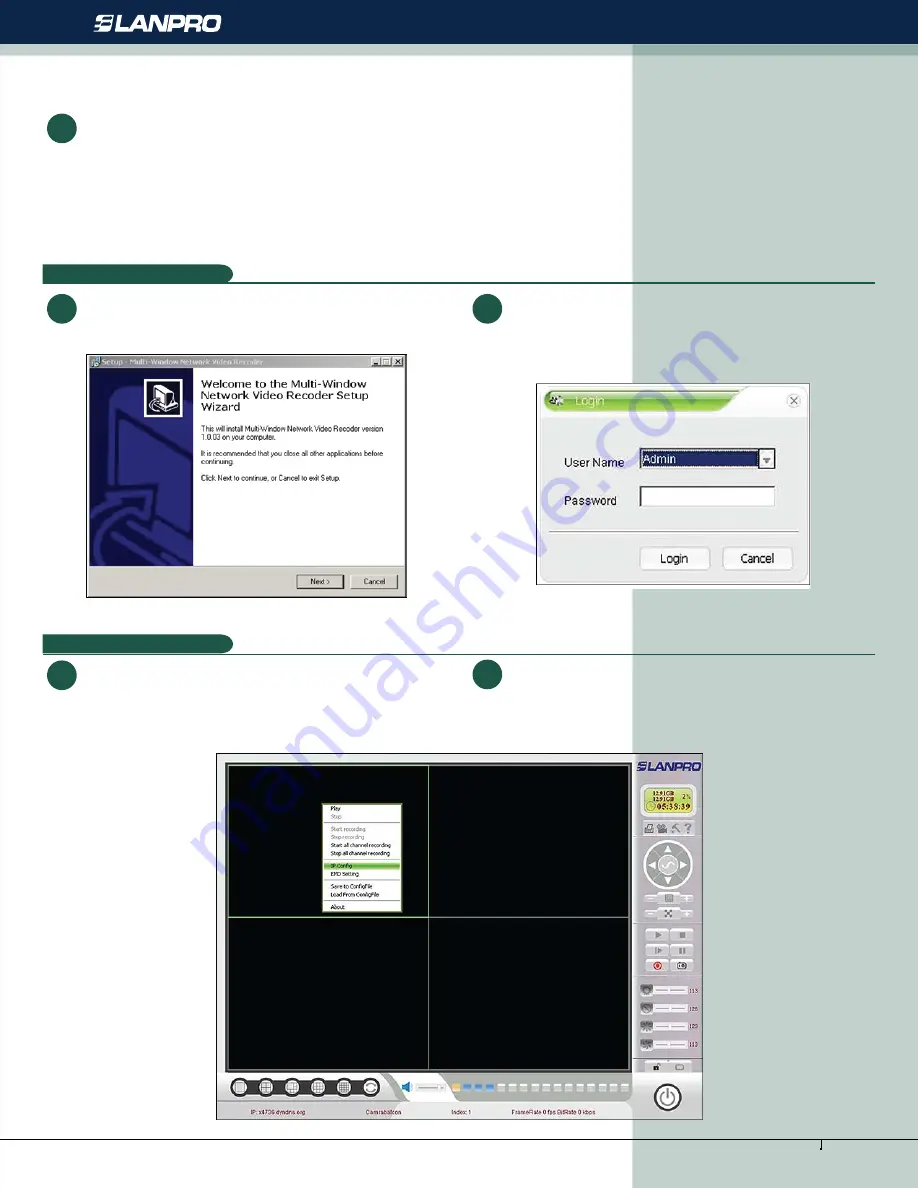
Run the  Multi-Windows-LANPRO software that came with the camera, a window 

like the one shown in figure 11 will pop-up.  

C

Follow the installer instructions:

1

Figure 12

Once finished, a window will pop-up as shown in figure 12 

for  validation.    In  the 

“Password” 

box  write  the  word:  

“Admin”

2

Console cameras setup:

D

Figure 13

A window, like the one in figure 13 appears. You can configure 

the cameras in this window.

1

Moving  the  pointer  of  your  mouse  to  the  black  frame 

corresponding  to  each  camera,  press  the  right  button  of 

your Mouse and select 

“IP Config”

 as shown in figure 13:

2

5

Содержание LP-355IR

Страница 1: ...Active Products Cameras www lanpro com LP355ir_M123_ENB01W LP 355ir Infrared IP Camera for indoors or outdoors LP 355ir 123 Fast Installation Guide without Router Basic...

Страница 2: ...ation A Insert one end of an UTP cable made to the required lenght As shown in figure 3 Attach the RJ45 connector as per the 568a 568b standard for patchcords make a joint between the power cable and...

Страница 3: ...m where you will configure the camera Go to the network card properties and change it s address to this one 192 168 1 1 subnet 255 255 255 0 as shown in figure 6 1 2 Figure 6 B Camera configuration an...

Страница 4: ...admin and the new password 7 Figure 9 The camera s management system pops up a window shown in figure 10 In that window select option Basic Configuration and then Networking Place the previously esta...

Страница 5: ...mera 1 192 168 10 100 camera 2 192 168 10 101 and so on 9 Figure 11 Run the Multi Windows LANPRO software that came with the camera a window like the one shown in figure 11 will pop up C Follow the in...

Страница 6: ...e 14 and press OK Note remember to use the password that you configured for each camera before the description is for reference purposes only 3 Figure 14 Placing the pointer in each black frame of eac...

Страница 7: ...order to be able to access your cameras from your browser you must enable the Activex controls installation in your browser s security properties Tab Then use the IP address you established in the st...

Отзывы: