Preparations for Use as a Network Scanner
16
2
I
When all settings have been made,
press
[
Exit
]
.
The display returns to the Scanner
Features screen.
J
Press
[
Exit
]
.
The main menu is shown again.
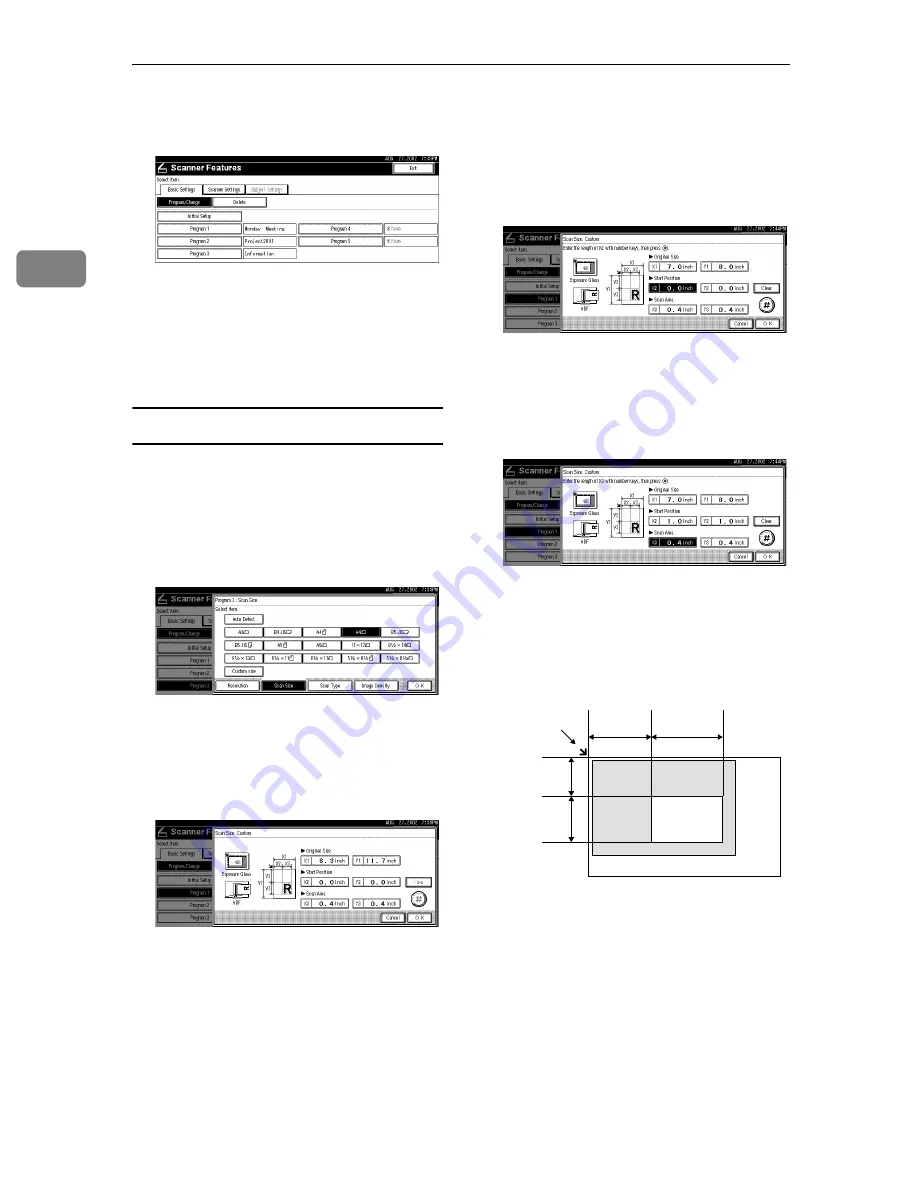
Selecting a custom size
When "Custom Size" is selected as the
scan size, follow the procedure be-
low.
A
Press
[
Custom size
]
on the Scan Size
setting screen.
B
Enter the original size with the
number keys.
Select
[
X1
]
or
[
Y1
]
, enter the value,
and then press
[
#
]
.
C
Use the number a scan starting
point other than the standard scan
starting point.
Select
[
X2
]
or
[
Y2
]
, enter the value,
and then press
[
#
]
.
D
Enter the scan size (area) with the
number keys.
Select
[
X3
]
or
[
Y3
]
, enter the value,
and then press
[
#
]
.
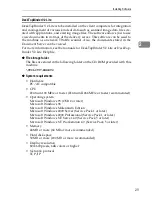
Depending on how the original is
positioned, the scan area will be as
follows:
A
When the original is placed on
the exposure glass
Start point,
horizontal (Y2)
Scan area
Start point,
vertical (X2)
Scan area,
vertical (X3)
Scan area,
horizontal (Y3)
Positioning mark
ZEKY030E
Содержание 5622
Страница 16: ...Network Scanner 8 1 ...
Страница 40: ...Preparations for Use as a Network Scanner 32 2 ...
Страница 60: ...Delivering Stored Scan Data by the Network Delivery Scanner 52 5 ...
Страница 86: ...78 UE USA B453 ...
Страница 88: ...Printer Scanner Controller Type 1027 Operating Instructions Scanner Reference UE USA B453 8607 ...


