background image

Lanier - SHRIKE 40 - Instructions

Page 10

Copyright 1998 - Lanier R/C

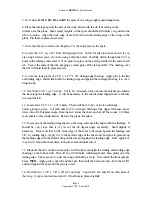
4. Turn on the radio with the engine running to make sure there are no intermittent glitches.  Give 
it a good range check.

5. Check all hardware to be sure it is secure.  There is nothing worse than losing an airplane on 
the first flight because of a lose nut or clevis

6. Always launch with up elevator for reflex action.

7. Hopefully by now you are ready.  We know you will be thrilled with your first flight and that it 
was most successful.  From now on - Happy Fly'in!

Содержание MARINER 40 MK II ARF

Страница 1: ...anier R C is proud of the care and attention that goes into the manufacture of parts for its model kits The company warrants that for a period of 30 days it will replace at the buyer s request any par...

Страница 2: ...g experience to take on a built up model however every minute detail is not covered This is not a basic trainer The plans and instructions together with the laser cut parts and the simplicity of this...

Страница 3: ...small end against F4 and pin in place over the wax paper Align the top curved edges and pin in place several places to keep aligned 7 Fold and crease the wax paper and trim off holding the razor again...

Страница 4: ...on top and two on the bottom These are required to provide material when you round the nose to former Fl 15 Cut two more pieces 6 3 4 long Trim to size and glue these in between F2 and F3 flush with t...

Страница 5: ...iling edge of the wing on the plans are perpendicular to the edge The side of the f uselage will be aligned with the work bench edge so it is important that things are square 1 Locate a 3 8 sq x 42 sp...

Страница 6: ...ile the diamond shaped hole in the fuse to accept the LE 11 Locate four 3 32 x 3 x 36 sheets These will have to be cut to size and shape before gluing in place Cut each sheet to 24 in length Starting...

Страница 7: ...d flush with each other Very few parts are required 1 Cut a 11 5 8 length from the 3 8 sq stick Install it in the 3 8 hole in the fuselage side against the wing trailing edge Center it leaving a equal...

Страница 8: ...a final sanding depending on how well you want to finish it IMPORTANT glue a piece of 2 1 2 nylon glass tape GOLDBERG 451 along the upper and lower joints between the wing and the fuse with CA as show...

Страница 9: ...throttle servo where shown Hook up the pushrod using the hardware specified not supplied 10 Mount the aileron and elevator servos Hook them up with the hardware specified It will be necessary to make...

Страница 10: ...it a good range check 5 Check all hardware to be sure it is secure There is nothing worse than losing an airplane on the first flight because of a lose nut or clevis 6 Always launch with up elevator...

Страница 11: ...lock 9 1 1 8 x 1 2 x 1 1 2 spruce front nose skid 10 1 1 8 dia x 2 dowel hatch hold down WING 1 2 sheet 3 laser cut Rl R5 and hatch parts 2 2 sheet 4 laser cut R2 R3 and misc 3 1 3 8 sq x 24 hardwood...

Страница 12: ...set Dubro no 129 3 Mounting bolt set Dubro no 127 4 Throttle pushrod Dubro no 108 Kwik link with rod and Dubro no 121 Ez connector 5 Elevator and ailerons pushrods 3 threaded 4 40 rods Dubro no 144 3...

Страница 13: ...Lanier SHRIKE 40 Instructions Page 13 Copyright 1998 Lanier R C...

Отзывы: