


Warbird Combat
Assembly instructions
17
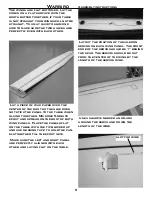
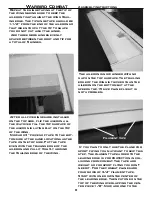
Locate the stab and mount the con-
trol horn on the bottom side. Drill a
9/16” hole 1/4” behind the hinge line
and 1/2” in on the end. Use the 6-32
x1-1/2” bolt two #6 washers and a 6-
32 nut. Use a washer top and bottom
and glue in place with CA glue after
tightening the nut. Install the nylon
horn fitting on top.
mounting holes
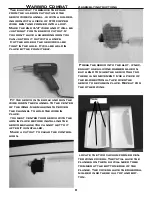
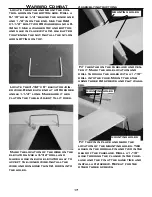
Fit the stab on the fuselage and cen-
ter it. Mark the hole location and
drill through the holes with a 1/16”
drill into the fuse. Mount the stab
using three #2 screws and flat wash-
ers.
mounting holes
mounting holes
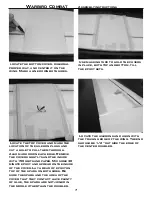
Fit the fin in place and mark the
location of the mounting holes. Two
holes in the dorsal fin and two in the
rear of the fuselage. Drill a 1/16”
hole through the flange in the fuse-
lage and the fin at the same time and
install a #2 screw. Repeat for the
other three screws.
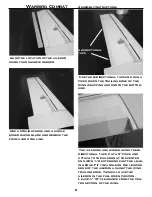
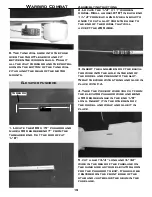
Locate the 3/32” x 6” elevator join-
er wire. Bend each end at a 90 degree
angle 1-1/4” long. Make sure it lies
flat on the table. Adjust till it does.
Mark the location of the wire on the
elevators. Use a 3/32” drill and
make a hole in each elevator half to
accept the joiner wire. Install the
wire and run some thin CA down into
the holes.
Содержание BF109
Страница 22: ...BF109 tip P 51 tip ...


