background image

Table of Contents

11/28/18

© 

Copyright 2018 All rights Reserved

Land Pride provides this publication “as is” without warranty of any kind, either expressed or implied. While every precaution has been taken in the
preparation of this manual, Land Pride assumes no responsibility for errors or omissions. Neither is any liability assumed for damages resulting from the use
of the information contained herein. Land Pride reserves the right to revise and improve its products as it sees fit. This publication describes the state of this
product at the time of its publication, and may not reflect the product in the future. 

Land Pride is a registered trademark.

All other brands and product names are trademarks or registered trademarks of their respective holders.

Printed in the United States of America.

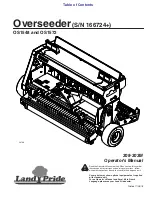
OS1548 and OS1572 Overseeder (S/N ) 308-303M

Table of Contents

Important Safety Information   . . . . . . . . . . . . .  1

Safety at All Times   . . . . . . . . . . . . . . . . . . . . . . . . . 1
Look for the Safety Alert Symbol  . . . . . . . . . . . . . . . 1
Safety Labels   . . . . . . . . . . . . . . . . . . . . . . . . . . . . . 4

Introduction   . . . . . . . . . . . . . . . . . . . . . . . . . . .  9

Application   . . . . . . . . . . . . . . . . . . . . . . . . . . . . . . . 9
Using This Manual   . . . . . . . . . . . . . . . . . . . . . . . . . 9
Owner Assistance  . . . . . . . . . . . . . . . . . . . . . . . . . . 9

Serial Number   . . . . . . . . . . . . . . . . . . . . . . . . . . 10

Section 1: Assembly & Set-up   . . . . . . . . . . .  11

Tractor Requirements  . . . . . . . . . . . . . . . . . . . . . . 11

Shipping information   . . . . . . . . . . . . . . . . . . . . . 11

Assembly Checklist  . . . . . . . . . . . . . . . . . . . . . . . . 11
Sling Brackets  . . . . . . . . . . . . . . . . . . . . . . . . . . . . 11
Torque Requirements  . . . . . . . . . . . . . . . . . . . . . . 11
Quick Change Rotor  . . . . . . . . . . . . . . . . . . . . . . . 12
Rear Roller Assembly  . . . . . . . . . . . . . . . . . . . . . . 13
Gauge Wheel Drive (Optional)   . . . . . . . . . . . . . . . 13
Rear Roller Drive (Optional)   . . . . . . . . . . . . . . . . . 13
Tractor Shutdown Procedure   . . . . . . . . . . . . . . . . 14
Tractor Hook-Up  . . . . . . . . . . . . . . . . . . . . . . . . . . 14
Driveline Installation & Hook-Up  . . . . . . . . . . . . . . 14

Check Driveline Collapsible Length  . . . . . . . . . . 16
Shorten Driveline  . . . . . . . . . . . . . . . . . . . . . . . . 16
Check Driveline Maximum Allowable Length  . . . 17
Check Driveline Interference   . . . . . . . . . . . . . . . 17

Hook-up LED Lights   . . . . . . . . . . . . . . . . . . . . . . . 18

Section 2: Operating Instructions . . . . . . . . .  19

Operating Checklist . . . . . . . . . . . . . . . . . . . . . . . . 19
Transporting  . . . . . . . . . . . . . . . . . . . . . . . . . . . . . 19
Fill Seedbox   . . . . . . . . . . . . . . . . . . . . . . . . . . . . . 20
Park Seeder   . . . . . . . . . . . . . . . . . . . . . . . . . . . . . 20
How the Seeder Works  . . . . . . . . . . . . . . . . . . . . . 20
General Notes for Field Operations . . . . . . . . . . . . 21
General Operating Instructions  . . . . . . . . . . . . . . . 21

Section 3: Adjustments  . . . . . . . . . . . . . . . . .  22

Speed Change Sprocket  . . . . . . . . . . . . . . . . . . . . 22
Seed Cup Settings   . . . . . . . . . . . . . . . . . . . . . . . . 24
Calibrate Main Seedbox Seed Rate   . . . . . . . . . . . 24
Main Seedbox Seed Rate Chart (English) . . . . . . . 27
Main Seedbox Seed Rate Chart (Metric) . . . . . . . . 29
Rotary Cutting Depth Adjustment   . . . . . . . . . . . . . 30
Rear Arm Length Adjustment   . . . . . . . . . . . . . . . . 32
Tine Attachment (Optional)  . . . . . . . . . . . . . . . . . . 32
Slit Seeder Attachment (Optional)  . . . . . . . . . . . . . 33
Feed Cup Drive System Adjustment  . . . . . . . . . . . 33
Rotor Drive Chain Adjustment  . . . . . . . . . . . . . . . . 33

Small Seeds Drive Train   . . . . . . . . . . . . . . . . . . . . 34
Calibrate Small Seeds Seedbox   . . . . . . . . . . . . . . 36
Small Seeds Seed Rate Chart (English)   . . . . . . . . 37
Small Seeds Seed Rate Chart (Metric)  . . . . . . . . . 40

Section 4: Maintenance & Lubrication   . . . . . 43

Maintenance  . . . . . . . . . . . . . . . . . . . . . . . . . . . . . 43
Individual Knife Replacement   . . . . . . . . . . . . . . . . 43
Rotor Maintenance   . . . . . . . . . . . . . . . . . . . . . . . . 43
Rear Roller Maintenance  . . . . . . . . . . . . . . . . . . . . 45

Rear Roller Inspection   . . . . . . . . . . . . . . . . . . . . 45
Rear Roller Disassembly   . . . . . . . . . . . . . . . . . . 45
Rear Roller Assembly . . . . . . . . . . . . . . . . . . . . . 45

Driveline Slip Clutches   . . . . . . . . . . . . . . . . . . . . . 46
Long-Term Storage  . . . . . . . . . . . . . . . . . . . . . . . . 50
Lubrication Points   . . . . . . . . . . . . . . . . . . . . . . . . . 50

Power Take-Off - U-Joint  . . . . . . . . . . . . . . . . . . 50
Power Take-Off - Profiles  . . . . . . . . . . . . . . . . . . 50
Wheel Bearings   . . . . . . . . . . . . . . . . . . . . . . . . . 51
Rear Roller Bearings   . . . . . . . . . . . . . . . . . . . . . 51
Driveline Chaincase  . . . . . . . . . . . . . . . . . . . . . . 51
Drive Sprocket Hanger Bearing   . . . . . . . . . . . . . 51
Feed Cup Drive Sprocket  . . . . . . . . . . . . . . . . . . 51
Right-hand Rotor Bearing . . . . . . . . . . . . . . . . . . 52
Feed Cup & Agitator Drive Chains  . . . . . . . . . . . 52
Small Seeds Drive Chains  . . . . . . . . . . . . . . . . . 52
Seed Cup Sprockets & Nylon Washers   . . . . . . . 53
Feed Cup Drive Sprocket  . . . . . . . . . . . . . . . . . . 53
Gearbox  . . . . . . . . . . . . . . . . . . . . . . . . . . . . . . . 53

Section 5: Options & Accessories . . . . . . . . . 54

Slit Seeder Attachment  . . . . . . . . . . . . . . . . . . . . . 54
Rear Tine Attachment  . . . . . . . . . . . . . . . . . . . . . . 54
Agitation Extension Kit (Accessory)  . . . . . . . . . . . . 54
Small Seeds Attachment  . . . . . . . . . . . . . . . . . . . . 55
Front Roller Attachment . . . . . . . . . . . . . . . . . . . . . 55
Slow Moving Vehicle Sign  . . . . . . . . . . . . . . . . . . . 55

Section 6: Specifications & Capacities  . . . . . 56
Section 7: Features & Benefits   . . . . . . . . . . . 59
Section 8: Troubleshooting  . . . . . . . . . . . . . . 60
Section 9: Torque Values Chart  . . . . . . . . . . . 61
Section 10: Warranty   . . . . . . . . . . . . . . . . . . . 61

Содержание OS1548

Страница 1: ...in French Language please see your Land Pride dealer Read the Operator s Manual entirely When you see this symbol the subsequent instructions and warnings are serious follow without exception Your lif...

Страница 2: ...ordered the weights and measurements are no longer accurate for your machine Update the record by adding the machine weight and measurements provided in the Specifications Capacities Section of this m...

Страница 3: ...up LED Lights 18 Section 2 Operating Instructions 19 Operating Checklist 19 Transporting 19 Fill Seedbox 20 Park Seeder 20 How the Seeder Works 20 General Notes for Field Operations 21 General Operati...

Страница 4: ...e appropriate App on your smart phone open the App point your phone on the QR code and take a picture Dealer QR Locator The QR code on the left will link you to available dealers for Land Pride produc...

Страница 5: ...alert and carefully read the message that follows it In addition to design and configuration of equipment hazard control and accident prevention are dependent upon the awareness concern prudence and p...

Страница 6: ...f it is necessary to work under the equipment securely support it with stands or suitable blocking beforehand Use properly grounded electrical outlets and tools Use correct tools and equipment for the...

Страница 7: ...y Lights and Devices Slow moving tractors and self propelled machines can create a hazard when driven on public roads They are difficult to see especially at night Use the Slow Moving Vehicle SMV sign...

Страница 8: ...arest Land Pride dealer To find your nearest dealer visit our dealer locator at www landpride com 3 Some new equipment installed during repair requires safety labels to be affixed to the replaced comp...

Страница 9: ...tion Table of Contents OS1548 and OS1572 Overseeder S N 166724 308 303M 11 28 18 5 26780 26780 26780 818 129C Danger Rotating Knife Hazard 818 132C Danger Thrown Object Hazard 818 130C Caution Use 540...

Страница 10: ...able of Contents OS1548 and OS1572 Overseeder S N 166724 308 303M 11 28 18 6 818 543C Danger Guard Missing Beneath Chain Guard 838 111C Danger Moving Parts Above Chain Guard 26780 26783 26783 818 560C...

Страница 11: ...Only 2 x 4 1 2 Red Reflector 2 places on back of small seeds box 858 095C OS1548 Only 2 x 4 1 2 Red Reflector 2 places on back of main seeds box 838 614C OS1572 Only 2 x 9 Red Reflector 2 places on b...

Страница 12: ...Important Safety Information Table of Contents OS1548 and OS1572 Overseeder S N 166724 308 303M 11 28 18 8 818 540C Danger Guard Missing DO NOT Operate 13042 13042 818 552C Danger Entanglement...

Страница 13: ...eeders are a highly versatile and well engineered seed planting systems designed to open up the soil or turf surface precisely meter out seed and then press the seed into full soil contact They may be...

Страница 14: ...ssistance Your dealer wants you to be satisfied with your new Overseeder If for any reason you do not understand any part of this manual or are not satisfied with the service received the following ac...

Страница 15: ...GR5 bolts 2 1 2 and hex flange locknuts 3 The sling brackets allow points at each end to hook the chain for lifting of the unit NOTE When hooking hoist chain to sling brackets be certain to either use...

Страница 16: ...aring cover 2 9 Retain these parts with 1 2 x 1 3 4 long bolts 5 1 2 lock washers 6 and 1 2 hex nuts 7 Hand tighten nuts at this time Final torquing of these bolts will be later in the assembly proces...

Страница 17: ...not tighten 4 Attach wheel 5 to hub 1 with 1 2 x 1 3 8 lug bolts 6 and lug nuts 7 Repeat steps 1 to 3 for the left hand side except use non drive spindle and hub 8 with bolts 6 5 Bolt chain guard 9 to...

Страница 18: ...the Overseeder while using the tractor s hydraulic control lever to align the tractor s lower hitch holes with the seeder s lower clevis lug holes 1 2 Shut tractor down properly before dismounting Ref...

Страница 19: ...rking condition to avoid driveline entanglement and projectiles flying off of the driveline Do not use a power take off adapter The adapter will increase strain on the tractor s power take off shaft c...

Страница 20: ...be lubricated before putting them into service Refer to Lubrication Points on page 50 IMPORTANT The tractor s power take off shaft and seeder gearbox shaft must be aligned and level with each other d...

Страница 21: ...t limitations 1 Start tractor and raise seeder up just enough to remove support blocks 2 Without changing 3 point lift height shutdown tractor properly before dismounting Refer to Tractor Shutdown Pro...

Страница 22: ...the lights are operating Start tractor and operate lights as follows a Turn on head lights to verify red lights illuminate b Turn on flasher lights to verify amber light are blinking on and off 4 If...

Страница 23: ...oes not allow adequate control of steering and stopping and never exceed 20 mph 32 2 km h with attached equipment Rough terrain requires a slower speed When traveling on public roads use LED lights sl...

Страница 24: ...n on long term storage of your Overseeder 1 Park the Overseeder on a level solid area 2 Lower seeder to level ground or onto blocks supporting the seeder just above ground level 3 Place gear selector...

Страница 25: ...filled the hopper with seed and calibrated the unit for proper seed rate delivery it s time to do some serious seeding The power to run the horizontal rotor shaft which is equipped with the vertically...

Страница 26: ...hain 2 Make sure the spring idler sprocket 4 is pressing against driven chain 5 7 Retention drive chain 2 by pressing down on its idler sprocket When tensioned properly tighten 1 2 flange locknut 1 to...

Страница 27: ...rive Instructions below change seeder from high to low range Refer to Figure 3 4 Figure 3 6 1 Pull down on spring idler sprocket 1 and remove drive chain 2 from speed change sprocket 3 2 Pull down on...

Страница 28: ...25 Move seed rate adjustment lever to cup setting number obtained from the seed rate charts For best results first move adjustment lever all the way to the left and then to the desired setting Increas...

Страница 29: ...ed cup adjustment lever 3 Repeat calibration procedure if the results of the calibration vary greatly with the chart Model No Number of Rear Roller Rotations For 1 10 Acre 1000 Sq Ft 1 20 Hectare 100...

Страница 30: ...3 2 3 6 4 1 4 5 4 9 5 4 5 8 6 2 6 6 7 1 7 5 7 9 8 4 8 8 High Range 0 77 151 224 297 372 444 517 592 664 737 812 884 957 1032 1104 1177 1252 1324 1397 1472 Low Range 0 24 48 71 94 118 141 164 187 211...

Страница 31: ...0 6 0 8 1 1 1 4 1 7 2 0 2 3 2 6 2 9 3 2 3 5 3 7 4 0 4 3 4 6 4 9 5 2 5 5 5 8 High Range 0 35 68 103 141 179 220 262 306 352 398 446 495 545 596 648 701 754 808 862 916 Low Range 0 18 28 41 55 71 89 107...

Страница 32: ...4 34 5 36 5 38 8 40 8 42 9 High Range 0 86 169 251 333 417 498 579 664 744 826 910 991 1073 1157 1237 1319 1403 1484 1566 1650 Low Range 0 27 54 80 105 132 158 184 210 236 262 288 314 340 367 392 418...

Страница 33: ...igh Range 0 39 76 115 158 201 247 294 343 395 446 500 555 611 668 726 786 845 906 966 1027 Low Range 0 20 31 46 62 80 100 120 142 165 188 212 235 259 282 304 325 345 364 380 395 High Range 0 0 3 9 7 6...

Страница 34: ...us causing the spring loaded gauge wheel link to bottom out 5 Loosen jam nut 3 and back it off 6 Turn adjuster nut 4 to shorten or lengthen spring loaded link 5 7 Dimension B should be the same on bot...

Страница 35: ...s Floating Top Link Adjustment Refer to Figure 3 13 Floating top link is used only when the seeder set up is rear roller drive with front roller support Refer to Figure 3 14 Set floating top link 16 f...

Страница 36: ...4 5 Remove rear roller adjustment bracket 2 from both rear roller arms by removing 1 2 x 1 1 4 long bolts 3 and 1 2 flange nuts 4 6 Remove from each roller arm 3 8 x 1 1 2 bolts 5 lock washer 6 and he...

Страница 37: ...eeder Attachment 1 Feed Cup Drive System Adjustment Your Overseeder uses standard no 40 roller chain throughout its feed cup drive system The drive system is simple and designed for low maintenance 1...

Страница 38: ...te Small Seeds Seedbox if its drive train is set up correct If the drive train set up is incorrect change sprocket 1 as follows a Remove chain guard not shown b Loosen idler plates 2 4 and remove roll...

Страница 39: ...er S N 166724 308 303M 11 28 18 35 Rear Roller Drive Small Seeds Sprocket Arrangement Figure 3 20 Gauge Wheel Drive Small Seeds Sprocket Arrangement Figure 3 21 11667 HIGH RANGE Main Seedbox LOW RANGE...

Страница 40: ...72 265 61 327 66 Model No Number of Gauge Wheel Rotations For 1 10 Acre 1000 Sq Ft 1 20 Hectare 100 Sq M OS1548 236 54 292 58 OS1572 157 36 194 39 IMPORTANT Seed rates provided in the charts may be in...

Страница 41: ...1 2 6 2 9 3 5 5 2 7 8 9 6 11 7 14 4 14 8 17 8 20 4 23 1 25 2 27 0 29 6 32 2 33 5 36 5 37 4 41 3 43 5 0 1 0 1 0 1 0 1 0 2 0 2 0 3 0 3 0 3 0 4 0 5 0 5 0 6 0 6 0 7 0 7 0 8 0 8 0 9 0 9 1 0 0 0 0 1 9 3 9...

Страница 42: ...31 3 33 9 37 0 40 0 42 2 45 2 48 3 0 0 0 0 0 0 0 1 0 1 0 2 0 2 0 3 0 3 0 4 0 5 0 5 0 6 0 7 0 7 0 8 0 8 0 9 1 0 1 0 1 1 0 0 0 0 3 0 3 9 6 5 9 6 11 7 14 8 16 1 18 7 21 3 23 9 27 0 29 6 32 6 35 7 37 0 40...

Страница 43: ...4 18 7 20 4 21 7 23 1 24 8 27 0 27 4 29 1 30 4 0 0 0 0 0 0 0 1 0 2 0 2 0 2 0 2 0 3 0 3 0 4 0 4 0 4 0 5 0 5 0 5 0 6 0 6 0 6 0 7 0 7 0 0 0 0 0 0 0 2 0 7 1 0 1 5 1 7 2 2 2 7 3 1 3 6 3 9 4 4 4 8 5 3 5 6...

Страница 44: ...30 3 33 2 36 1 37 5 40 9 41 9 46 3 48 8 0 3 0 3 0 4 0 6 0 9 1 1 1 3 1 6 1 7 2 0 2 3 2 6 2 8 3 0 3 3 3 6 3 8 4 1 4 2 4 6 4 9 0 0 0 0 2 1 4 4 6 8 9 5 12 2 14 7 17 4 19 8 22 5 25 2 27 9 30 7 33 4 36 3 3...

Страница 45: ...1 7 2 1 2 3 2 7 3 0 3 3 3 5 3 8 4 1 4 5 4 7 5 1 5 4 0 0 0 0 3 4 4 4 7 3 10 8 13 1 16 6 18 0 21 0 23 9 26 8 30 3 33 2 36 5 40 0 41 5 44 8 50 7 50 7 54 1 0 0 0 0 0 3 0 4 0 7 1 1 1 3 1 7 1 8 2 1 2 4 2 7...

Страница 46: ...0 7 32 6 34 1 0 0 0 0 0 2 0 7 0 8 1 0 1 2 1 2 1 5 1 6 1 8 2 0 2 1 2 3 2 4 2 6 2 8 3 0 3 1 3 3 3 4 0 0 0 0 0 0 0 2 0 8 1 1 1 7 1 9 2 5 3 0 3 5 4 0 4 4 4 9 5 4 5 9 6 3 6 8 7 1 7 6 7 8 0 0 0 0 0 0 0 0 0...

Страница 47: ...sfar as possible in order to get oil back into square 5 Always maintain proper air pressure in turf tires 6 Replace any worn damaged or illegible safety labels by obtaining new labels from your Land P...

Страница 48: ...g 4 from the rotor shaft 8 Loosen two set screws 5 in seal guard hub 6 and slide hub off the rotor shaft 9 Clamp rotor shaft on one of the knife mounting flanges and using a spanner wrench unscrew lef...

Страница 49: ...ting tube Also the roller wheels should be inspected for breakage Broken rollers should be replaced as soon as possible Inspect roller wheels for wear by sliding all rear roller wheels 14 and end spac...

Страница 50: ...on plates Refer to Figure 4 8 to determine which friction clutch your seeder has Follow run in instructions on the following pages for your specific clutch type Clutch Types Figure 4 8 Type A Clutch T...

Страница 51: ...ce OS1548 2 Plate Disassembly Step 1 Remove snap ring Step 6 Inspect friction discs and hub 10449 Step 2 Compress Belleville Springs to the pressure plate by tightening the four hex nuts and then plac...

Страница 52: ...for inspection or service Step 6 Inspect friction disks and hub OS1572 4 Plate Disassembly 14233 Step 2 Compress the Belleville Springs to the pressure plate by tightening the four hex nuts and then...

Страница 53: ...4 11 If the clutch run in procedure indicated that one or more of the friction disks did not slip then the clutch must be disassembled to separate the friction disks 1 Rotate 8 hex head socket bolts 2...

Страница 54: ...il back into the square bore This is most important before putting the Overseeder in storage 6 Check knives for wear and replace if necessary 7 Inspect Overseeder for loose damaged or worn parts and a...

Страница 55: ...Bearings Type of Lubricant Multi purpose Grease 25 Hours Drive Sprocket Hanger Bearing Small Seeds Attachment Type of Lubricant Multi purpose Grease 25 Hours 20 Hours Feed Cup Drive Sprocket Small Se...

Страница 56: ...Drive Chains Maine Seedbox 2 chains Type of Lubricant Chain Lubricant Do not overlubricate Small Seeds Drive Chains Small Seeds Attachment 3 chains Type of Lubricant Chain Lubricant Do not overlubrica...

Страница 57: ...1 042C 1 lb Container Quantity Mix as needed 1 teaspoon of powdered graphite for every bushel of seed in the seedbox IMPORTANT DO NOT use petroleum lubricant on plastic seed cups Petroleum will absorb...

Страница 58: ...can be set at different angles and depths The Rear Tine option may be ordered with your Overseeder or installed at a later time by you or your dealer 308 316A 48 Overseeder 308 317A 72 Overseeder For...

Страница 59: ...cutting depth of the knives when used in conjunction with a rear roller drive seeder The Front Roller option may be ordered with your Overseeder or installed later by you or your dealer 308 258A 48 O...

Страница 60: ...g 170 knives on 2 5 1 cm spacing 115 knives on 3 7 6 cm spacing Knife construction Straight knives 3 16 5 mm thick high carbon heat treated steel Curved knives 5 32 4 mm thick high carbon heat treated...

Страница 61: ...S N 166724 308 303M 11 28 18 57 26728 Gauge Wheel Drive Rear Roller Drive OS1548 40 3 4 1 04 m OS1572 42 1 07 m OS1548 47 3 4 1 21 m OS1572 49 1 24 m OS1548 60 3 4 1 54 m OS1572 81 3 4 2 08 m OS1548 7...

Страница 62: ...nives More aggressive picks up thatch Curved Knives Less aggressive and less disturbance of thatch layer Small seeds box Simultaneously seeds second type of seed Slit seeder attachment Guides seed dir...

Страница 63: ...e tractor rpm Adjust gauge wheels Replace worn or bent knives Clear obstacles entangled in knives and or rotor Machine skips Replace worn knives Reduce load Reduce ground speed Knives balling up with...

Страница 64: ...X 2 5 195 145 310 230 405 300 3 4 10 235 170 360 265 510 375 M18 X 1 5 220 165 350 260 485 355 3 4 16 260 190 405 295 570 420 M20 X 2 5 280 205 440 325 610 450 7 8 9 225 165 585 430 820 605 M20 X 1 5...

Страница 65: ...so specifically includes failure to properly maintain oil levels grease points and driveline shafts Claims under this Warranty should be made to the dealer which originally sold the product and all wa...

Страница 66: ...Corporate Office P O Box 5060 Salina Kansas 67402 5060 USA www landpride com...

Отзывы: