background image

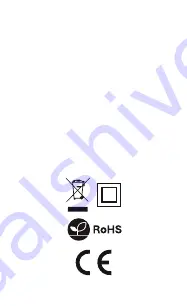
The use of the WEEE symbol (crossed-out wheelie bin 
symbol) means that this product cannot be treated as 
household waste. Proper disposal of used equipment 
avoids risks to human health and the environment, 
resulting from the possible presence of hazardous 
substances, mixtures, and components in the equipment, 
as well as, improper storage and processing of such 
equipment. The selective collection also allows you to 
recover materials and components, from which the device 
was manufactured. For more information about the 
recycling of this product, please contact the retail outlet, 
where the product was purchased, or request information 
from the local authority.

Important note: If the pairing process has failed, please repeat 

the whole process from the beginning by resetting the device 

as in point 6. During this procedure, it is recommended to 

bring the device as close to the phone as possible. 

L.  Symbol description

Solution:


The pairing of the device will only be possible if the 

smartphone is connected to a 2.4 GHz Wi-Fi network band

Problem: 

The device's LED stopped flashing but the sensor

has not been added to the TuyaSmart App

Solution: 

Reset the sensor by pressing the reset button for 

at least 5 seconds and start the process of adding a new 

device in the application again

Solution: 

Verify if WIFI range is sufficient where the sensor 

is placed – Minimum two bars are required

The following Lanberg product is covered by a 24-month 
warranty from the moment of the purchase. It does not 
apply in case of defects and faults resulting from improper 
use and handling (not in accordance with this manual). 
Mechanical damages are the basis for rejecting the 
warranty claim.

Содержание SM01-WP10

Страница 1: ...USER MANUAL INSTRUKCJA OBSŁUGI SM01 WP10 Smart WiFi Plug Gniazdko WiFi Smart ...

Страница 2: ...łączenie Wi Fi pasmo 2 4 Ghz 4 Nie instaluj wielu urządzeń SMART WIFI blisko siebie może to powodować zakłócenia sygnału 5 Skontaktuj się ze sprzedawcą dystrybutorem w celu uzyskania pomocy jeżeli wystąpił jakikolwiek problem z produktem Nie próbuj samodzielnie naprawiać tego produktu B Zawartość opakowania 1 Gniazdko Smart 2 Instrukcja obsługi 3 Deklaracja zgodności C Opis urządzenia 1 Gniazdko S...

Страница 3: ...enie uruchomi się automatycznie należy rozpocząć proces parowania z aplikacją TUYA sprawdź w sekcji G Uwaga urządzenie powinno być zamontowane w suchym miejscu Niezalecamy używania produktu włazienkach pod zlewami i innych narażonych na wilgoć miejscach może skutkować to uszkodzeniem urządzenia 1 2 3 ...

Страница 4: ...Google Play b Urządzenia z systemem iOS wyszukaj TuyaSmart w aplikacji App Store 2 Użyj poniższego kodu QR dostępnego dla urządzeń z systemem operacyjnym iOS lub Android Uwaga Po zeskanowaniu kodu QR otworzy się okno domyślnej przeglądarki urządzenia np Safari W nowo otwartym oknie kliknij Download a następnie wybierz opcję otwarcia za pomocą App Store Google Play aby pobrać aplikację ...

Страница 5: ...ji F Logowanie Rejestracja w aplikacji G Parowanie z aplikacją TuyaSmart Jeżeli nie posiadasz konta konieczne będzie stworzenie nowego W tym celu użyj przycisku Zarejestruj się i postępuj zgodnie z instrukcjami wyświetlanymi na ekranie Jeżeli posiadasz już konto w aplikacji Tuya kliknij przycisk Zaloguj się używając istniejącego konta i postępuj zgodnie z instrukcjami wyświetlanymi na ekranie ...

Страница 6: ...awania urządzeń Auto Scan znajdującej się w górnej części okna 4 Wprowadź hasło do aktualnie podłączonej sieci WIFI i naciśnij przycisk Dalej 3 Ważne Proces dodawania będzie można ukończyć tylko i wyłącznie jeżeli smartfon ma włączoną komunikację WIFI i jest podłączony do sieci do której chcemy dodać urządzenie ...

Страница 7: ...Aplikacja wyszukuje urządzenia do dodania urządzenie powinno znajdować się tak blisko smartfona jak to możliwe 8 Urządzenie zostało poprawnie dodane zalecamy wykonanie testu czy urządzenie działa prawidłowo poprzez włączenie i wyłączenie produktu z poziomu aplikacji TUYA Uwaga jeżeli proces łączenia się nie powiódł ponów cały proces od początku resetując urządzenie jak w punkcie 6 Podczas parowani...

Страница 8: ...Menu główne gniazdka smart 1 2 3 4 5 1 Nazwa 2 Przycisk ON OFF 3 Harmonogram 4 Minutnik 5 Zużycie energii H Dostępne funkcje urządzenia z poziomu aplikacji ...

Страница 9: ...Harmonogram Pozwala na ustawianie harmonogramu włączania i wyłączania urządzenia ...

Страница 10: ...ala na ustawienie minutnika który wyłączy włączy zależnie od aktualnego stanu urządzenia gniazdko po określonym czasie Pozwala na bieżąco śledzić zużycie energii elektrycznej Dodatkowo możliwe jest też przejrzenie historii zużycia ...

Страница 11: ... bezprzewodowa Zarządzanie Obudowa Gniazdko Sieciowe Wi Fi Zdalne zarządzanie Obsługiwane wersje systemów Materiał ABS 75 x 45 mm 230 V 50 Hz 2 4 GHz IEEE 802 11b g n Poprzez aplikację TuyaSmart iOS 8 0 lub nowszy Android 4 4 lub nowszy 75 mm 45 mm ...

Страница 12: ...isk reset co najmniej przez 5 sekund i rozpocznij proces dodawania w aplikacji ponownie Problem Urządzenie nie reaguje na polecenia reaguje z opóźnieniem Możliwa przyczyna Niewystarczający zasięg WIFI Rozwiązanie Zweryfikuj czy miejscu umieszczenia czujnika jest dostępny zasięg Wi Fi Dla poprawnego działania wymagane są minimum 2 kreski J Rozwiązywanie problemów Niniejszy produkt Lanberg jest objęt...

Страница 13: ...www lanberg pl ...

Страница 14: ...ie niebezpiecznych substancji mieszanin oraz części składowych a także niewłaściwego składowania i przetwarzania takiego sprzętu Zbiórka selektywna pozwala także na odzyskiwanie materiałów i komponentów z których wyprodukowane było urządzenie W celu uzyskania szczegółowych informacji dotyczących recyklingu niniejszego produktu należy skontaktować się z punktem sprzedaży detalicznej w którym dokona...

Страница 15: ...to work correctly 4 Do not install multiple SMART Wi Fi devices very close to each other it may cause signal interference 5 Contact your dealer distributor for assistance if there is any problem with your product Do not attempt to repair this product by yourself B Package content 1 Smart Plug 2 User Manual 3 Declaration of Confirmity C Product description 1 Schuko socket 2 LED 3 Reset button 15A 34...

Страница 16: ... socket 3 The device should start automatically begin parring it with TUYA application See section G Warning the device should be mounted in dry place we do not recommend using the product in bathrooms under sink and other places where humidity is high this may damage the device 1 2 3 ...

Страница 17: ...obile devices Type and search TuyaSmart in App Store 2 Use the provided QR code on the next page available for devices with the iOS or Android operating systems Important note After scanning the QR code the default browser window will open e g Safari In the newly opened window click Download and then select the option to open using the App Store Google Play to download the application ...

Страница 18: ...upper right corner of the application F Login Register using TuyaSmart App G Pairing with TuyaSmart App If you already have an account with TuyaSmart click the Login using an existing account button and follow the on screen instructions If you do not have an account you will need to create a new one Use the Register button and follow the on screen instructions ...

Страница 19: ...unction at the top of the window 4 Enter the password for the currently connected Wi Fi network and press Next 3 Important note Adding a new device will only be possible if the smartphone has Wi Fi connection enabled and is connected to the network to which you want to connect the Smart Lanberg device ...

Страница 20: ...n be resumed 7 The App searches for devices to add the plug should be as close to the smartphone as possible 8 The device has been added successfully we recommend that you test the device e g turn on off plug using Tuya App Important note If the pairing process has failed please repeat the whole process from the beginning byresetting the device as in point 6 During this procedure it is recommended ...

Страница 21: ...Main menu of the device 1 2 3 4 5 1 Name 2 ON OFF Button 3 Schedule 4 Countdown 5 Electric H Functions avaliable the TuyaSmart App ...

Страница 22: ...Schedule Set the option to turn on off the device according to schedule ...

Страница 23: ...ctric Allows you to set a timer that will turn off on depending on the current status of the device the socket after a certain time Allow to check current Energy usage also enables to view the history of power usage ...

Страница 24: ...sions Power Wireless Management Housing Socket Mains supply Wi Fi Remote control Supported OS versions Material ABS 75 x 45 mm 230 V 50 Hz 2 4 GHz IEEE 802 11b g n Via TuyaSmart App iOS 8 0 or newer Android 4 4 or newer 75 mm 45 mm ...

Страница 25: ...sor by pressing the reset button for at least 5 seconds and start the process of adding a new device in the application again Problem Device does not respond respond with delay Possible reason Insufficient WIFI range Solution Verify if WIFI range is sufficient where the sensor is placed Minimum two bars are required J Troubleshooting The following Lanberg product is covered by a 24 month warranty from...

Страница 26: ...nce of hazardous substances mixtures and components in the equipment as well as improper storage and processing of such equipment The selective collection also allows you to recover materials and components from which the device was manufactured For more information about the recycling of this product please contact the retail outlet where the product was purchased or request information from the ...

Страница 27: ......

Страница 28: ......

Отзывы: