QUICK
START GUIDE
BEFORE FIRST USE
¬
Fully charge battery using
the Spin Touch USB cable and
adapter plug in AC outlet.
¬
Ensure your Spin Touch has
the latest firmware. A USB
connection to a Windows® PC is
required:
1. Download and install the
WaterLink Connect 2
application for Windows
at
http://softwarecenter.
lamotte.com/
.
2. Plug meter into the computer
with the provided USB
cable and launch WaterLink
Connect 2 application from
the Start Menu.
3. A prompt will appear if
firmware updates are
available. Select Update.
Testing and data transfer will
not be possible until firmware
has been updated.
NOTE: For water samples over 100 °F (38 °C) subtract 0.3 from pH result or, for the most accurate result, wait until
water sample is below 90 °F (32 °C) to test.
Remove salt residue daily. Salt will damage the meter and cause inaccurate results. See CLEANING section in manual.
TESTING
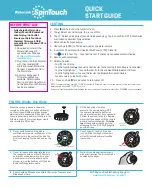
1. Press and hold until the meter turns on.
2. Tap . Select a sanitizer type. Tap to confirm.
3. Tap . Select a disk series (found on disk packaging). Tap to confirm. NOTE: Disk Series
are limited by Sanitizer Type selection.
4. Remove disk from packaging.
5. Use syringe (1189) to fill disk with pool or spa water sample.
6. Insert disk. Cover disk with Universal Disk Cover (1719). Close lid.
7. Tap to start test. Tap to cancel the test. If the test is cancelled discard the disk.
8. Results will be displayed.
9. Select an option.
- Tap
to add a tag.
- Tap the highlighted
to save the test results to the test log if Auto Save is not enabled.
- Tap the hightlighted to send the results to the enabled Mobile Bluetooth Printer.
- Tap the highlighted to send the results to a Bluetooth enabled device.
-
Tap to return to the Test Screen.
10. Press and hold for 2 seconds to turn meter off.
FILLING: Single-Use Disks
When the syringe is placed in the water
sample, and the plunger is pulled all the way
up, the syringe will hold more than enough
water sample to adequately fill the disk. Hold
the syringe vertically and insert the tip into the
fill hole in the disk. Press the plunger slowly
and smoothly to fill the disk.
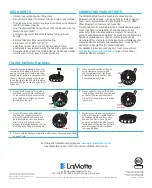
1. Fill the disk using slow, even
pressure. The sample water will fill
the spaces between the baffles in a
counterclockwise order. Each space will
fill from the bottom to the top. Sample
water should be added until the sample
water in the fourth chamber fills
to the
top
of the chamber slightly past the
embossed fill line. It is OK to fill slightly
past the fill line.
Correct Fill
(Fill line)
2. Do not overfill the disk. If the disk is
overfilled, sample water will flow out of the
overflow hole in the center of the disk. The
disk is not leaking. Dry the disk and run the
test.
Overfilled
(Dry disk before placing in meter)
3. Do not under fill the disk. If the disk
is under filled, the reagent chambers
will not fill entirely and results will be
inaccurate.
Underfilled
4. Do not introduce air bubbles into the disk.
The reagent chambers will not fill entirely
and results will be inaccurate. As soon as
a bubble starts to form, pull back on the
plunger to draw the bubble out of the disk.
Begin the filling process again.
Air
Bubble
5. Wet disks should be dried thoroughly
with a lint free wipe. The disk should be
handled by the edges.
6. Disks should be filled and used within 10 minutes. They cannot be
filled ahead of time.
For filling and troubleshooting tips go to:
www.lamotte.com/spin_support/


