background image

10

www.howdens.com

From Gas hob pan stand - minimum distance: 650mm

   From Electric hob surface - minimum distance: 450mm 

LAM2304 60cm = 497mm

LAM2305 80cm = 677mm

257mm

13mm

FRONT

190mm

170mm

LAM2304 60cm = 497mm

LAM2305 80cm = 677mm

257mm

13mm

20mm

min.160mm

FRONT

Installing the cooker hood

1

 Minimum distance above hob.

2

 Mark and cut cooker hood cabinet. Remove back panel.

Extraction via exhaust ducting  
(vented outside)

Extraction via recirculation (vented Internally) 

Either can be used for recirculation


*

Any cut edges should be 

sealed with a water proof 

varnish or PVA.

to trim / cornice / overhang

Содержание LAM2304

Страница 1: ...User Instructions and Installation LAM2304 LAM2305 www howdens com appliance registration 60cm 80cm Canopy Cooker Hood ISSUE v2 130422 ...

Страница 2: ...2 www howdens com ...

Страница 3: ...etal surfaces of the cooker hood and condensation p 4 SAFETY p 4 General safety p 4 Children and general safety p 5 Safety when working with electricity p 5 Electrical connections p 5 Waste Electrical and Electronic Equipment p 5 Danger of toxic fumes p 5 Contents 1 Cooker hood overview p 6 Control panel overview p 6 2 Installation p 7 Methods of extraction p 7 Ducting mode Recirculation mode Inst...

Страница 4: ...ses Commercial use will void the guarantee The manufacturer shall not be liable for any damage caused by improper use installation or handling errors General safety This product is not intended to be used by persons with physical sensory or mental disorders or unlearned or inexperienced supervised by a person who will be responsible for their safety or who will instruct them accordingly in the use...

Страница 5: ...r The appliance must not be used with energy saving plug devices The appliance will not function correctly and may overheat If the mains cable needs to be replaced this Check that the appliance is working correctly Waste Electrical and Electronic Equipment WEEE symbol for waste electrical and product has been manufactured with high quality parts and materials which can be reused and are suitable f...

Страница 6: ...6 www howdens com Lamp On Off Speed Lights Cooker hood body Cooker hood fascia Control panel Fixing clips 1 Cooker hood overview Control panel overview ...

Страница 7: ...ranteed There must be adequate ventilation in the room when the cooker hood is used at the same time as an appliance burning gas or other fuels Connect the external ducting kit to the outlet of the cooker hood cooker hood is to be ducted out Tips for ducting optimal air extraction Keep duct work short and straight Do not reduce the size or diameter of the duct Keep ductwork taught to minimise pres...

Страница 8: ...n hood body Fascia panel 8 10x 20mm Round head screw 4x 15mm Round head screw On opening the packaging remove and identify each component part Carefully place each part on a clean scratch free surface Do not component parts ...

Страница 9: ...nd power cables If ducting externally ensure the ducting tube is kept as short as possible and with a maximum number of 3 bends to permit the fumes from appliances supplied with energy other than electricity eg gas boilers wood Ensure the requirements of the local authorities are adhered to concerning the discharge of exhaust air Ensure adequate room ventilation is provided when the cooker hood is...

Страница 10: ...60cm 497mm LAM2305 80cm 677mm 257mm 13mm 20mm min 160mm FRONT Installing the cooker hood 1 Minimum distance above hob 2 Mark and cut cooker hood cabinet Remove back panel Extraction via exhaust ducting vented outside Extraction via recirculation vented Internally Either can be used for recirculation Any cut edges should be sealed with a water proof varnish or PVA to trim cornice overhang ...

Страница 11: ...11 Exclusive to Howdens 37mm 13mm 37mm 13mm 4x 50mm Countersunk screw 4x 50mm Countersunk screw Installing the cooker hood 3 70cm or greater cabinets only ...

Страница 12: ...d 4 panel is attached with magnets 80cm cabinet illustrated 60cm cabinet similar 5 Fitting Option 1 Fit cooker hood body into cooker hood cabinet Ensure side supports snap into place tighten screws to secure 5 Fitting Option 2 into cooker hood cabinet using screws supplied ...

Страница 13: ...13 Exclusive to Howdens 4x 15mm Countersunk screw Installing the cooker hood DO NOT 6 Secure fascia panel to cooker hood ...

Страница 14: ...e same time The terminations labelled SUPPLY are the connections for the internal house wiring and the terminations labelled LOAD are for connection to the appliance IMPORTANT The wires in the mains lead are coloured in accordance with the following code Blue Neutral Brown Live Green Yellow Earth As the colours of the wires in the mains lead of this appliance may not correspond with the coloured m...

Страница 15: ...he control panel voiding the manufacturers warranty Stainless steel The stainless steel must be cleaned regularly to ensure long life Dry with a clean soft cloth be used Note Ensure that wiping is done along the grain of the stainless steel to prevent any unsightly criss cross patterns appearing The manufacturer declines all liability in cases where the instructions for the appropriate installatio...

Страница 16: ...process Illustration shows a generic application other installations are similar power to the cooker hood is switched off changing them when there is a noticeable drop in performance The intervals between the amount of cooking done but on average will last about 3 months from your local Howdens depot or online Part No LAM2012 Illustration shows a generic application other installations are similar...

Страница 17: ...f reliable service In the used during operation of the cooker hood They should not be left on permanently and used as a main lighting source The cooker hood is for domestic use only Only use replacement lamps of type LED Candle Thermal Plastic 4W 4000K AC 220 240V ...

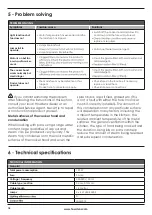
Страница 18: ...type of food being cooked and the duration Using lids on pans can help reduce the amount of steam being released and subsequent condensation TECHNICAL INFORMATION General Total power consumption 123 W Fuse 3 Amp Voltage Frequency 220 240 V 50 Hz Cable type section 3 core 0 75mm2 Cable length 1 5 Metres Lamps 2 x 4 W LED 4000 K D LAM2012 PROBLEM SOLVING Symptoms Possible cause Solutions Light funct...

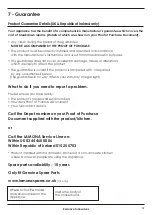
Страница 19: ...cidental damage misuse or alterations which are likely to affect the product The guarantee is invalid if the product is tampered with or repaired by any unauthorised person The guarantee in no way affects your statutory or legal right What to do if you need to report a problem Please ensure you have ready The product s model and serial numbers Howdens Proof of Purchase Document Your full contact d...

Страница 20: ...has a policy of continuous product development and manual Subject to the Terms and Conditions of Trading a copy of the Howdens Terms and Conditions is available upon request Copyright 2021 Howden Joinery Ltd All rights reserved Cet appareil se recycle Points de collecte sur www quefairedemesdechets fr Privilégiez la répara on ou le don de votre appareil À DÉPOSER EN DÉCHÈTERIE À DÉPOSER EN MAGASIN...

Отзывы: