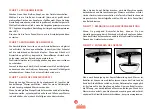
STEP
4
: PROGRAMMING
Press the On/Off button to start your unit.
Choose the ice cube size (small or large), by successively pressing
the ice cube size selection button. The default size is the largest size.
Select the smallest size when the ambient temperature is below
15
°C and the largest size when the ambient temperature is higher
than
30
°C.
Press the Pause/Start button to start making ice cubes.
STEP
5
: RECOVERY OF THE ICE CUBES
The sheet of ice cubes detaches from the ice cube making tray and
slides into the bin. You can help the separation of the ice cubes
by tapping with the scoop on the remaining blocks. Once the bin
is full of ice cubes, the "bin full" indicator light will go on and the
unit will stop making ice cubes. The ice cubes are kept cool in the
unit but will nonetheless start to melt.
Empty the ice cube bin rapidly, either to use the ice cubes immediately
or to keep them in the freezer for later use, then put the empty
bin back in place.
STEP
6
: LACK OF WATER IN THE TANK
When the unit has used up all of the water in the tank, the "lack of
water" indicator light will go on because there is not enough water
to start another cycle. If you want to obtain more ice cubes and
continue to make ice cubes, put more water into the tank without
going beyond the maximum level.
Press the on/off button. This will put the unit into standby mode
and turn off the “lack of water” indicator light.
To restart the unit, press the On/Off button again then select
the desired ice cube size. Press the Pause/Start button to restart
the process.
STEP
7
: STOPPING OF ICE CUBE MAKING
When the quantity of ice cubes obtained is sufficient, you can stop
the ice cube making by simply pressing the on/off button. Remove ice
cube bin to recover the last ice cubes made. Then unplug your unit.
STEP
8
: DRAINING OF THE UNIT
Visuel 5
If water remains in the unit when the ice cube making is finished,
you can drain it. To do this, move the unit to the edge of your table
until the drain plug is accessible. Remove the plug and then place
a recipient under the plug to receive the flow of water. When the
water stops flowing, put the plug back in place and push your unit
back on the work surface before storing it.
53
ENG
Содержание Transparence 489
Страница 1: ...INSTRUCTIONS FR NED DEU GB type 489 NOTICE Machine gla ons Transparence...
Страница 5: ...05 FR...
Страница 6: ...10 8 Visuel 1 Machine gla ons Transparence Type 489 7 2 6 4 5 9 3 1 06...
Страница 15: ...15 FR...
Страница 19: ...19 NED...
Страница 20: ...10 8 Visuel 1 IJsbokjesmachine Transparence Type 489 7 2 6 4 5 9 3 1 20...
Страница 29: ...29 NED...
Страница 33: ...33 DEU...
Страница 34: ...10 8 Visuel 1 Eisw rfelbereiter Transparence Typ 489 7 2 6 4 5 9 3 1 34...
Страница 43: ...43 DEU...
Страница 47: ...47 ENG...
Страница 48: ...10 8 Visuel 1 Ice cube maker Transparence Type 489 7 2 6 4 5 9 3 1 48...
Страница 57: ......
Страница 58: ......
Страница 59: ......
Страница 60: ...17 Chemin de la Plaine ZA les Plattes CS 30228 69390 VOURLES France conso lagrange fr www lagrange fr S481304...

